前言
最近在網路上發現了一個有趣的專案:LivePortrait。
這個專案是在 face-vid2vid 的基礎上進行改良,能夠將靜態照片與動態人臉圖像結合,從而產生栩栩如生的頭部動態效果。
目前可以透過 Live Demo進行線上合成。
不過考慮隱私問題,可以在本地安裝後在本地進行產生,這樣不僅速度更快,也無使用限制。
整個安裝過程需要至少約 4 GB 的本地空間,預計花費約 30 分鐘。
本文將重點介紹如何在本地進行安裝及使用、最後輸出其結果。
前置安裝
不知道什麼是 winget 請參考 安裝 winget
| 工具 | 功能描述 | 安裝指令 |
|---|
| Git | 主要用來下載相關程式碼。 | winget install --id Git.Git |
| FFmpeg | 進行影片輸出合併與轉檔。 | winget install --id Gyan.FFmpeg |
| conda | 建立獨立的 Python 環境以避免不同專案間的衝突。 | winget install --id Anaconda.Miniconda3 |
安裝 LivePortrait
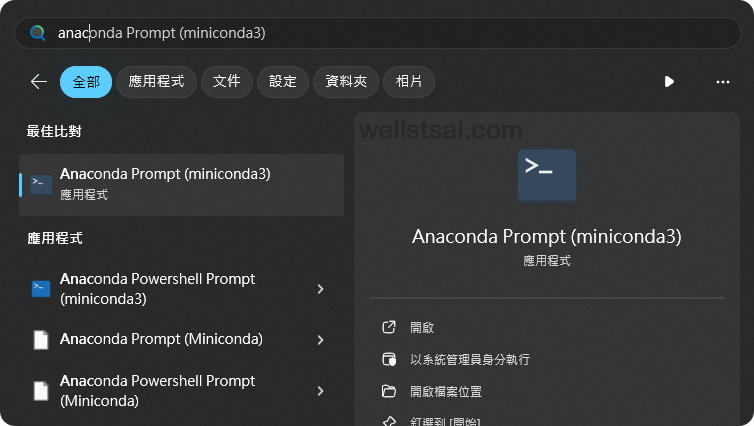
從開始找到 Anaconda Powershell Prompt (miniconda3) 並執行以載入 conda。
執行以下指令進行下載與安裝
 1
 2
 3
 4
 5
 6
 7
 8
 9
10
11
12
13
14
15
16
17
18
19
20
21
| # 複製程式碼
git clone https://github.com/KwaiVGI/LivePortrait
# 進入 LivePortrait 目錄
cd LivePortrait
# 建立 Python 3.9 的環境,並命名為 LivePortrait
conda create -n LivePortrait python==3.9.18
# 啟動 LivePortrait 環境
conda activate LivePortrait
# 安裝相關依賴項
pip install -r requirements.txt
# 安裝 git lfs
git lfs install
# 刪除預先複製下來的空目錄,這裡使用的是 Powershell。你也可以手動刪除這個空目錄
Remove-Item -Recurse -Force pretrained_weights
# 複製預先訓練的內容
git clone https://huggingface.co/KwaiVGI/liveportrait pretrained_weights
|
上述僅需要操作 1 次,僅有 conda activate LivePortrait 是在每次開啟終端機時才需要主動切換至 LivePortrait 環境。
執行完畢後,就可以開始產生影片。
合成影片
| 名稱 | 路徑 |
|---|
| 靜態照片 | C:\Users\USER_NAME\LivePortrait\assets\examples\source |
| 動態影片 | C:\Users\USER_NAME\LivePortrait\assets\examples\driving |
| 輸出目錄 | C:\Users\USER_NAME\LivePortrait\animations |
於終端機中進入到 LivePortrait 的目錄中,我們可以輸入 python inference.py,會載入測試圖檔、影片並進行合成輸出。
 1
 2
 3
 4
 5
 6
 7
 8
 9
10
11
12
13
14
15
16
17
18
19
20
21
22
23
24
25
26
27
28
29
30
31
32
33
| (LivePortrait) C:\Users\wells\LivePortrait>python inference.py
[02:19:04] Load appearance_feature_extractor done. live_portrait_wrapper.py:36
Load motion_extractor done. live_portrait_wrapper.py:39
Load warping_module done. live_portrait_wrapper.py:42
[02:19:05] Load spade_generator done. live_portrait_wrapper.py:45
Load stitching_retargeting_module done. live_portrait_wrapper.py:49
[02:19:06] LandmarkRunner warmup time: 1.006s landmark_runner.py:89
[02:19:07] FaceAnalysisDIY warmup time: 1.328s face_analysis_diy.py:79
Load source image from live_portrait_pipeline.py:49
C:\Users\wells\LivePortrait\src\config\../../assets/examples/source/s6.jpg
[02:19:09] Load video: live_portrait_pipeline.py:99
C:\Users\wells\LivePortrait\src\config\../../assets/examples/driving/d0.mp4
The FPS of live_portrait_pipeline.py:104
C:\Users\wells\LivePortrait\src\config\../../assets/examples/driving/d0.mp4 is:
25
Load video file (mp4 mov avi etc...): live_portrait_pipeline.py:106
C:\Users\wells\LivePortrait\src\config\../../assets/examples/driving/d0.mp4
Start making motion template... live_portrait_pipeline.py:110
Making motion templates... ━━━━━━━━━━━━━━━━━━━━━━━━━━━━━━━━━━━━━━━━ 100% 0:00:00
[02:19:10] Dump motion template to live_portrait_pipeline.py:127
C:\Users\wells\LivePortrait\src\config\../../assets/examples/driving\d0.pkl
Prepared pasteback mask done. live_portrait_pipeline.py:139
🚀Animating... ━━━━━━━━━━━━━━━━━━━━━━━━━━━━━━━━━━━━━━━━ 100% 0:00:07
Concatenating result... ━━━━━━━━━━━━━━━━━━━━━━━━━━━━━━━━━━━━━━━━ 100% 0:00:00
Writing ━━━━━━━━━━━━━━━━━━━━━━━━━━━━━━━━━━━━━━━━ 0% -:--:--[swscaler @ 0000021de7021b80] Warning: data is not aligned! This can lead to a speed loss
[02:19:18] Animated template: live_portrait_pipeline.py:248
C:\Users\wells\LivePortrait\src\config\../../assets/examples/driving\d0.pkl,
you can specify `-d` argument with this template path next time to avoid
cropping video, motion making and protecting privacy.
Animated video: animations/s6--d0.mp4 live_portrait_pipeline.py:249
Animated video with concact: animations/s6--d0_concat.mp4 live_portrait_pipeline.py:250
(LivePortrait) C:\Users\wells\LivePortrait>
|
在輸出目錄中,可以看到我們的成品影片,分別為:
- 比較影片(s6–d0_concat.mp4),原始影片、靜態圖象、合成結果三個放在一起進行輸出。
- 成品影片(s6–d0.mp4),僅最終合成結果。
成品影片如下:
我們可以將原始照片,放到 ./assets/examples/source 底下 (或你喜歡的路徑),並套用相關的範例影片(./assets/examples/driving)以進行合成。
例如我這篇透過 DALL·E 產生一張虛擬人臉,並套用範例的一個影片(./assets/examples/driving/d10.mp4),其指令如下:
1
2
| python inference.py -s assets/examples/source/dalle.webp -d assets/examples/driv
ing/d10.mp4
|
比較影片如下,由左到右依序為動圖、靜態、合成結果:
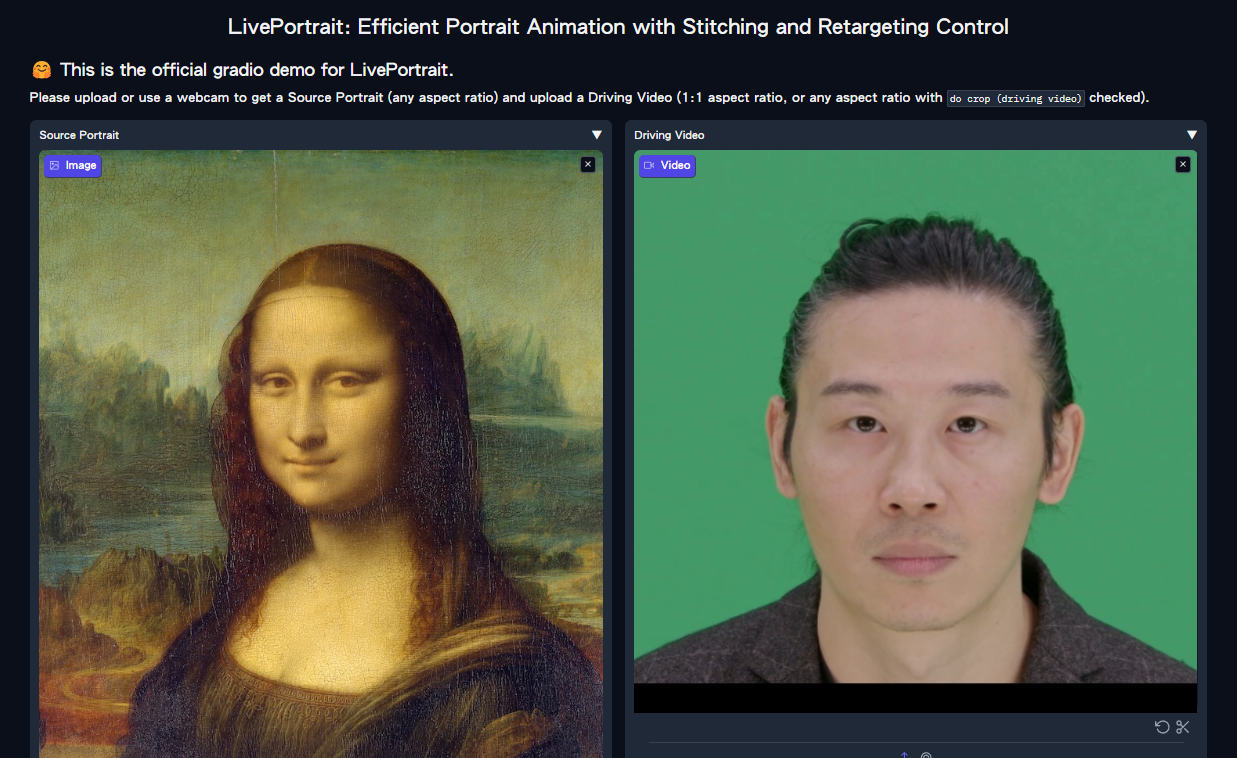
使用 Web GUI
於終端機中輸入 python app.py 可以在本地建立伺服器,即跟 Live Demo 的頁面一致,透過 Web GUI 的好處是不用再輸入指令了,操作上非常簡易明瞭。
 1
 2
 3
 4
 5
 6
 7
 8
 9
10
11
| (LivePortrait) C:\Users\wells\LivePortrait>python app.py
[02:47:14] Load appearance_feature_extractor done. live_portrait_wrapper.py:36
[02:47:15] Load motion_extractor done. live_portrait_wrapper.py:39
Load warping_module done. live_portrait_wrapper.py:42
Load spade_generator done. live_portrait_wrapper.py:45
Load stitching_retargeting_module done. live_portrait_wrapper.py:49
[02:47:16] LandmarkRunner warmup time: 1.055s landmark_runner.py:89
[02:47:18] FaceAnalysisDIY warmup time: 1.336s face_analysis_diy.py:79
Running on local URL: http://127.0.0.1:8890
To create a public link, set `share=True` in `launch()`.
|
於瀏覽器中輸入 http://127.0.0.1:8890,即可透過 GUI 的方式進行產生。
心得
這個專案非常好玩且有趣,但更多僅侷限於朋友之間傳傳圖。切勿使用在公眾人物並公開以避免觸法。
此外,產圖時會消耗一定的功耗,請確保電腦性能足夠與外部電源足夠穩定。
本次使用的硬體配置為 i7-13700 + GeForce RTX™ 3060 Ti 合成 15 秒的影片共計 63 秒。
即輸出影片秒數:轉換時間 = 1:4.2 (秒)。
參考資料
- KwaiVGI/LivePortrait: Bring portraits to life!