這是一張有關標題為 Hugo 建站筆記 的圖片

Hugo 建站筆記

這是一篇建站筆記,詳細記錄如何一步一步透過 Hugo 實現建站的過程

什麼是 Hugo

根據官網所描述,是一個基於 Go 語言所撰寫的快速且現代的靜態網站產生器(static site generator),其中靜態網頁的好處在於性能、安全性是吸引人的主要原因。

透過 Hugo,會將撰寫的 Markdown 編碼成 HTML 頁面。由於 HTML頁面已經建構好,使用者在瀏覽時可以幾乎零延遲的載入。

其特點不需要後端程式或是資料庫(database)。也因為相較於非靜態網頁來得安全、漏洞更少。

動態網頁與靜態網頁

動態網頁(dynamic web page)是指在用戶訪問時,網頁的內容可以根據用戶的請求、操作或其他特定條件而動態地生成或改變的網頁。

以伺服器端語言(server-side scripting)為例子,會在伺服器執行相關程式後,再把結果傳給使用者。

常見的語言依熱門程度排序: Node.js, PHP, Ruby on Rails, Go, Python, ASP.NET, JSP, CGI 等…

在以前寫部落格的時候,使用過 WordPress 這個內容管理系統(content management system,CMS),它是用 PHP 語言開發的。搭建 WordPress 需要擁有一台主機,可以是 Windows 或 Linux 系統,並架設在某個地方,通常是由主機商提供,並最終取得跟主機商的 FTP 或是 SSH 的配置方式。有了主機後,在主機上安裝 Apache 或 Nginx 來處理 HTTP 請求,並且安裝 PHP 執行 WordPress。同時,為了儲存寫的文章,還需要安裝 MySQL 或 MariaDB 資料庫。如果必要時管理資料庫還需要一個人性化的介面(?),可能還需要安裝 phpMyAdmin(非必要)。

最後 WordPress 運作起來後,會開始進行設定、SEO 優化、美化主題、安裝部分外掛等一系列操作,目前臺灣主流旅遊網誌還是走這套系統。終端使用者在閱讀文章時,其動態網頁簡易流程為:

使用者發送 Request → Apache → PHP → Database → HTML → Apache → Response 給使用者

相較之下,靜態網頁僅需由 Apache 處理使用者的 Request 與 Response,不需要後台運作 PHP 來處理檔案。其特點在於快速、安全,且無需等待後端程式執行完成才將內容呈現給使用者。靜態網頁的簡易流程為:

使用者發送 Request → Apache → HTML → Apache → Response 給使用者

兩者之間的差異是在於伺服器端有沒有因為使用者的瀏覽時,而執行伺服器端的程式在呈現,靜態網頁也不需要資料庫存取文章,大多數的文章都已經被編譯成單一的 HTML 檔案,直接供給使用者。

建站流程

建站流程可以參考下圖可分為以下流程,後續會逐一講解每個步驟,更詳細的內容可能在往後文章有需要再提及:

  1. 開始與安裝(Hugo、Git)
  2. 開始新的網站
  3. 初始化 Git Repo
  4. 安裝 Hugo 主題
  5. 開始新的文章
  6. 設定網站細節
  7. 執行 Hugo 伺服器
  8. 推送到遠端伺服器
  9. 編譯並發佈網站
Flow chart to build Hugo sites

Flow chart to build Hugo sites

開始與安裝

在 Windows 與 Linux 上安裝 Hugo 非常簡單與快速,建議使用命令列的方式,可以更快速且一致性的操作。

另外除了安裝 Hugo,Windows 用戶還需要另外安裝 Git 實現原始檔案的管理。

未來編輯文章時有任何的出錯想要復原,都可以藉由 Git 快速回朔。

透過 Winget 安裝 Hugo (Windows)

1
winget install Hugo.Hugo.Extended

安裝結果:

Use winget to install Hugo

透過 snap 安裝 Hugo (Linux)

1
sudo snap install hugo

安裝結果:

wells@server:~$ sudo snap install hugo

[sudo] password for wells:

hugo 0.120.4 from Hugo Authors installed

透過 Homebrew 安裝 Hugo (macOS, Linux)

在使用 brew 指令前,需要先 安裝 Homebrew

1
brew install hugo

透過 Winget 安裝 Git (Windows)

預設 Linux 或 Mac 已經安裝好 Git 指令,故這裡只提及 Windows 上的安裝

1
winget install -e --id Git.Git

Use winget to install Git

檢查執行檔版本

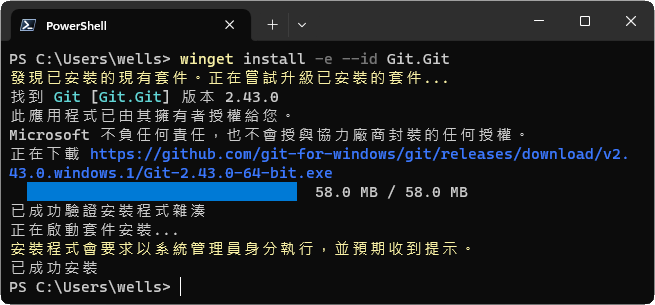
安裝後可以檢查是否安裝成功,順便檢查版本號,目前安裝的 Hugo 版本為 v0.120.4,Git 為 v2.43.0

1
2
3
4
5
wells@server:~/wellwells_hugo$ hugo version
hugo v0.120.4-f11bca5fec2ebb3a02727fb2a5cfb08da96fd9df+extended linux/amd64 BuildDate=2023-11-08T11:18:07Z VendorInfo=snap:0.120.4

wells@server:~/wellwells_hugo$ git --version
git version 2.43.0

開始新的網站

在一個可以存放網誌原始檔的地方,Linux 可選擇個人的 Home 目錄(~/),Windows 可選擇使用者目錄(C:\Users\USER),想儲存在其他區域也是都可以的,要開始新的網站,輸入 hugo new site BLOG_NAME,並進入到該目錄即可,這邊以 my_blog 為例子:

 1
 2
 3
 4
 5
 6
 7
 8
 9
10
11
12
13
14
15
16
17
18
wells@server:~$ hugo new site my_blog
Congratulations! Your new Hugo site was created in /home/wells/my_blog.

Just a few more steps...

1. Change the current directory to /home/wells/my_blog.
2. Create or install a theme:
   - Create a new theme with the command "hugo new theme <THEMENAME>"
   - Install a theme from https://themes.gohugo.io/
3. Edit hugo.toml, setting the "theme" property to the theme name.
4. Create new content with the command "hugo new content <SECTIONNAME>/<FILENAME>.<FORMAT>".
5. Start the embedded web server with the command "hugo server --buildDrafts".

See documentation at https://gohugo.io/.

wells@server:~$ cd my_blog/
wells@server:~/my_blog$ ls # 列出目錄結構
archetypes  assets  content  data  hugo.toml  i18n  layouts  static  themes

如此一來就建立好了一個新的網誌,而這個網誌預設是沒有安裝主題與文章的,所以直接編譯的話是沒有內容的。

初始化 Git Repo

在進入到網誌目錄底下(~/my_blog),輸入 git init 便可以初始化本地的 local repo。後續可以 git status 查看 Untracked files。

預設 Git 是沒有追蹤任何檔案的,可以把 hugo.toml, archetypes 等相關檔案加入至索引對象(git add)。

 1
 2
 3
 4
 5
 6
 7
 8
 9
10
11
12
13
14
15
16
17
18
19
20
21
22
23
24
25
26
27
28
29
30
31
32
33
34
35
36
37
38
39
wells@server:~/my_blog$ git init
hint: Using 'master' as the name for the initial branch. This default branch name
hint: is subject to change. To configure the initial branch name to use in all
hint: of your new repositories, which will suppress this warning, call:
hint: 
hint:   git config --global init.defaultBranch <name>
hint: 
hint: Names commonly chosen instead of 'master' are 'main', 'trunk' and
hint: 'development'. The just-created branch can be renamed via this command:
hint: 
hint:   git branch -m <name>
Initialized empty Git repository in /home/wells/my_blog/.git/
wells@server:~/my_blog$ git status
On branch master

No commits yet

Untracked files:
  (use "git add <file>..." to include in what will be committed)
        .hugo_build.lock
        archetypes/
        hugo.toml

nothing added to commit but untracked files present (use "git add" to track)

wells@server:~/my_blog$ git add archetypes/ hugo.toml
wells@server:~/my_blog$ git status
On branch master

No commits yet

Changes to be committed:
  (use "git rm --cached <file>..." to unstage)
        new file:   archetypes/default.md
        new file:   hugo.toml

Untracked files:
  (use "git add <file>..." to include in what will be committed)
        .hugo_build.lock

安裝 Hugo 主題

要安裝 Hguo 主題,我們可以先到 Hugo Themes 找一個喜歡的主題,主題的供應者會提供安裝的方式。

這裡以 PaperMod 主題為例子。並從 PaperMod - Installation 文件中可以得知安裝有不同方法。

Method 1 的話,則是在site 目錄下進行 git clone 即可。

1
2
3
4
5
6
7
8
wells@server:~/my_blog$ git clone https://github.com/adityatelange/hugo-PaperMod themes/PaperMod --depth=1
Cloning into 'themes/PaperMod'...
remote: Enumerating objects: 134, done.
remote: Counting objects: 100% (134/134), done.
remote: Compressing objects: 100% (113/113), done.
remote: Total 134 (delta 33), reused 57 (delta 15), pack-reused 0
Receiving objects: 100% (134/134), 263.32 KiB | 1.61 MiB/s, done.
Resolving deltas: 100% (33/33), done.

編輯 ~/my_blog/hugo.toml,並於後方新增一行 theme = ‘PaperMod’ 即可套用該主題,注意大小寫是有差異的。

1
2
3
4
baseURL = 'https://example.org/'
languageCode = 'en-us'
title = 'My New Hugo Site'
theme = 'PaperMod'

開始新的文章

透過以下指令,便可新增一篇新文章

1
2
wells@server:~/my_blog$ hugo new content posts/my-first-post.md
Content "/home/wells/my_blog/content/posts/my-first-post.md" created

編輯 ~/my_blog/content/posts/my-first-post.md 就等同於在寫文章了,其中語法為 Markdown,記得把 draft = true 改為 false,確定此文章為 release 的狀態。

my-first-post.md

1
2
3
4
5
6
7
8
+++
title = 'My First Post'
date = 2023-11-27T10:58:32+08:00
draft = false
+++

Hello, My Site
I'm Wells

設定網站細節

在此,其實已經可以運行 Hugo Server 並看到網誌了,不過在執行伺服器前可以考慮進行一些網誌設定,像是:

  1. 編輯 ~/my_blog/hugo.toml 的語言
  2. 網誌名稱
  3. 是否要啟用 emoji (enableEmoji)
  4. 網站的 favicon
  5. 摘要
  6. 其他配置…

這部分因為設定繁多,所以也可以執行伺服器後動態調整。

更多的設定可參考 Configure Hugo,此時也可以考慮要不要把 hugo.toml 轉為 hugo.yaml (習慣性)。

另外,不同主題有主題相關性的配置,通常要在參照特定主題下的 config 配置。

執行 Hugo 伺服器

根據官網描述,是一個高性能 Web 伺服器,不過更多來說是方便 Local 端的測試,可以透過以下指令來執行伺服器。

1
hugo server -D

其中 -D 也會建置 draft 的文章,最終建置預設是不會編譯 draft 文章。

 1
 2
 3
 4
 5
 6
 7
 8
 9
10
11
12
13
14
15
16
17
18
19
20
21
22
23
24
25
wells@server:~/my_blog$ hugo server -D
port 1313 already in use, attempting to use an available port
Watching for changes in /home/wells/my_blog/{archetypes,assets,content,data,i18n,layouts,static,themes}
Watching for config changes in /home/wells/my_blog/hugo.yaml
Start building sites … 
hugo v0.120.4-f11bca5fec2ebb3a02727fb2a5cfb08da96fd9df+extended linux/amd64 BuildDate=2023-11-08T11:18:07Z VendorInfo=snap:0.120.4


                   | ZH-TW  
-------------------+--------
  Pages            |    10  
  Paginator pages  |     0  
  Non-page files   |     0  
  Static files     |     0  
  Processed images |     0  
  Aliases          |     2  
  Sitemaps         |     1  
  Cleaned          |     0  

Built in 25 ms
Environment: "development"
Serving pages from memory
Running in Fast Render Mode. For full rebuilds on change: hugo server --disableFastRender
Web Server is available at http://localhost:46651/ (bind address 127.0.0.1) 
Press Ctrl+C to stop

建立後,可以於瀏覽器中打開 http://localhost:46651,並看到部落格與文章。後續編輯配置或是修改文章都會看到即時的更新。

執行 Hugo Server

推送到遠端伺服器

安裝好主題、新增了文章、編輯配置檔,後續要做的就是把目錄下的改變使用 git 管理,並把 git 推送至遠端伺服器進行管理維護。

由於我們先前只進行了 git init 而還沒加入 remote 端的伺服器。

這邊假設 github 已經建立好伺服器端的 repo ,或是其他的伺服器已經準備建立 repo 的情況下,最後會取得到一段 ssh的連接方式:

1
git@github.com:USER/private.repo.git

藉由 git remote add 與 git remote -v 可以新增與檢查當前本地端 repo 的 remote 狀態:

1
2
3
4
wells@server:~/my_blog$ git remote add main git@github.com:USER/private.repo.git
wells@server:~/my_blog$ git remote -v
main    git@github.com:USER/private.repo.git (fetch)
main    git@github.com:USER/private.repo.git (push)

確定本地端,修改的檔案都已經 git add 加入索引、並且 git push 加入預期的 commit 後,便可以 git push 把本地端的修改整個推送到遠端伺服器上。

編譯並發佈網站

編譯網站非常簡單,只要輸入指令 hugo 就會產出 ~/my_blog/public 目錄,該 public 裡面的 HTML 就可以放到伺服器上供他人預覽。網路上有提供數個免費靜態網頁的託管(hosting),像是:

  1. GitHub pages
  2. Cloudflare pages
  3. Netlify

其中目前使用的是 GitHub pages,支持自定義域名,可以整合 repo 與 GitHub Actions。

實現推送 repo 後,全自動編譯並 push 到 GitHub pages,在每個月 免費的額度 下其實是蠻充裕的。

結論

整個建立 Hugo 靜態網頁其實沒有很困難,就是安裝 Hugo 與 Git → 安裝主題 → 新增文章 → 發佈

中途 Git 引入是確保在修改網頁的過程中是能夠回朔的,如果真的不需要其實不用 git init,但也非常不建議。因為網頁突然不小心改壞了,要復原會有一定難度。

參考文獻

  1. Hugo - Quick start
  2. Benefits of static site generators
  3. Configure Hugo
  4. Hugo Themes
  5. PaperMod’s wiki
主題 Stack 由 Jimmy 設計