Introduction
In Windows, the built-in Sandbox feature uses virtualization technology to securely isolate potential threats while ensuring applications run in a restricted environment without impacting the host system. It’s perfect for testing unknown applications or for experimental development.
Key advantages of Windows Sandbox:
- Lightweight isolation: A secure desktop environment that doesn’t affect the host system.
- Complete reset on reboot: Each session provides a new, isolated environment.
- No extra downloads: Pre-installed with Windows—no need for additional software.
- Hardware-based security: Enhanced protection using hardware virtualization.
- Optimized performance: Intelligent resource allocation for smooth operation.
However, by default, Sandbox only offers basic functionality, and newer Windows 11 versions may lack even simple apps like Notepad. This guide explains how to configure Sandbox to support essential tools (e.g., VS Code or portable apps) for a functional and efficient testing environment.
Enabling Virtualization in BIOS
To use the Windows Sandbox feature, you must first ensure that virtualization is enabled in the BIOS or UEFI settings.
Identifying the Motherboard Model
- Identify your motherboard model by opening the
Command Promptand entering the following command to retrieve the motherboard information:
| |
- After executing the command, detailed information about the motherboard will be displayed. For example:
| |
How to Enable Virtualization
Based on your motherboard model, you can quickly find relevant tutorials for enabling virtualization using the following methods:
Search by Model Keywords Use the motherboard model as a keyword, such as
TUF GAMING B760-PLUS WIFI D4 virtualization, to locate specific guides.Refer to Official Resources or Video Tutorials Visit the official website of your motherboard brand or search for related YouTube tutorials to find step-by-step instructions.
Search by Brand Name If you know the brand of your motherboard, search for terms like
ASUS virtualizationorLenovo virtualizationto find brand-specific guidance.
Here are some common virtualization guides provided by the major motherboard manufacturers:
- ASUS - How to enable Intel(VMX) Virtualization Technology in the BIOS
- ASUS - How to enable or disable AMD Virtualization (AMD-V™) technology?
- Lenovo - How to enable Virtualization Technology on Lenovo PC computers
- Dell - How To Enable or Disable Hardware Virtualization on Dell Systems
- HP PCs - Enable Virtualization Technology in the BIOS
- MSI - Intel Virtualization Technology Support
- MSI - Enable/Disable AMD virtualization in BIOS
- Gigabyte - Hardware Virtualization in AMD Machine with Gigabyte Mother Board
Verifying Virtualization is Enabled
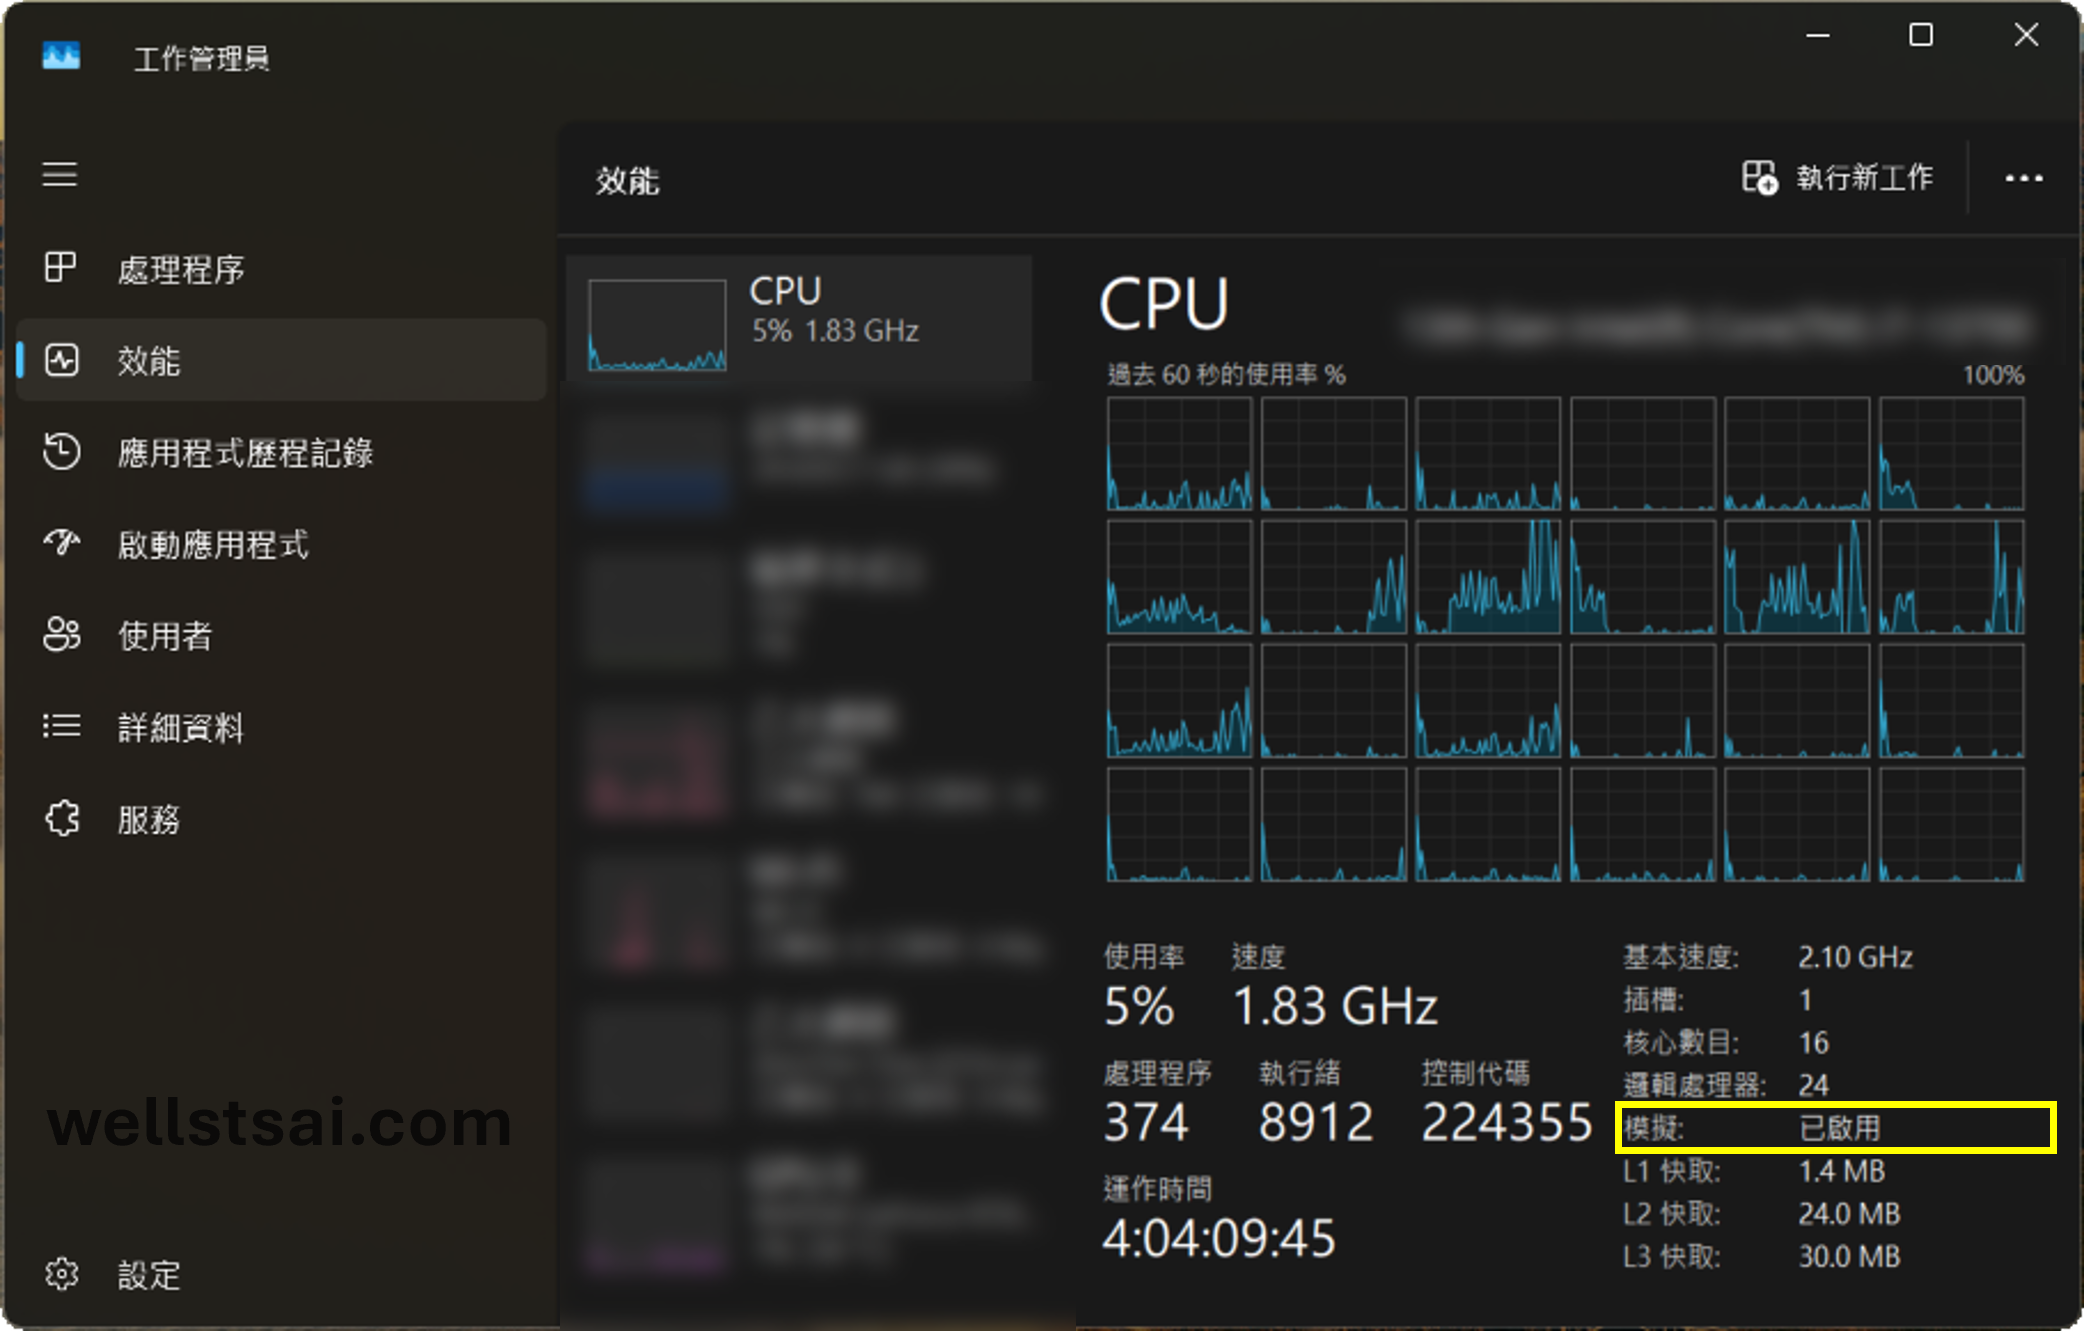
After completing the configuration, restart into Windows. Open Task Manager (shortcut: Ctrl + Shift + Esc), navigate to the Performance tab, and check if Virtualization is displayed as “Enabled.”

Installing Windows Sandbox
By default, only Professional, Enterprise, or Education editions of Windows support Windows Sandbox. If you use the Home edition, refer to Enable Windows Sandbox Feature in Windows 10 Home Edition.
To enable the Windows Sandbox feature, run Command Prompt or PowerShell as an administrator and enter the following command:
| |
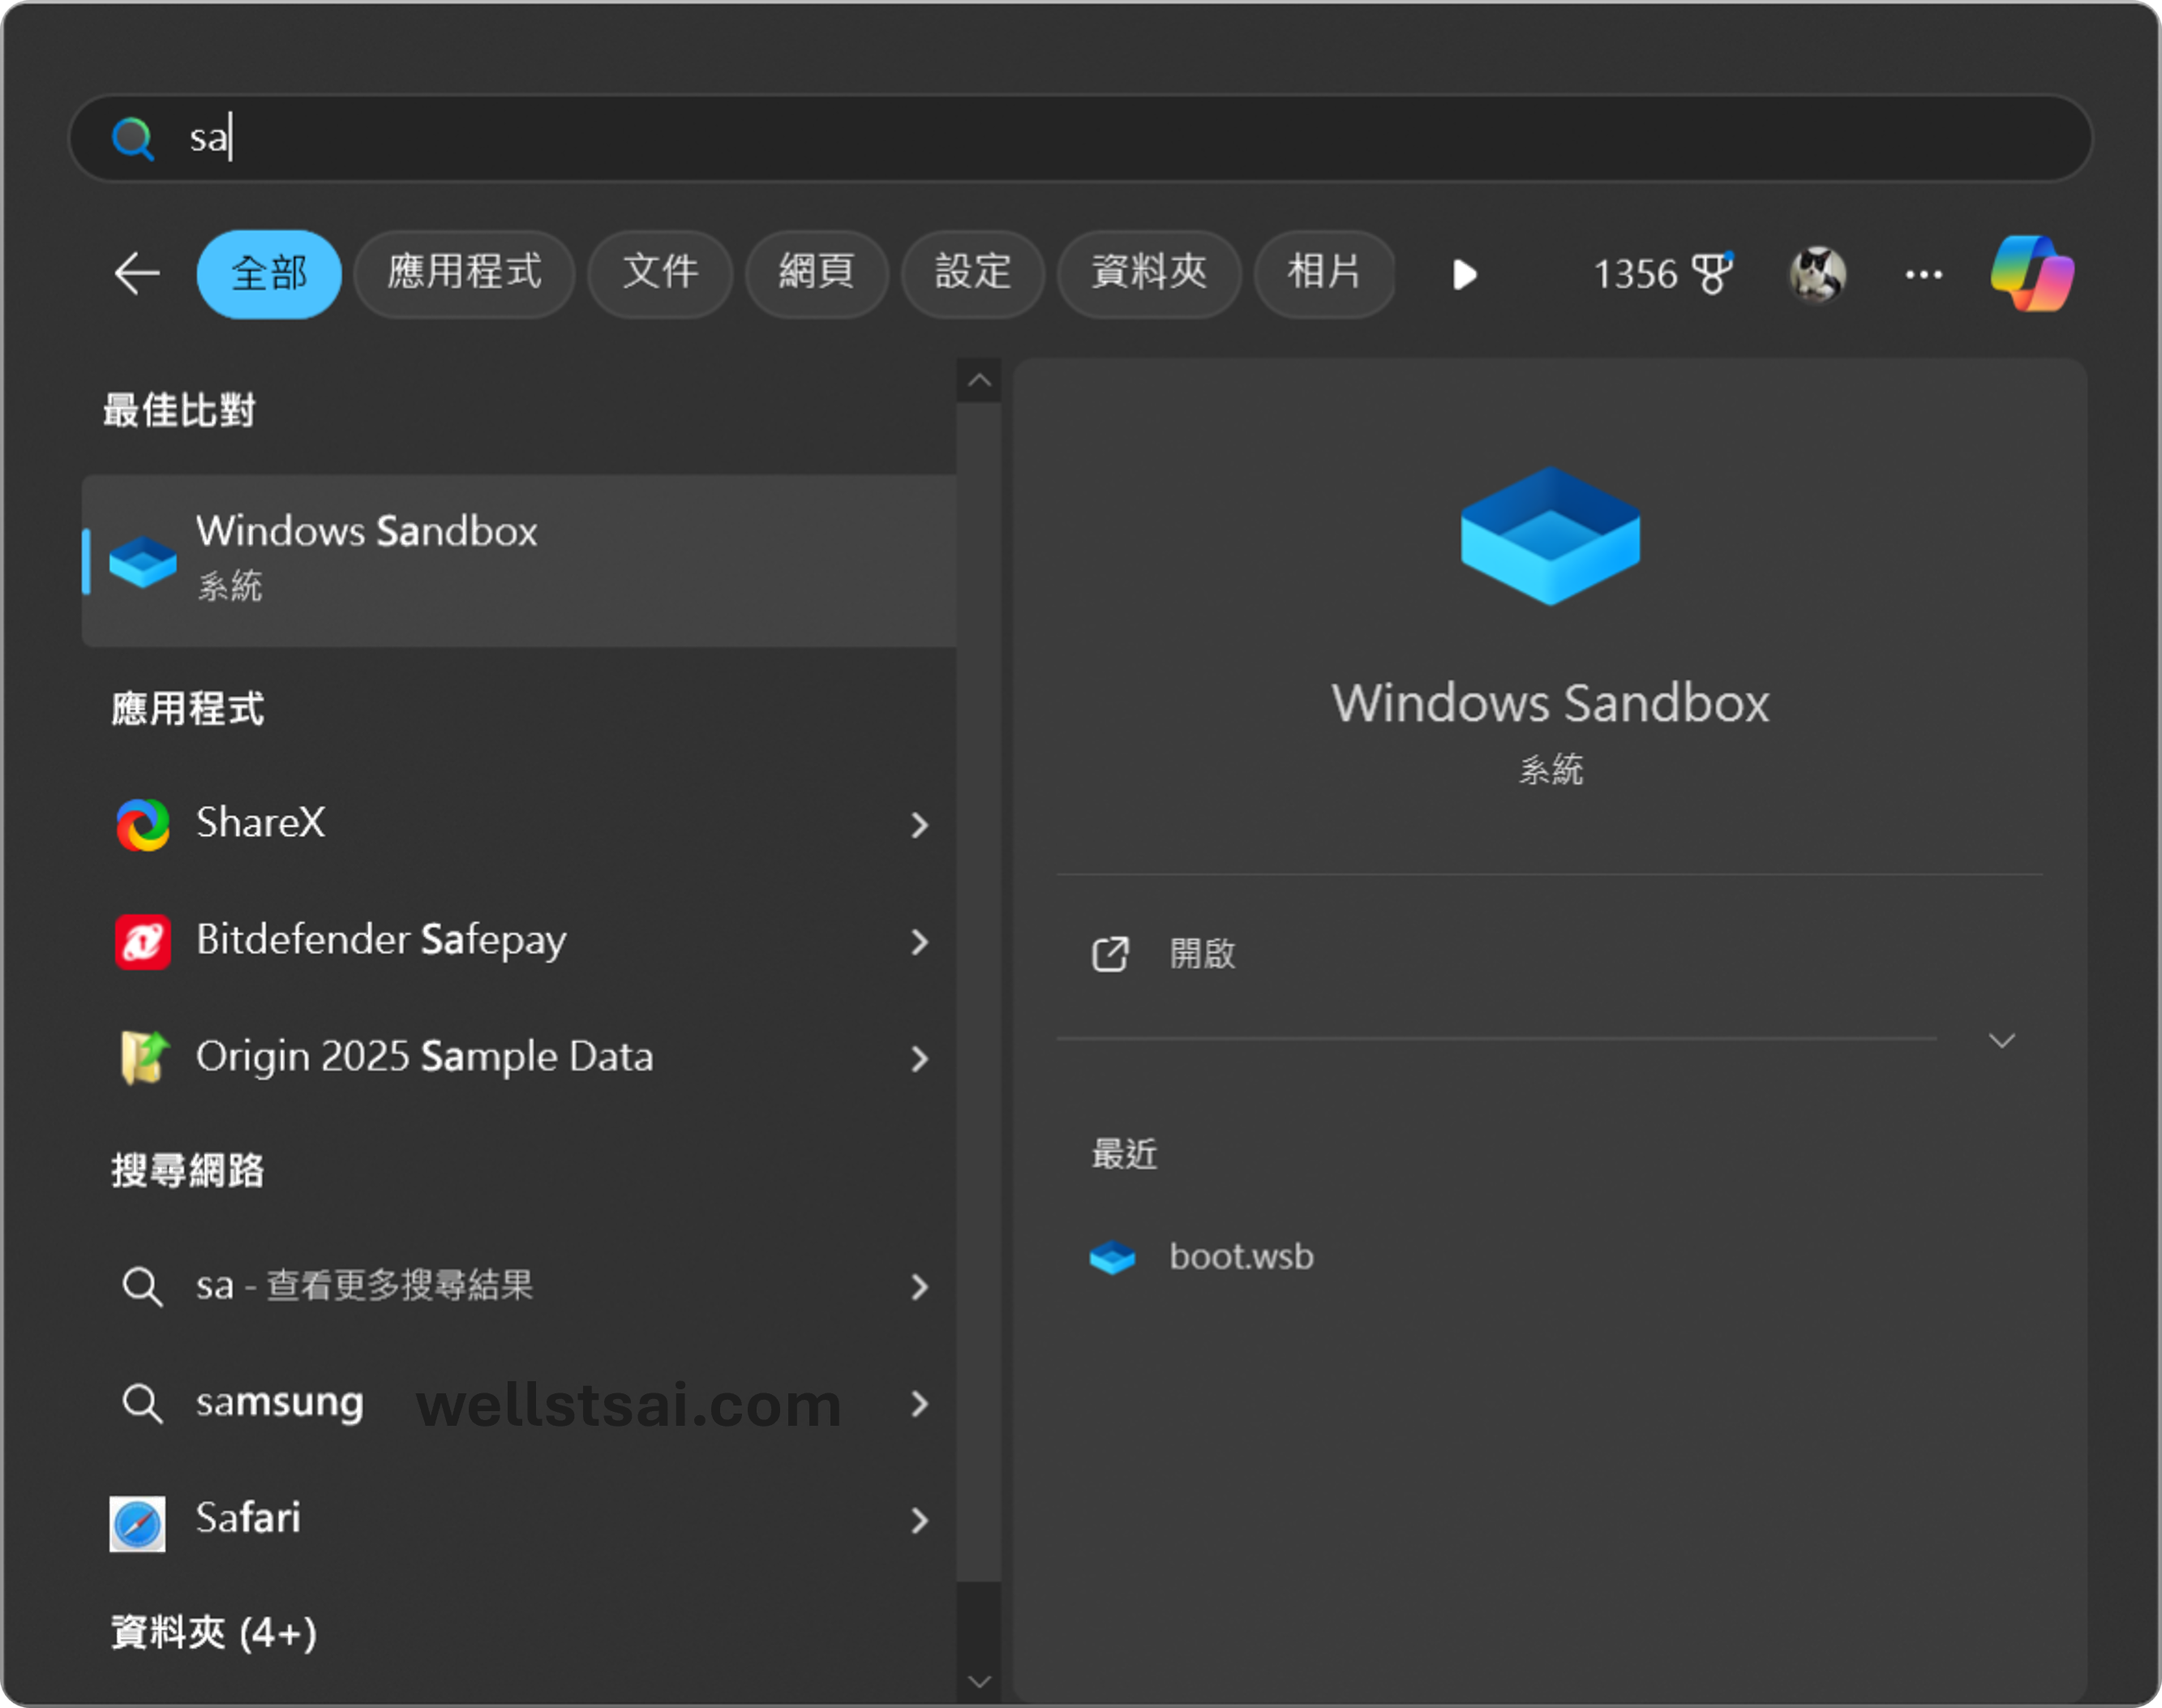
After installation, you can find Windows Sandbox in the Start menu:

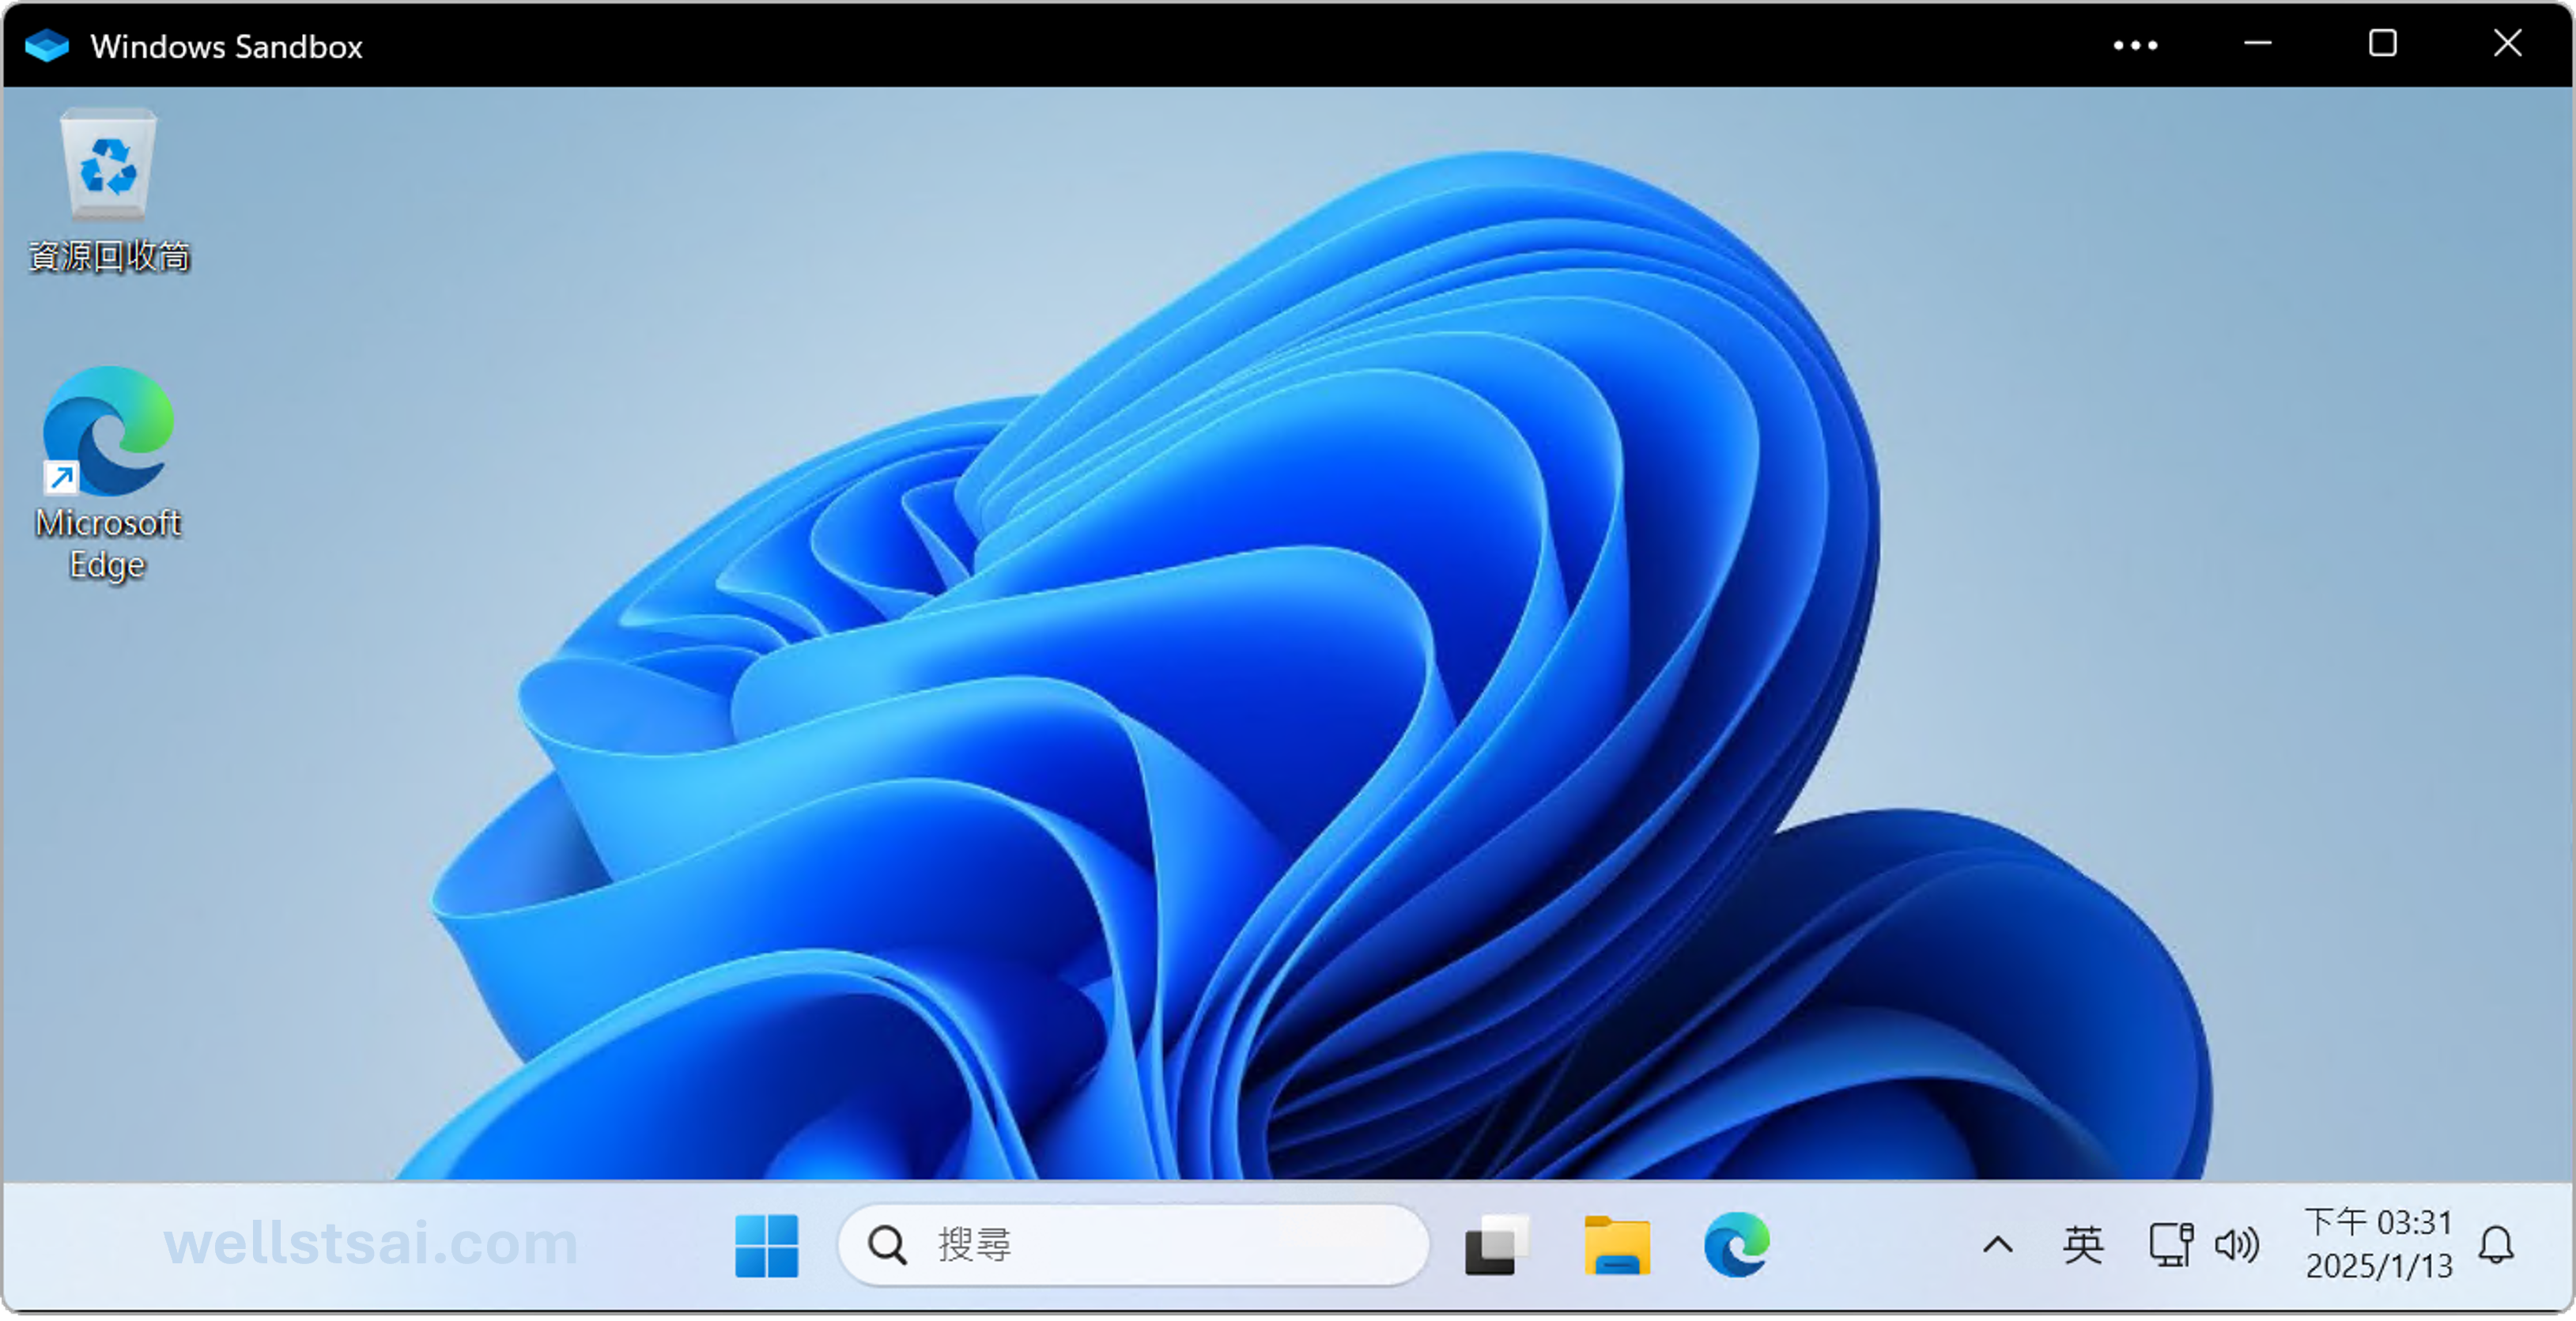
When you launch Windows Sandbox, you will see a clean virtual environment:

Configuring Windows Sandbox (.wsb)
Creating the Sandbox Working Directory
To maintain a consistent environment, it is recommended to create a dedicated working directory for the Sandbox. Folder names and default paths can be adjusted as needed, but ensure script paths are updated accordingly:
C:\Sandbox: Maps to the main directory in the Sandbox with read/write permissions.C:\Sandbox\Apps: Stores installed or portable applications, similar to theC:\Program Filesdirectory.C:\Sandbox\Install: Holds original installation files for manual installation if necessary.C:\Sandbox\boot.bat: A script executed automatically at Sandbox startup to perform basic configurations.C:\Sandbox\create_paths.ps1: A PowerShell script for generating desktop shortcuts from applications in theAppsdirectory.
Creating a WSB Configuration File
Windows Sandbox supports basic initialization through an XML configuration file. You can create a boot.wsb file on your desktop using VS Code or any other text editor. Below is an example configuration:
| |
The above configuration mainly includes the following:
- Main Directory Mapping: Maps the host’s
C:\SandboxtoC:\Sandboxwithin the Sandbox, with read/write permissions. - Downloads Folder Mapping: Maps the host’s
C:\Users\wells\DownloadstoC:\Users\WDAGUtilityAccount\Downloadswithin the Sandbox, with read-only access. - Auto-Execution Script: Automatically executes
C:\Sandbox\boot.batupon Sandbox login to complete necessary initialization.
Creating a Startup Script
Create a boot.bat file in the C:\Sandbox directory on the host machine. This script will automatically initialize the Sandbox environment upon startup. Its main functions include:
- Creating Desktop Shortcuts (Line 4)
- Installing 7-zip (Line 7)
- Configuring Windows Basic Options (Lines 9–58)
- Setting File Associations (Lines 60–78)
This script is highly customizable. For instance, if you need to install Notepad++, place the installer in C:\Sandbox\Install and add the following command to the script:
| |
If using a portable version, extract it to a designated path (e.g., C:\Sandbox\Apps) and set up automatic desktop shortcut creation in subsequent steps.
C:\Sandbox\boot.bat:
| |
Automatically Adding Shortcuts to the Desktop
Create a create_paths.ps1 file in the C:\Sandbox directory on the host machine. This script will be used to create desktop shortcuts when the Sandbox starts.
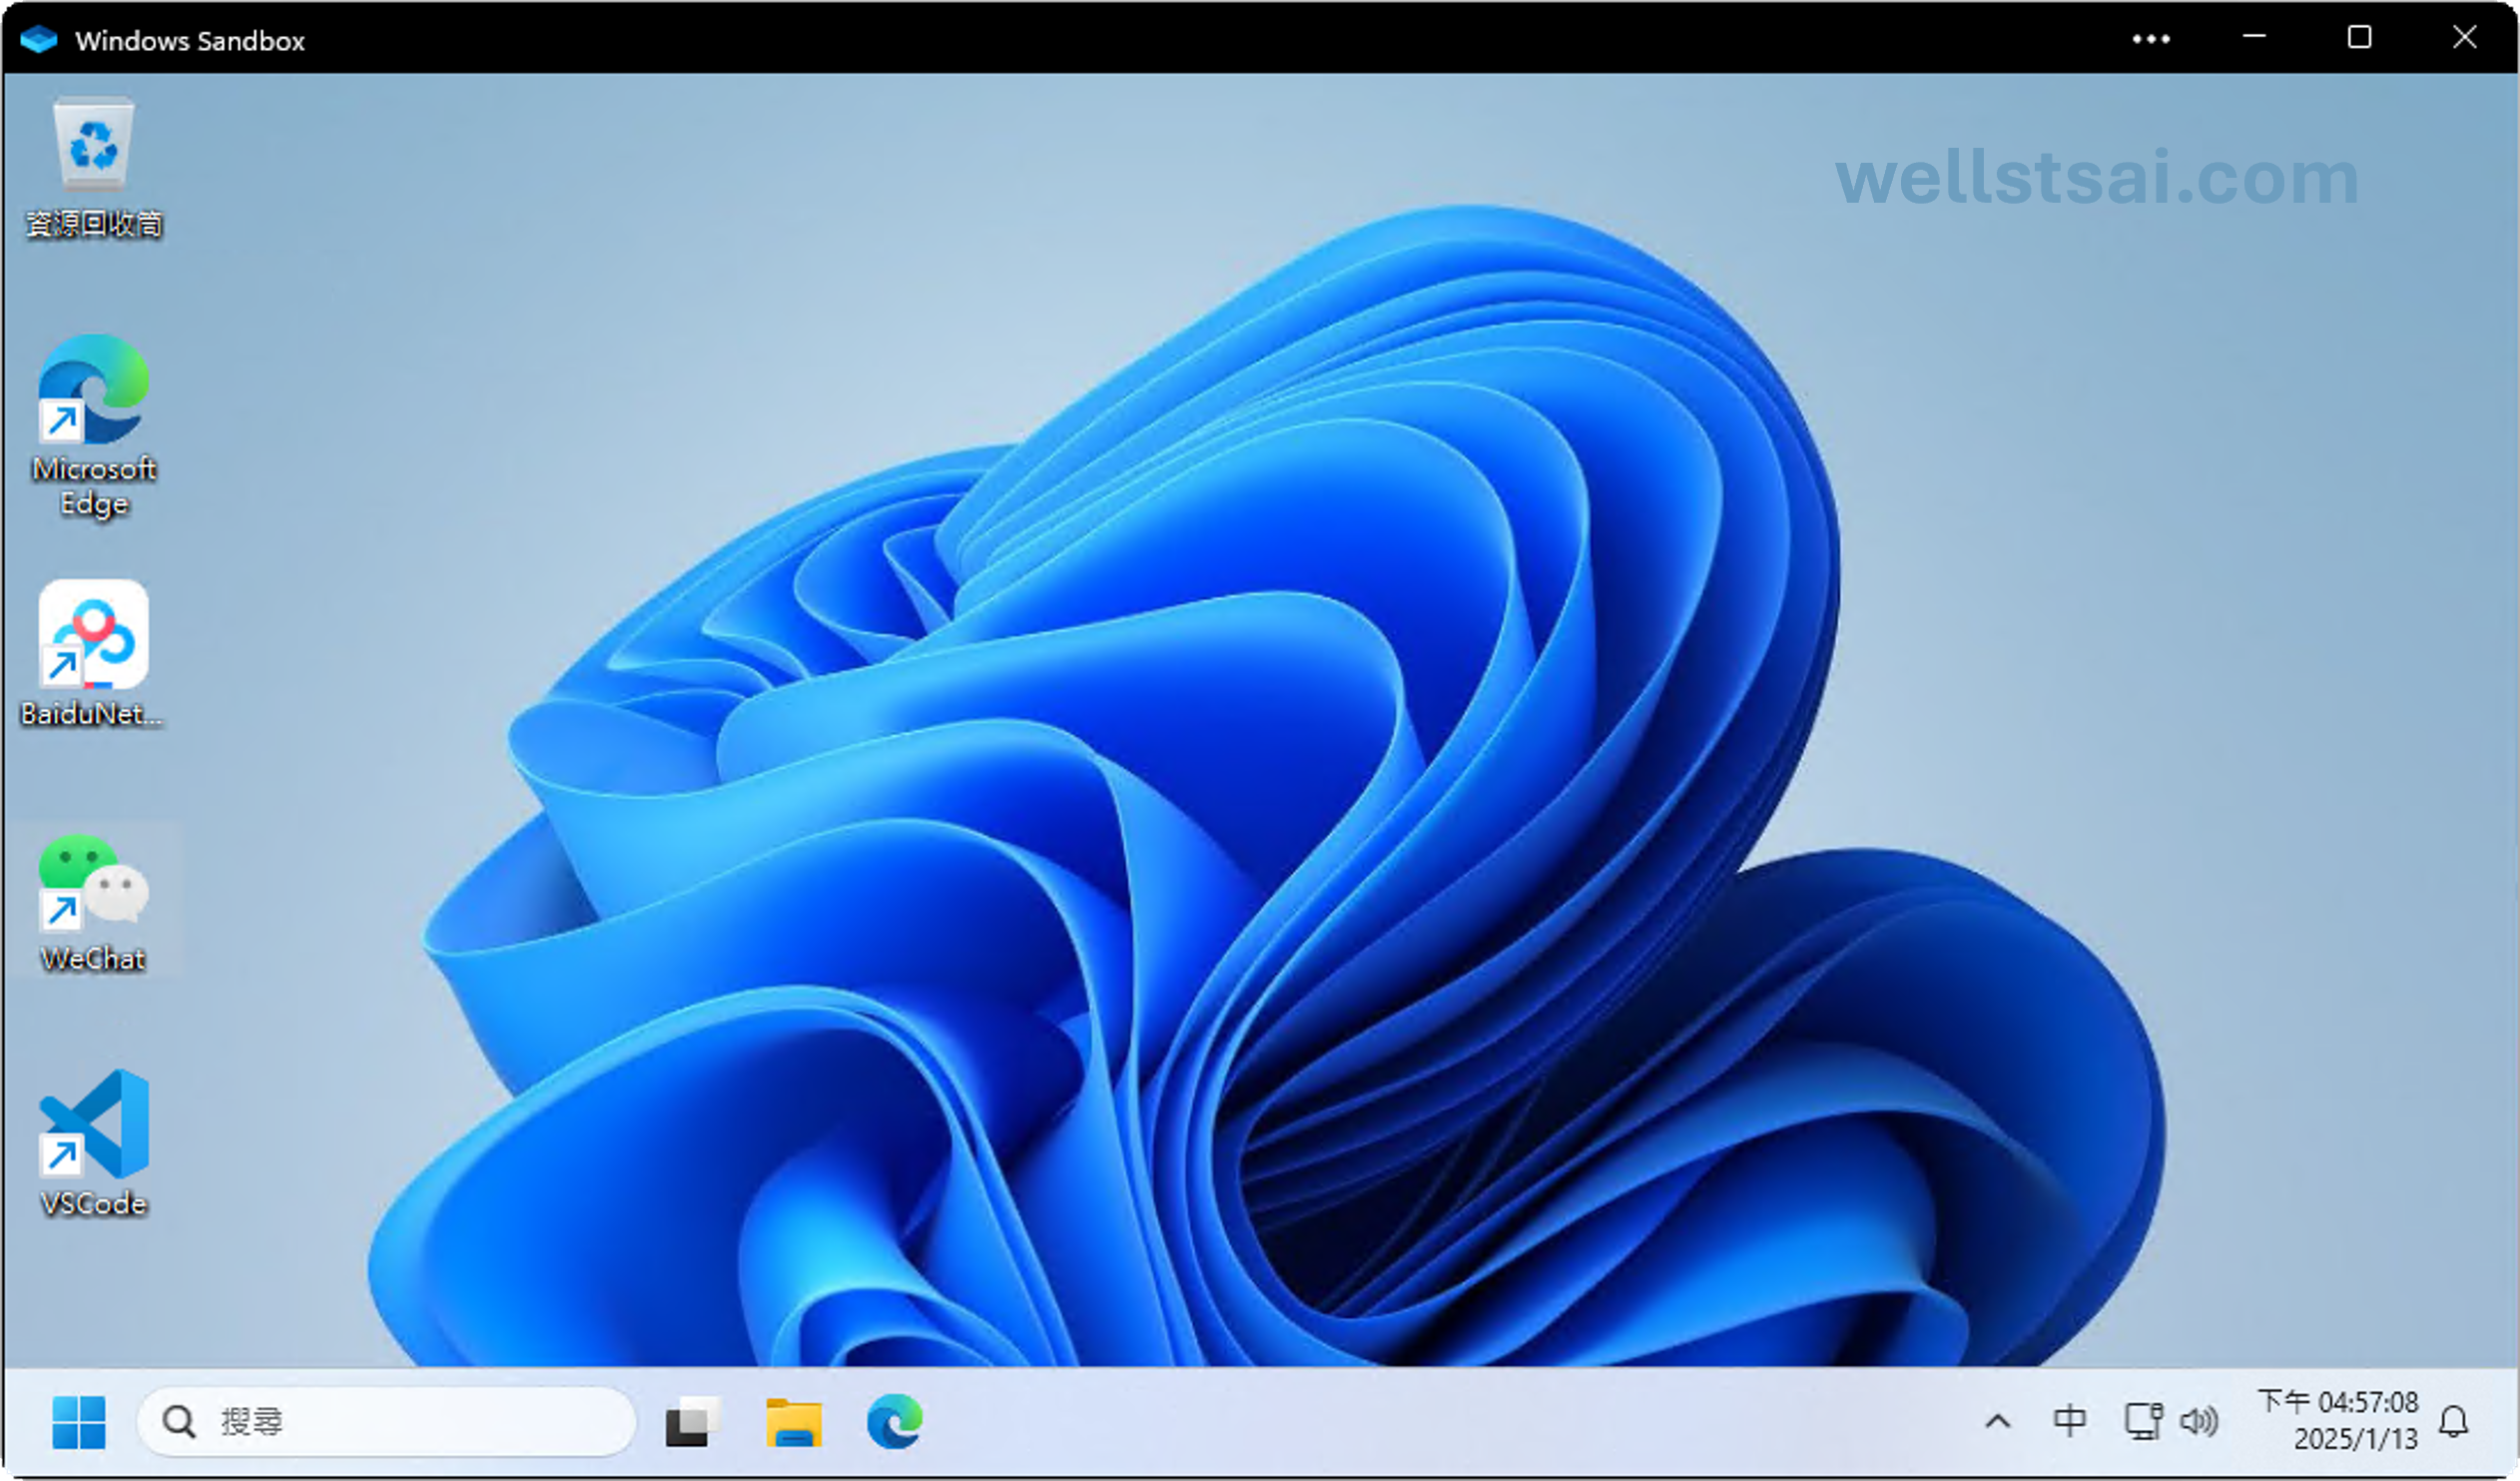
To add new shortcuts, simply update the $Apps array with the application paths and names. For example, I currently have VS Code, WeChat, and BaiduNetdisk stored in C:\Sandbox\Apps.
Here is the complete PowerShell script:
| |
With the necessary folders and scripts in place, you can now proceed to launch the Sandbox with the following steps.
Using WSB to Launch the Sandbox
Launch the Sandbox
Click on the
boot.wsbfile on your desktop to quickly start the Sandbox environment.
Automatically Load Settings
As shown below, by using a pre-written configuration file, the Sandbox automatically loads the required settings upon each launch. This avoids the need to repeatedly download or install specific software, significantly improving efficiency.

Conclusion
By creating a well-prepared Sandbox environment with pre-installed software, you can quickly test applications while maintaining complete isolation from the host system. The Sandbox is ideal for running software from unknown sources, as well as for development tasks, providing a secure and independent workspace.
For example, in my use case, the Sandbox is primarily used to run Chinese applications like WeChat and BaiduNetdisk. Since these applications may make unknown modifications to the system, the Sandbox allows for quick restoration to the initial state, effectively eliminating security risks and enhancing overall system safety.
Additionally, the Sandbox serves as an ideal environment for testing software after compilation, especially when simulating a fresh Windows system. It helps identify whether the necessary runtime environment is fully provided, preventing issues caused by incomplete environments when distributing program files to others.
