Introduction
In the previous article, Using Tailscale to Easily Create Secure and Private Tunnels, we demonstrated how to use Tailscale to establish a secure, private VPN (tailnet) accessible only by you.
This guide will walk you through installing the latest version of Tailscale on a Synology NAS and setting up automated updates to keep it current.
System Configuration
The steps in this guide are based on the following setup:
- NAS Device: DS220+
- Operating System: DiskStation Manager 7 (DSM 7)
- CPU: Intel Celeron J4025
- Synology Package Arch: Geminilake
- Generic Arch:
x86_64
To install the latest version of Tailscale, you need to identify the generic architecture of your NAS. This determines the appropriate Synology package (.spk) file for installation and updates.
If you’re unsure about your NAS architecture, refer to the Synology and SynoCommunity Package Architectures for detailed information.
Traditional Installation Method
The traditional installation method is through the Synology Package Center, where you can install the version released by Synology.
Click the Main Menu button in the top left corner, then select Package Center.

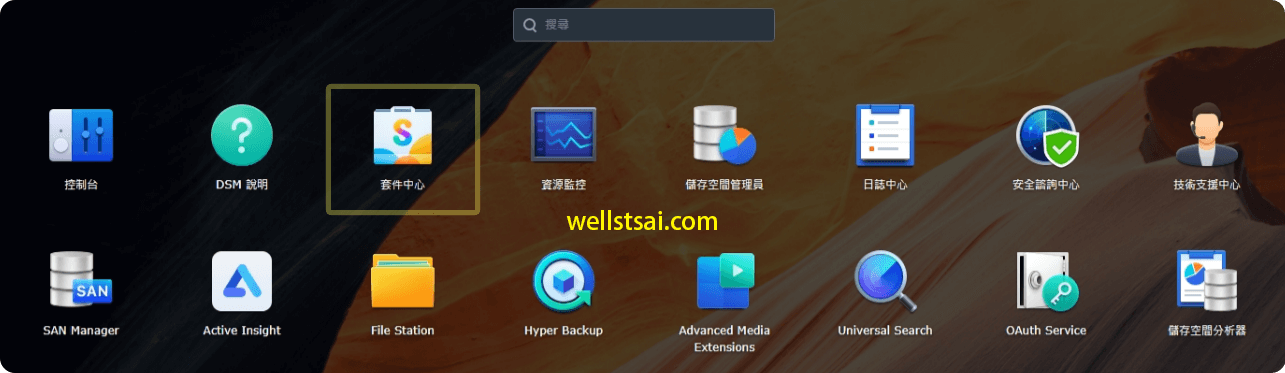
Find Tailscale at the bottom of all packages and click Install.
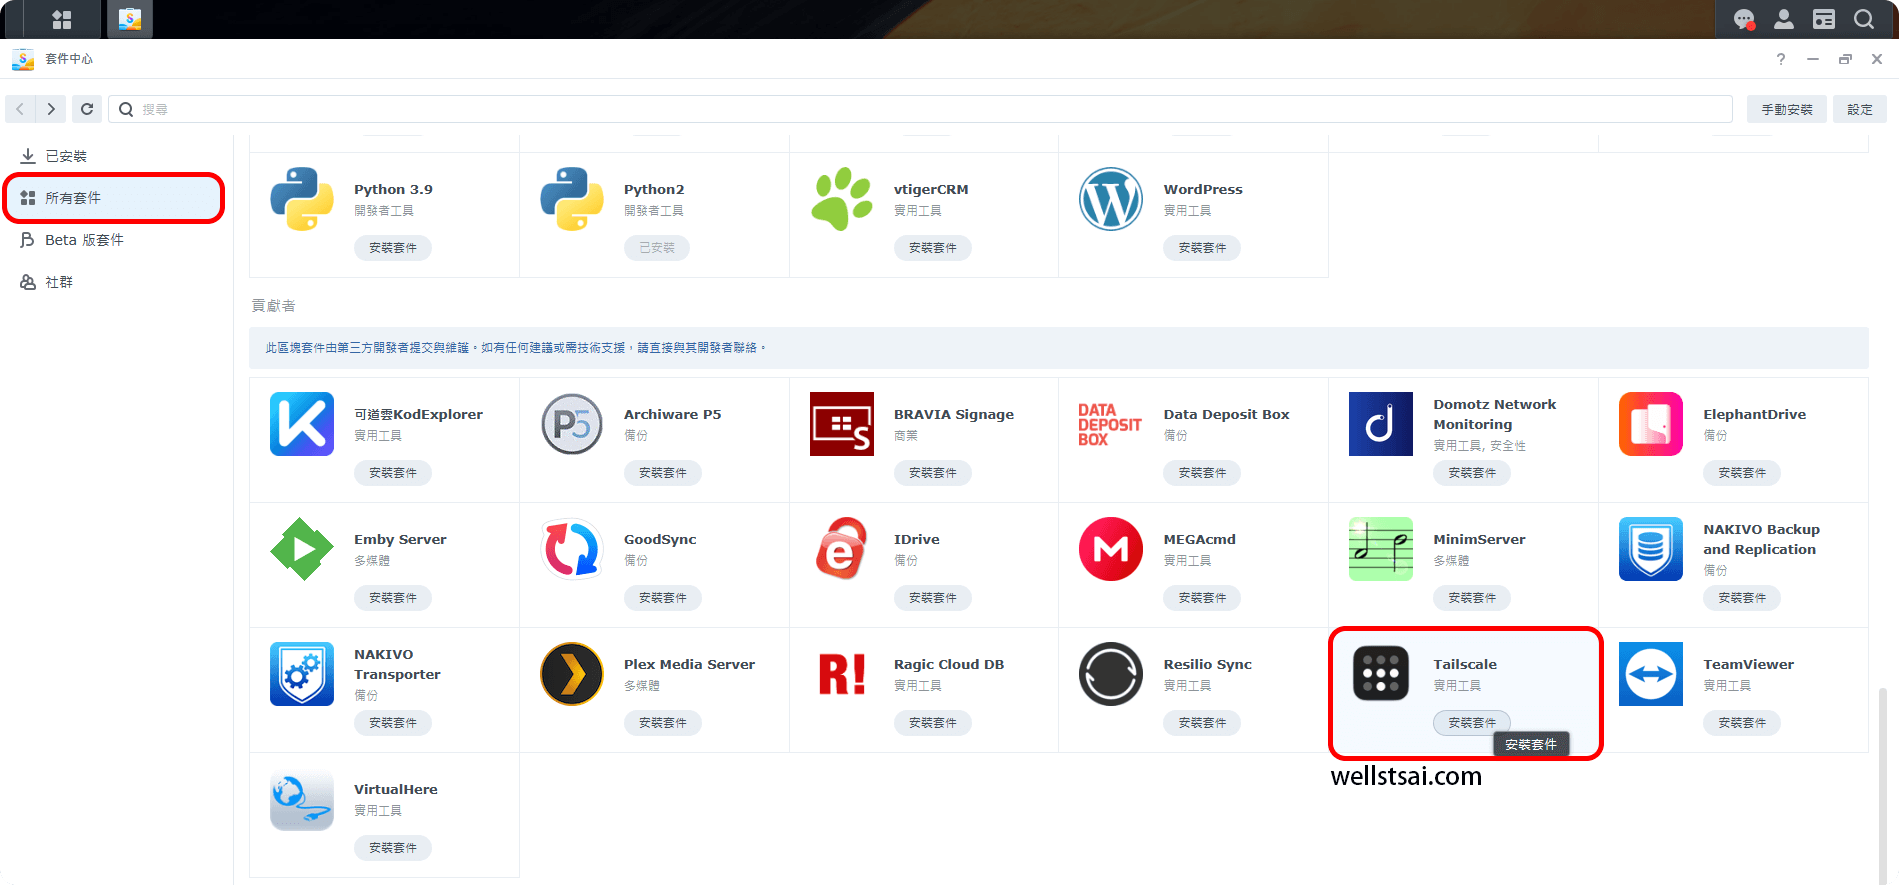
After installation, click on the main menu’s Tailscale and log in to use it.
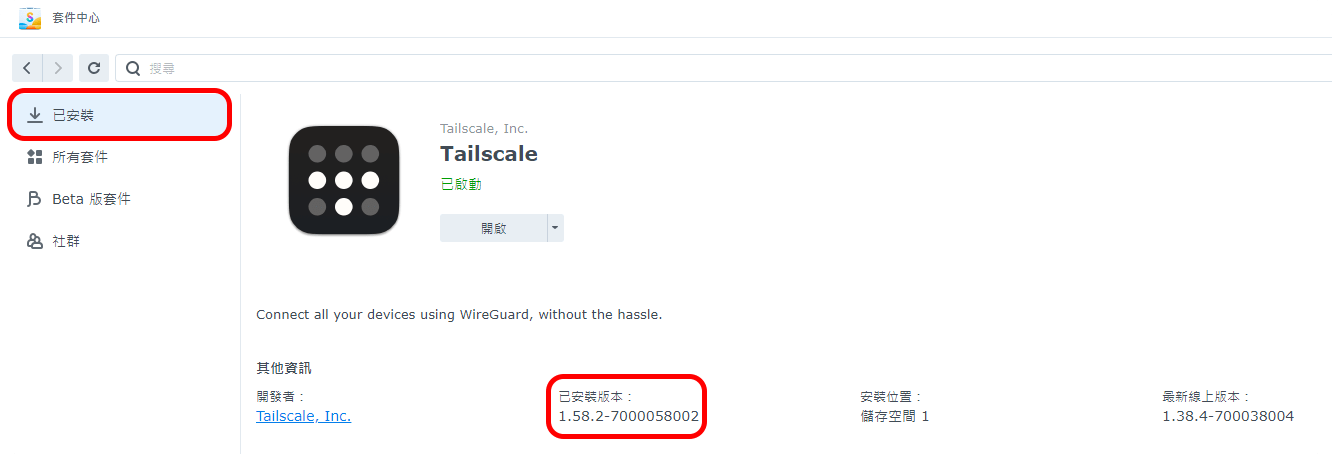
In the Package Center, check the installed version to see it is the official version 1.58.2-700058002.
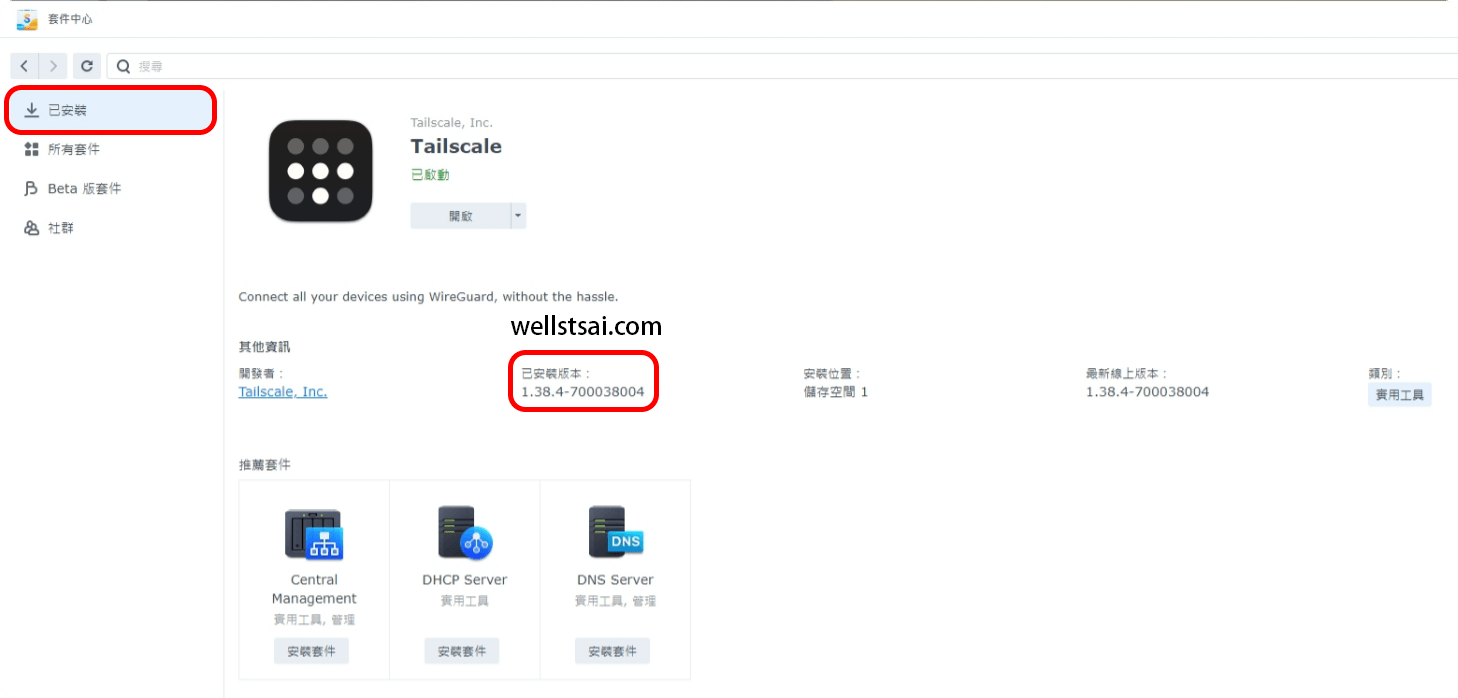
This version is released by Synology (2023/5/8).
According to Tailscale’s latest official release, the version is 1.58.2 (2024/4/18).
Installing the Latest Version of Tailscale from the Official Website
Tailscale releases the latest version of the spk for Synology. Users can manually install it or automate the process using the script below.
Copy and Modify the Script
Open a text editor and paste the script below:
| |
Modify the URL in the Script
- Identify your NAS’s architecture using Synology and SynoCommunity Package Architectures.
- For example:
- DS220+ uses
x86_64. - DS218play uses
armv7.
- DS220+ uses
- For example:
- Visit the Tailscale Stable Releases.
- Locate the
.spkfile that corresponds to your DSM version and architecture, then copy its URL. - Replace the
urlvariable in the script with the selected.spkURL.
Note: If your NAS uses the
x86_64architecture, no changes to the script are required. Models such as DS224+, DS923+, DS723+, DS423+, DS1621+, DS220+, DS420+, RS820+, RS1219+, FS1018, and FS3017 all usex86_64, allowing the script to be used directly.
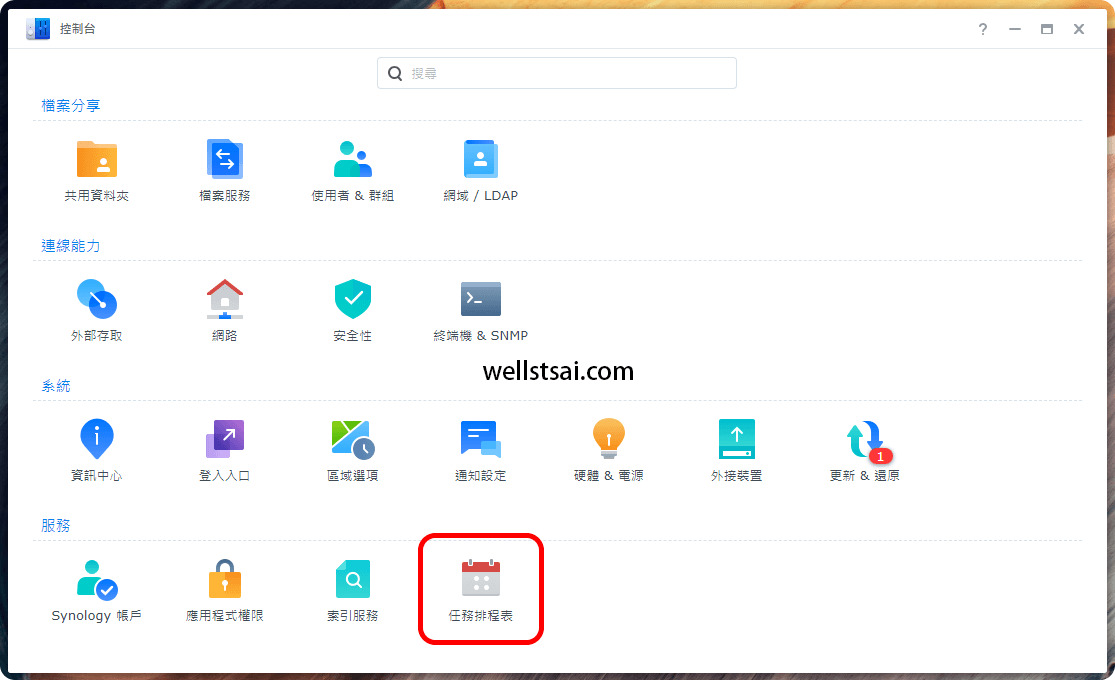
Access the Task Scheduler
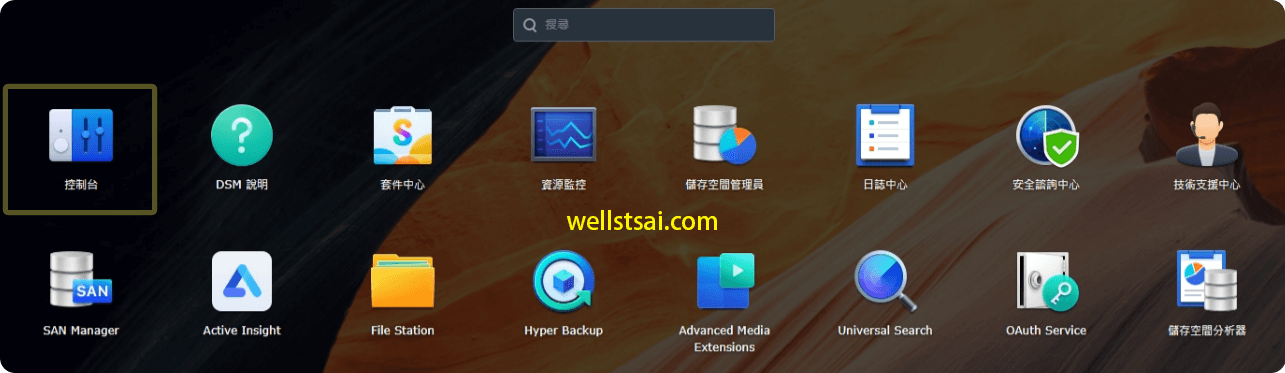
Click the main menu button in the top-left corner.
- Click the main menu button in the top-left corner.
![]()
- Select Control Panel.
- Navigate to Task Scheduler.
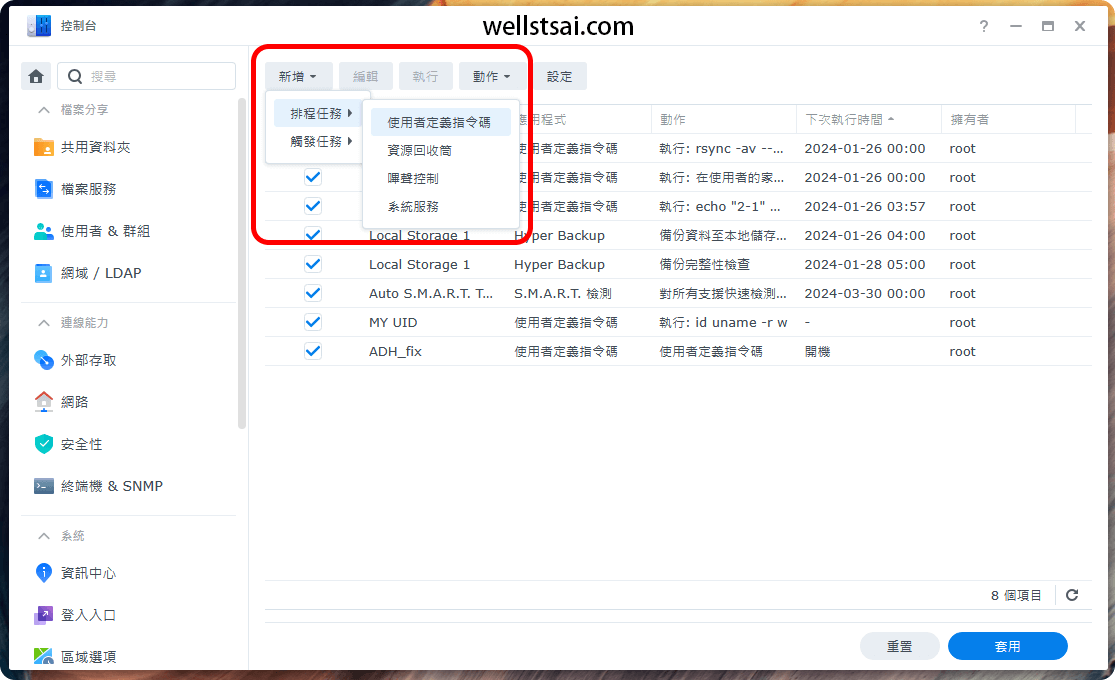
Add a Scheduled Task
Create a new scheduled task for running the script.
Add → Scheduled Task → User-defined Script
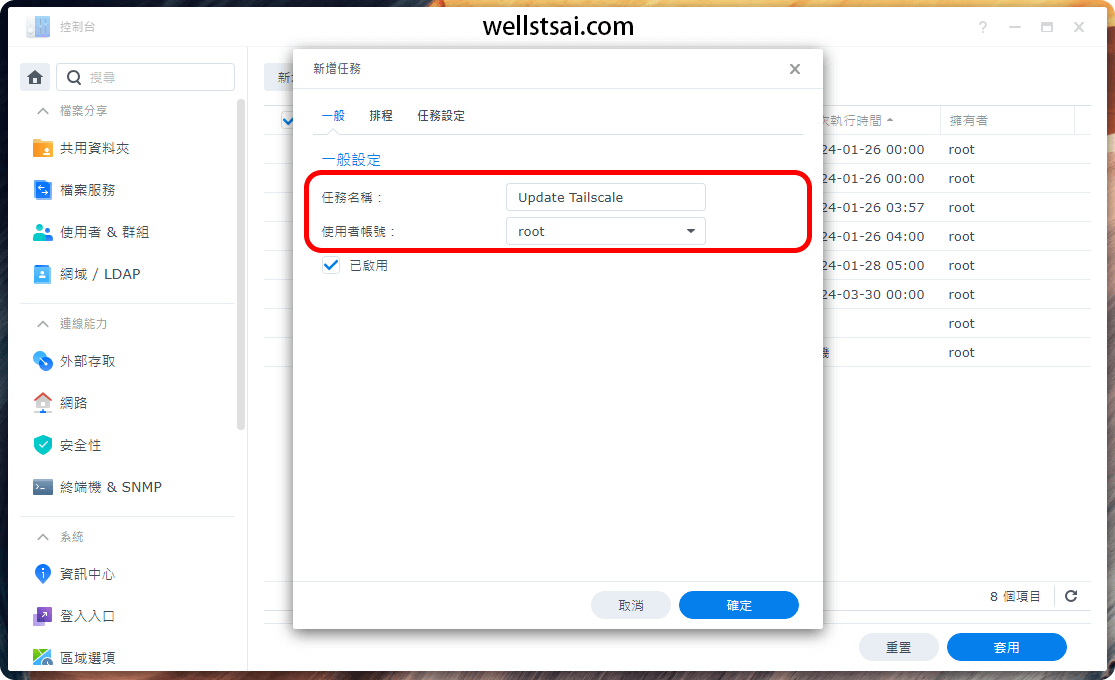
Configure and Save the Task
- Set a task name and ensure it runs as the root user.
- Schedule the task to execute daily at midnight.
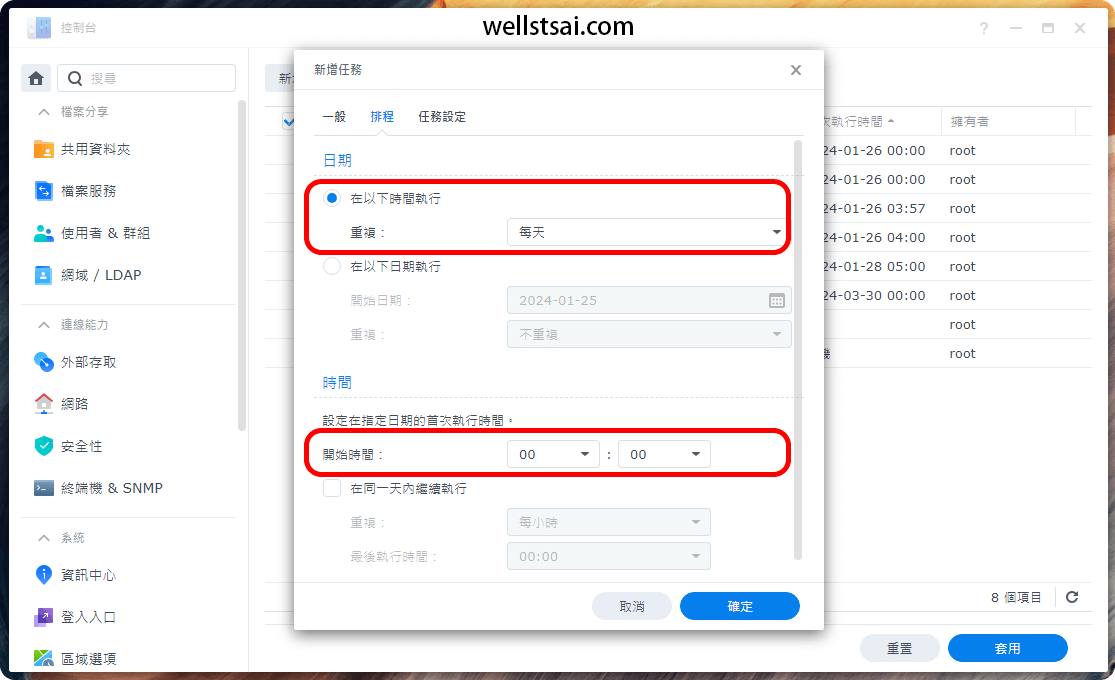
- In the task settings, paste the script tailored for your NAS’s architecture. Optionally, configure the task to send execution results via email.
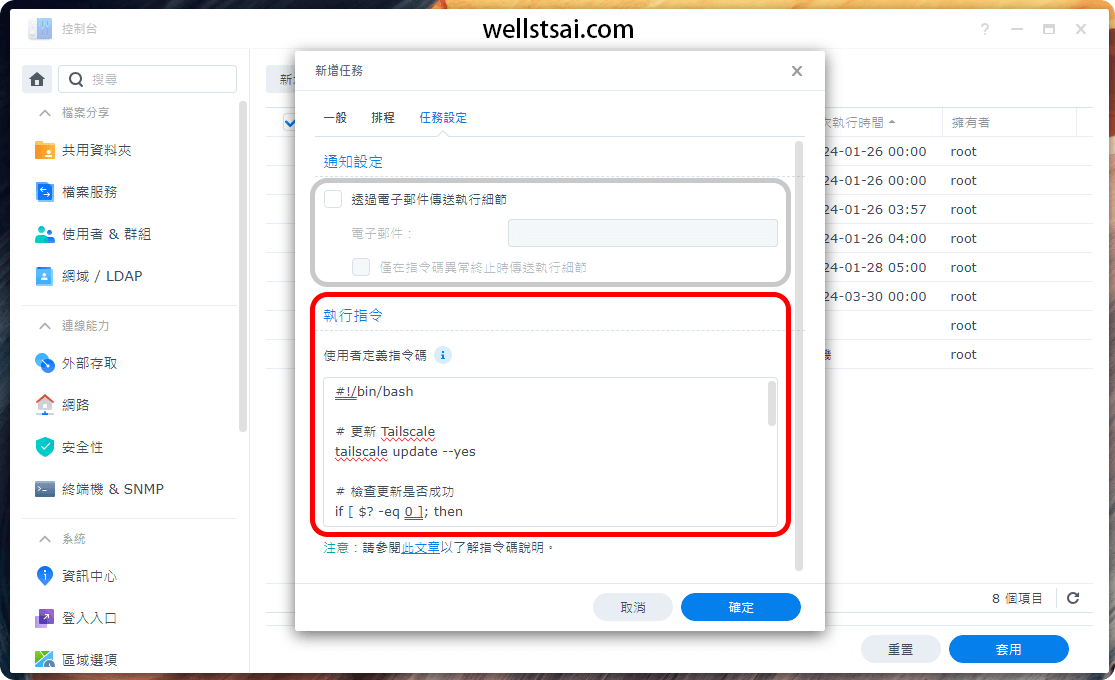
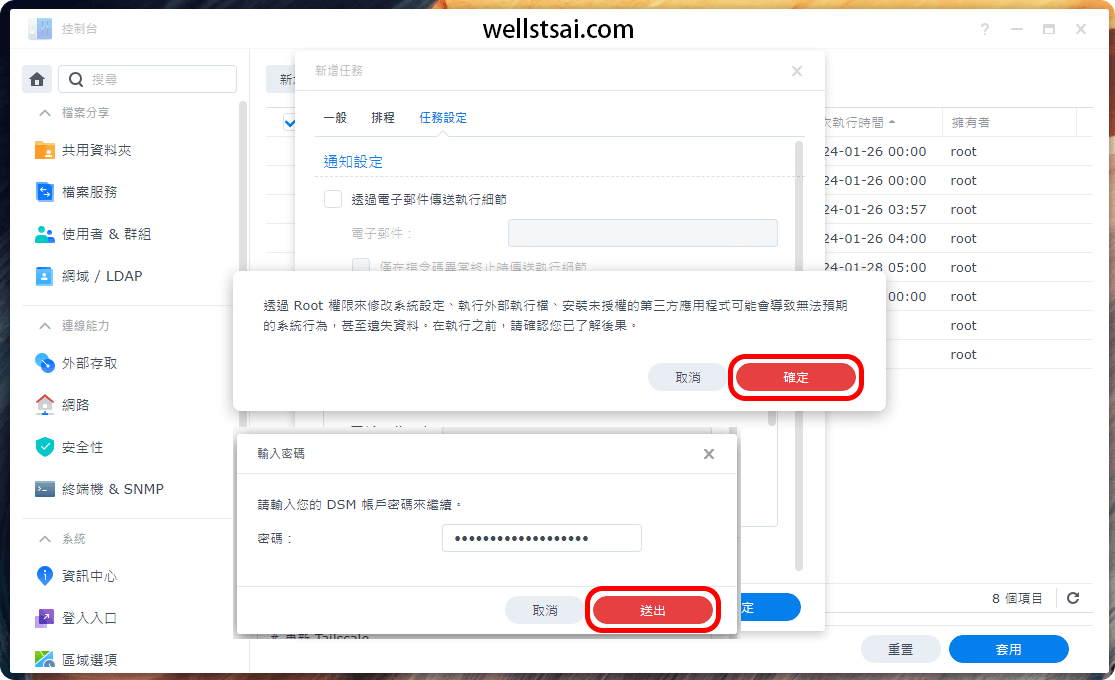
- Click Confirm to save the task. If a warning message appears, select Yes to proceed.
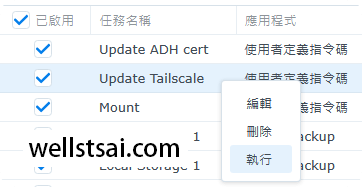
Run the Task Manually
To ensure Tailscale is upgraded to the latest version, manually execute the task for the first time:
- Right-click on the created task in the Task Scheduler.
- Select Execute from the context menu.
Verify the Update
- Open the Package Center and locate the installed Tailscale package.
- Confirm that the version matches the latest release (
1.58.2as of January 25, 2024), which is newer than Synology’s official version (1.38.4).
Note: This script upgrades the existing Package Center version (e.g., from
1.38) directly, without requiring you to uninstall the previous installation.
Conclusion
Once the installation is complete, navigate to the Control Panel and open the Tailscale app. This will launch a new tab where you can log in and begin setting up your network.
For more advanced networking details, refer to Using Tailscale to Easily Create Secure and Private Tunnels.