
Introduction
In the previous article, “Using Tailscale to Easily Create Secure and Private Tunnels”, we introduced the principles behind Tailscale, how to install it, and how to connect two computers. As enterprises increasingly require seamless integration of internal and external networks and resource sharing, this article will delve into the advanced applications of Tailscale, including Taildrop file sharing, Exit Node setup, and Subnet Routing configuration. With these features, you can efficiently achieve NAT traversal and remote access while enhancing overall network security and management efficiency.
These functionalities are not limited to enterprise environments—individual users can also leverage Tailscale to securely integrate internal network services such as NAS and media streaming, enabling efficient and convenient remote access and management.
Here are some practical examples:
- How can files or photos from Device A be securely and efficiently transferred to Device B?
- How can Device B access the internet through Device A to bypass restrictions on certain websites?
- If Device A can connect to a NAS (with IP address 192.168.88.88), how can an external Device B access the NAS through this IP address?
These topics will be further explored and explained in the following sections.
Verifying Connected Devices
First, ensure that at least two devices have successfully installed Tailscale. On a Windows system, open the Command Prompt (CMD) and enter the following command:
| |
The output should display connected devices as follows:
| |
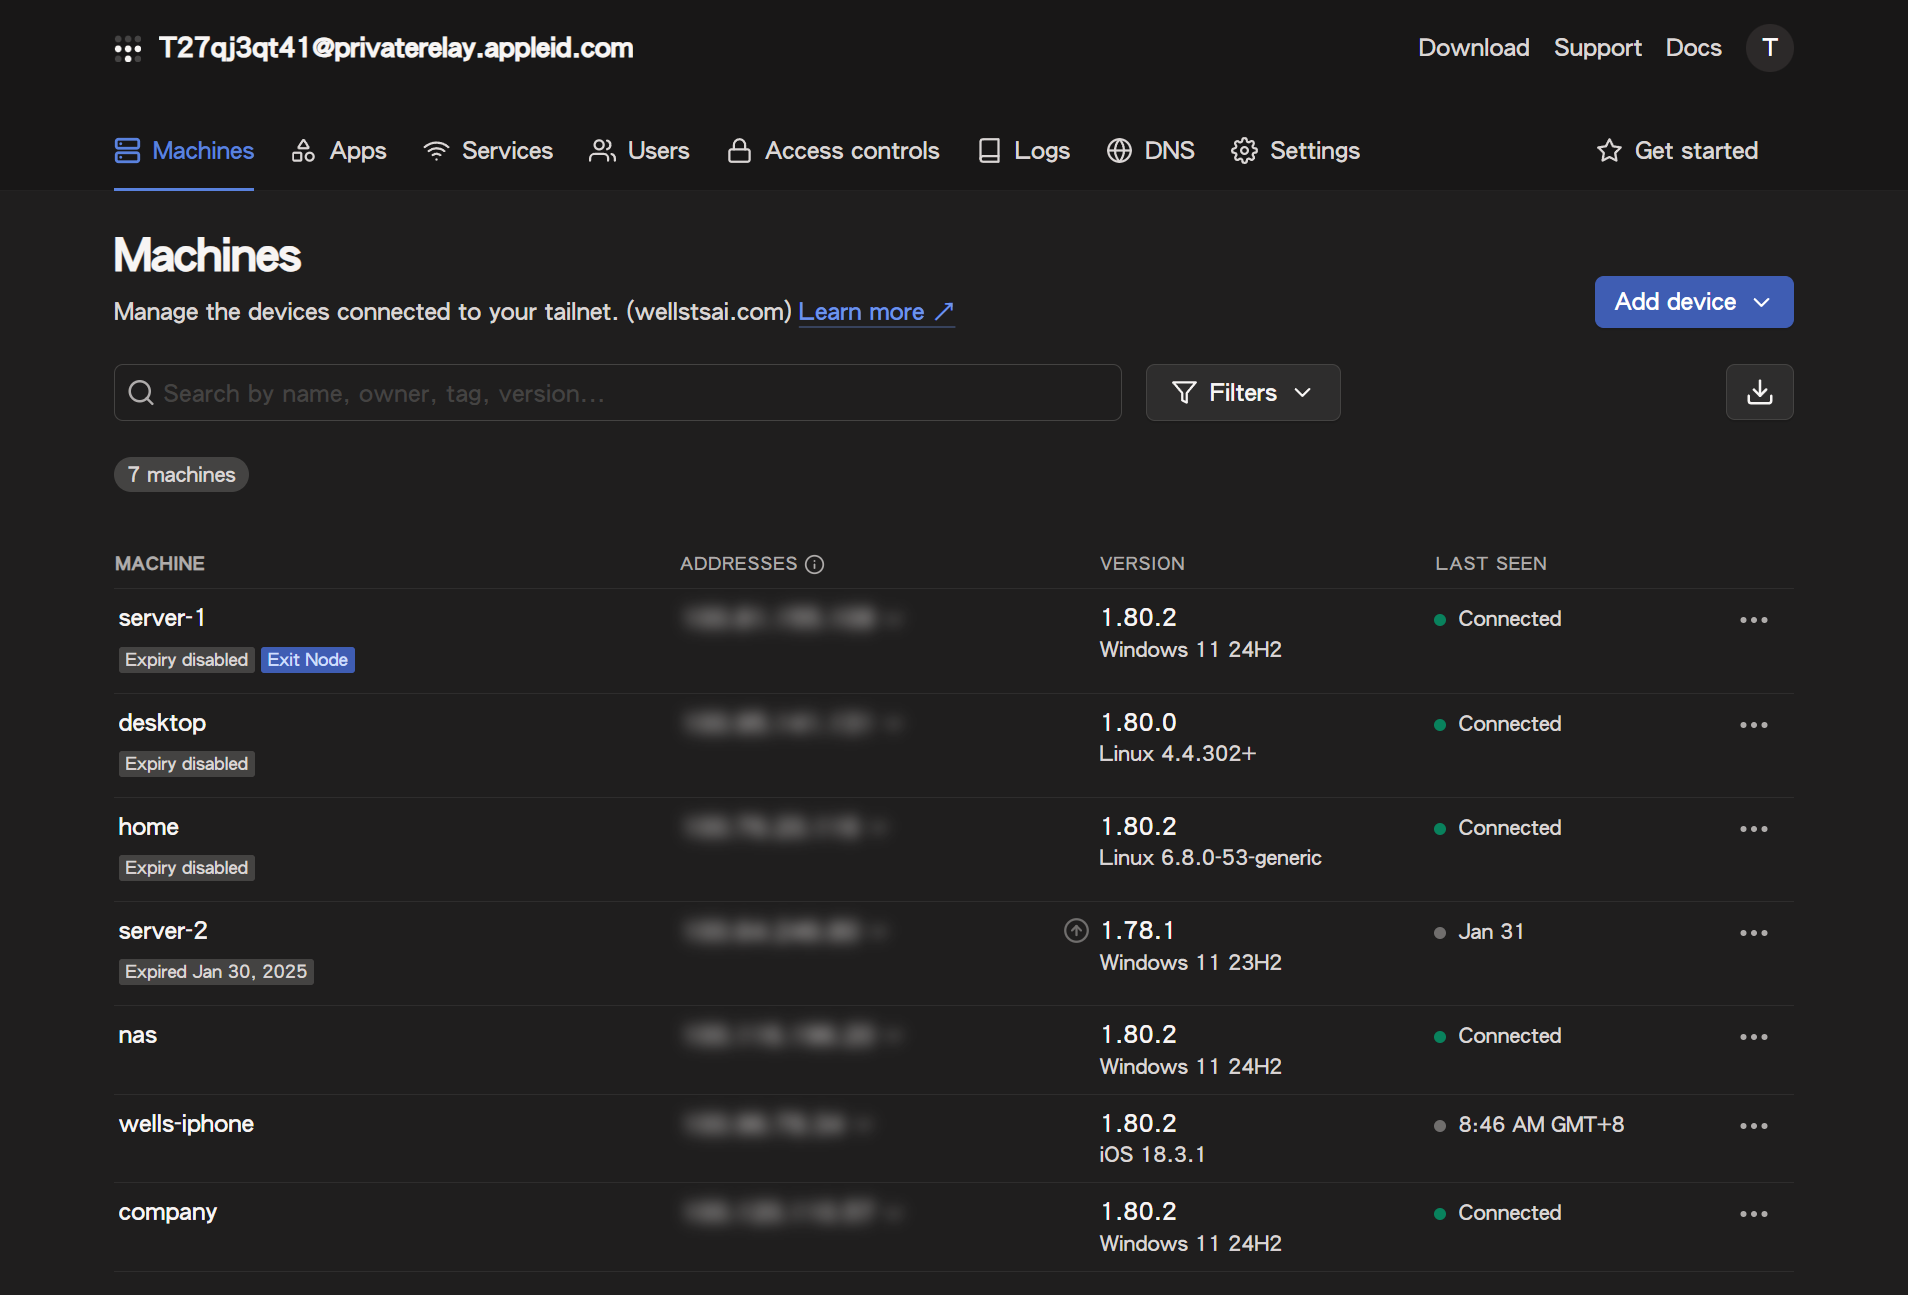
Alternatively, you can check the device status in the Tailscale Admin Console, where you can view all registered devices within your tailnet.
Transferring Files with Taildrop
Taildrop allows seamless file and data transfers between two devices. Its concept is similar to Apple’s AirDrop, but unlike AirDrop, which relies primarily on Wi-Fi or Bluetooth, Taildrop uses Tailscale’s secure encrypted tunnel for file transmission. This means that files can be transferred regardless of device proximity.
Enabling Taildrop
Taildrop is currently in the Alpha stage and must be manually enabled before use:
- Log in to the Tailscale Admin Console
- Navigate to Settings > General
- Locate the Send Files option and enable Taildrop.

Transferring Files
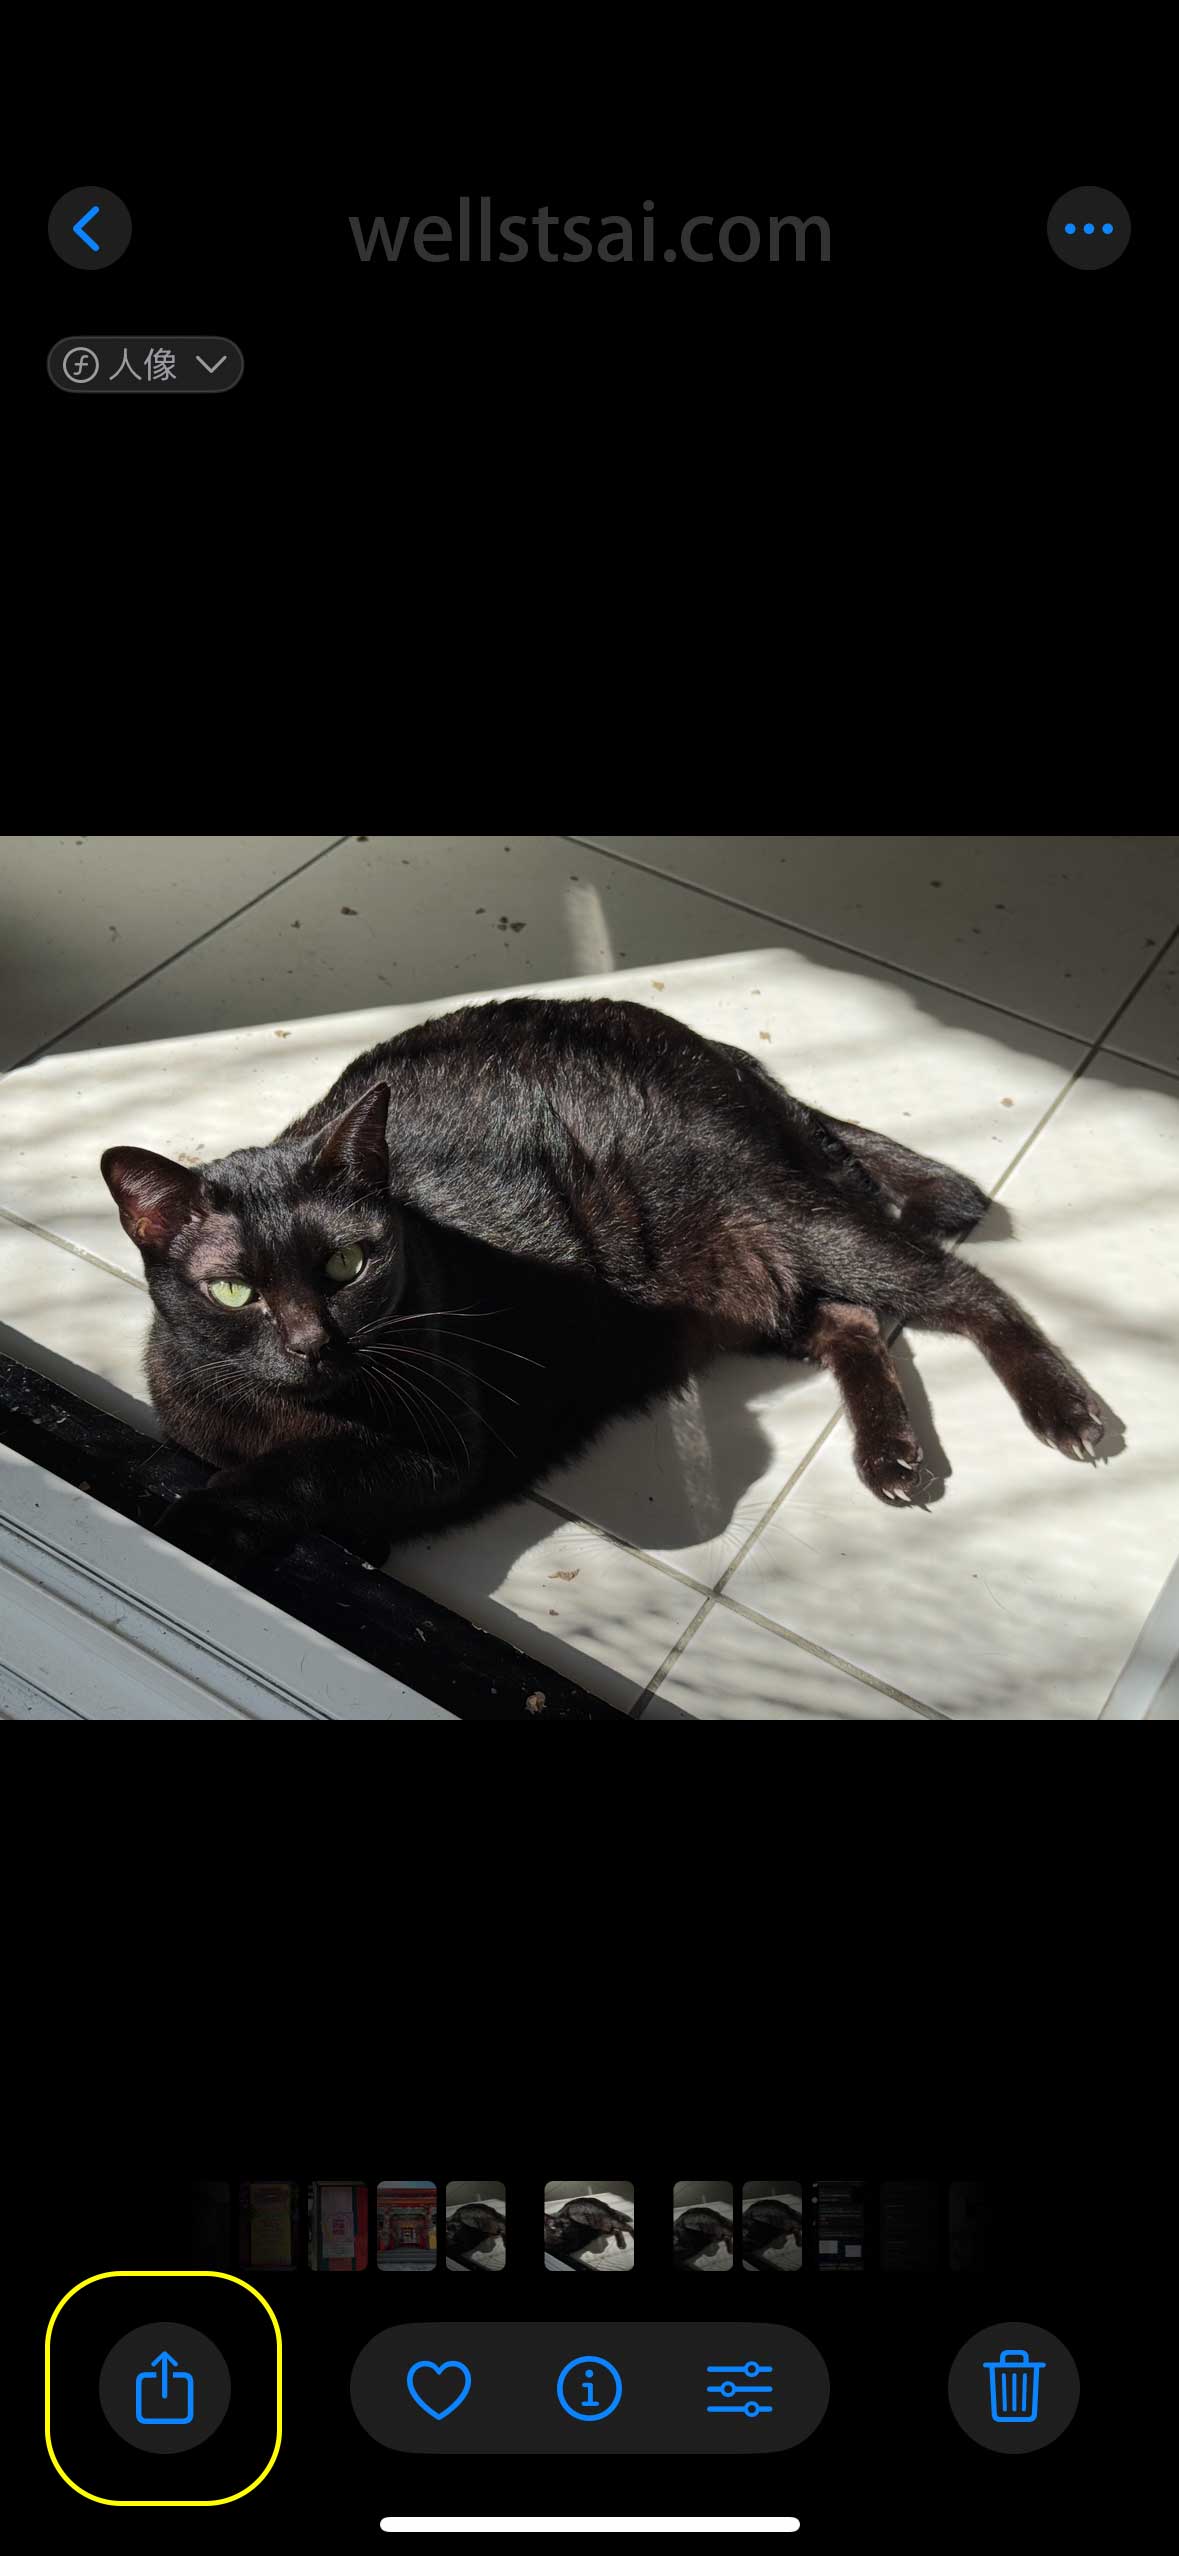
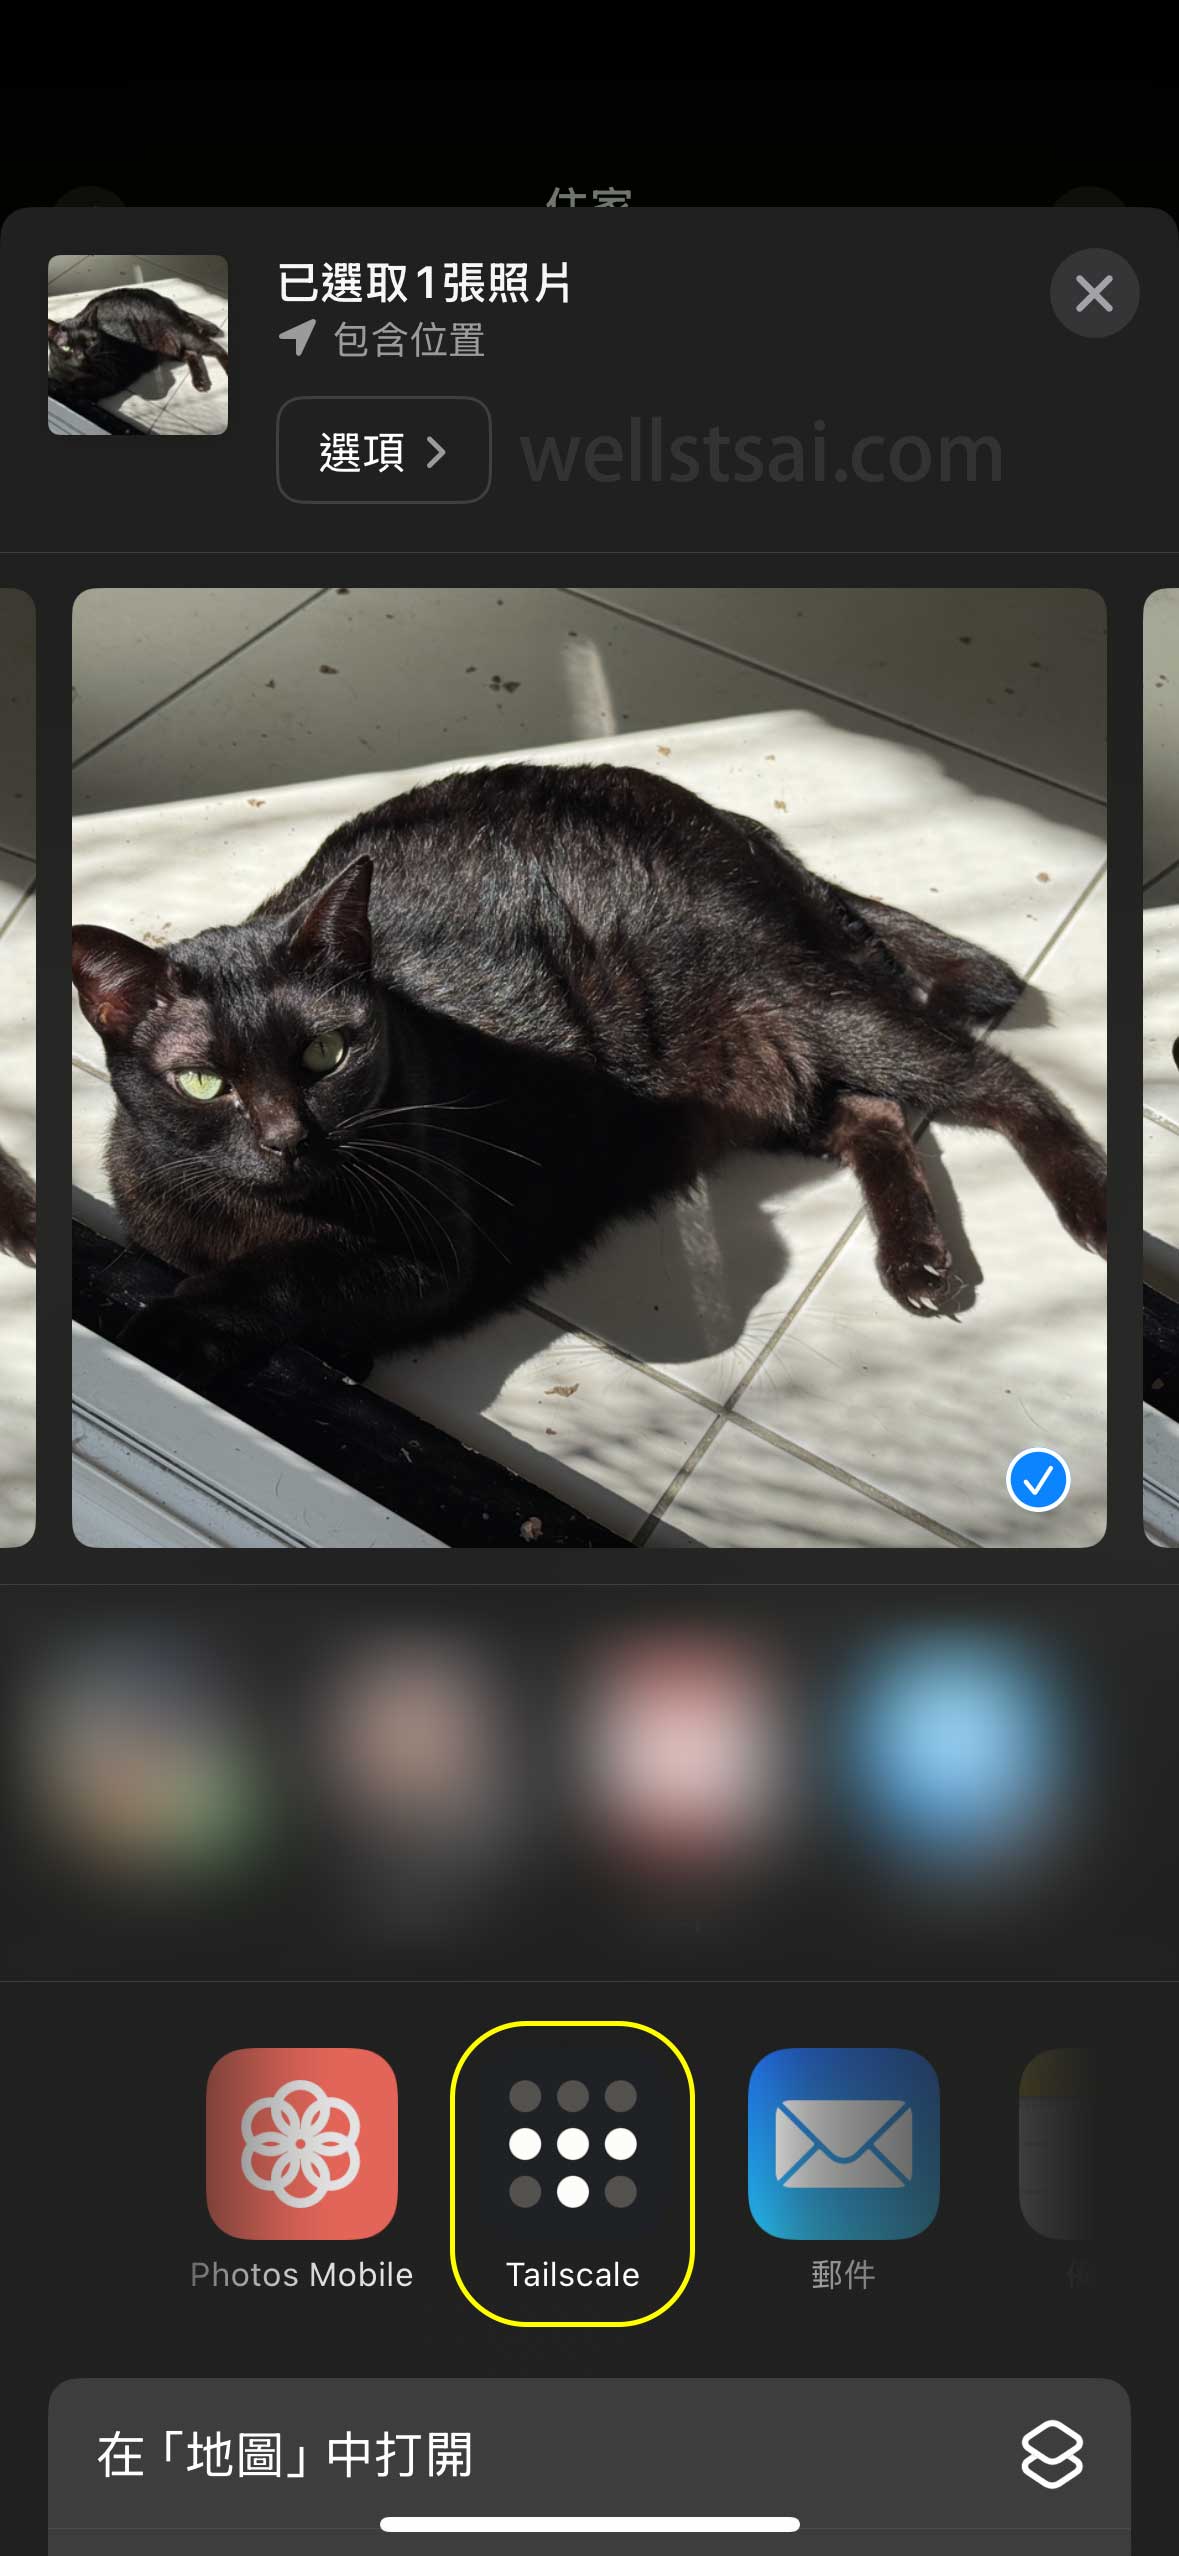
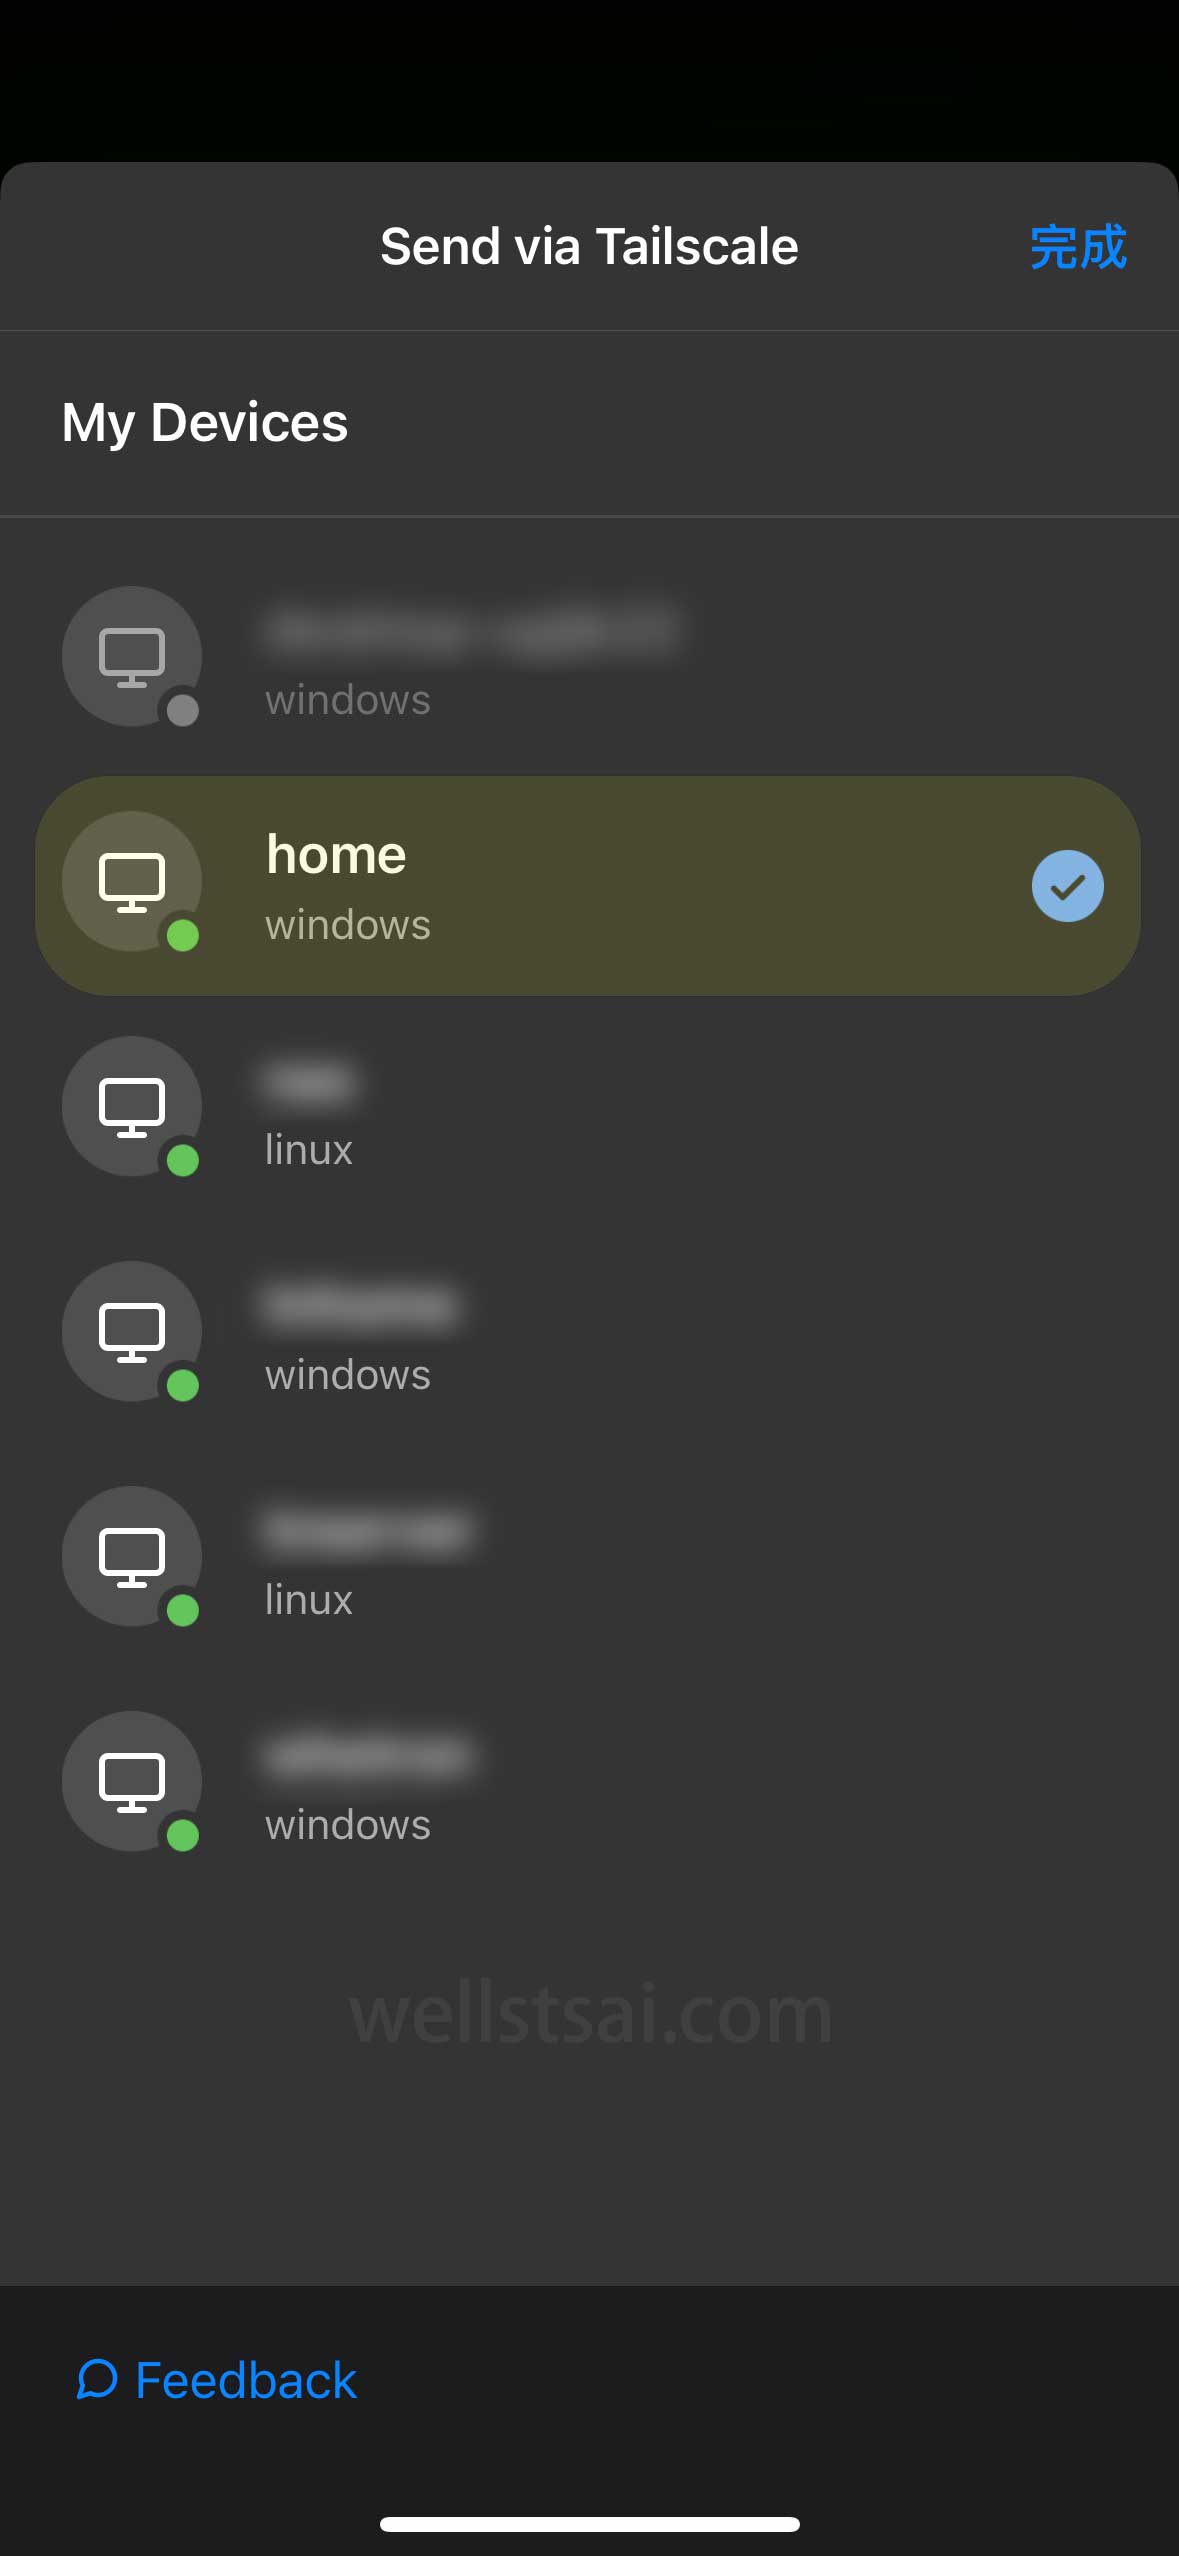
To send files from your mobile device to another device, first select the desired photo or file, tap the share menu, and choose Tailscale. The system will then display a list of available recipient devices. After selecting the target device, the transfer will begin. Once the file transfer is complete, it will be automatically saved in the Downloads directory of the target device.
Transferring files from a computer to an iPhone, Mac, or Android device is also straightforward. Simply right-click the file and select
Send with Tailscale..., allowing the file to be easily accessed on other devices.
Transferring Files to NAS
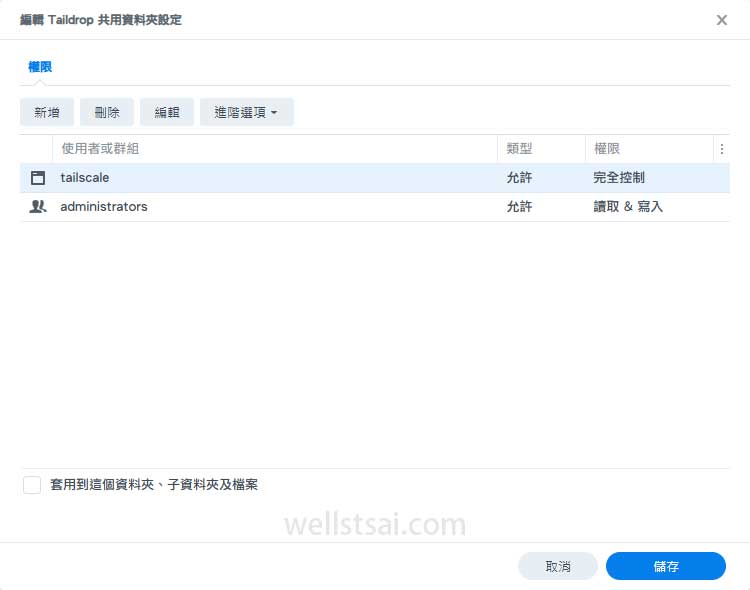
By default, Synology NAS does not have a designated Downloads folder. Therefore, you need to manually create a new shared folder and name it Taildrop. Additionally, you must grant read and write permissions to the tailscale user within the system. Once configured, you can transfer files to the NAS using Taildrop.
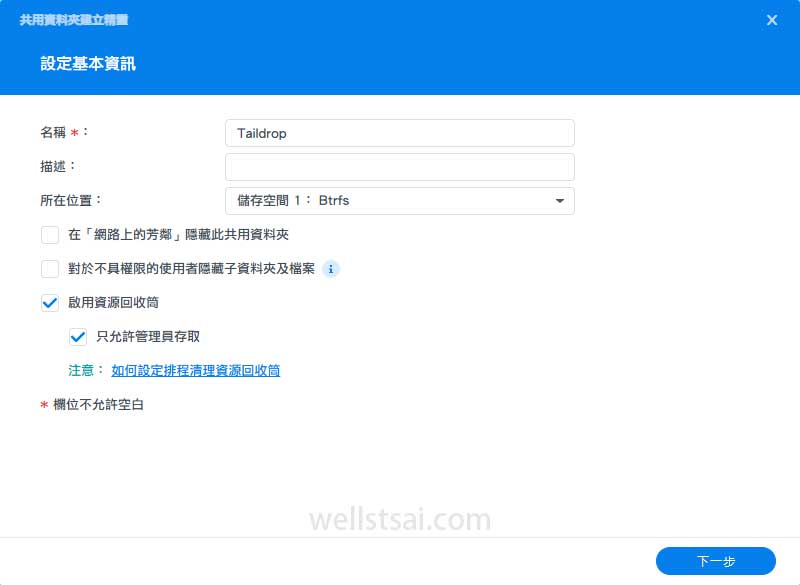
Create a Shared Folder
- Navigate to Synology Control Panel > Shared Folder > Create
- Set the folder name as
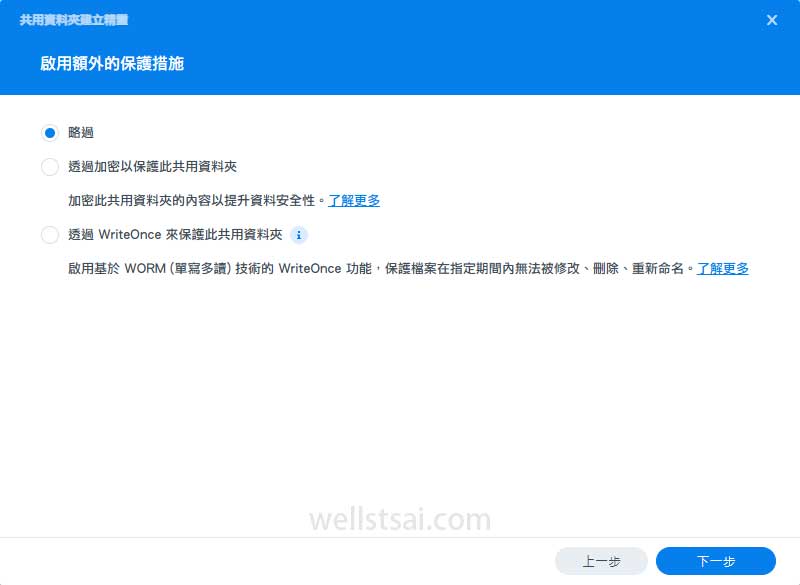
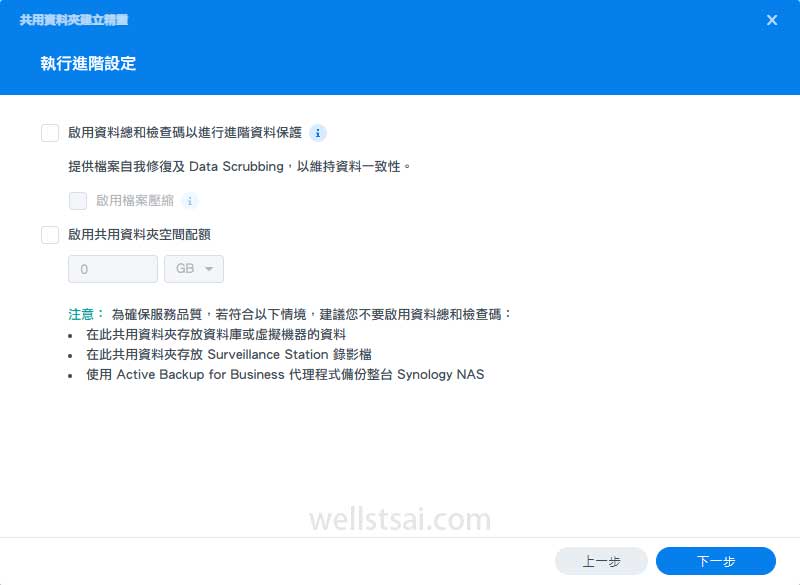
Taildrop - Skip encryption and advanced settings

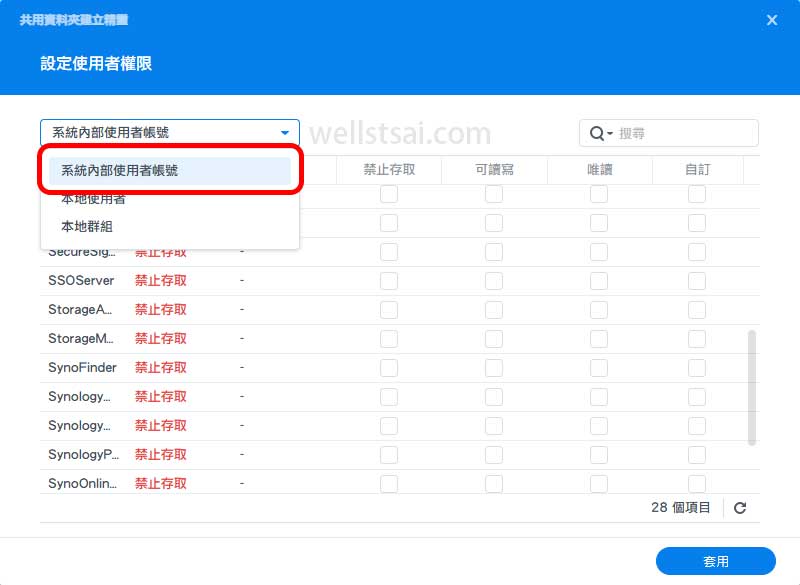
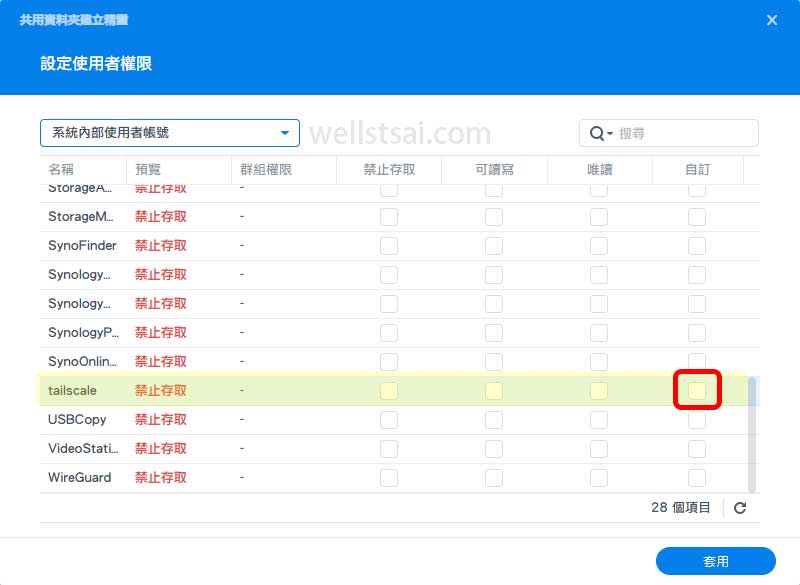
Configure
tailscaleUser Permissions- In the permission settings screen, display internal user accounts
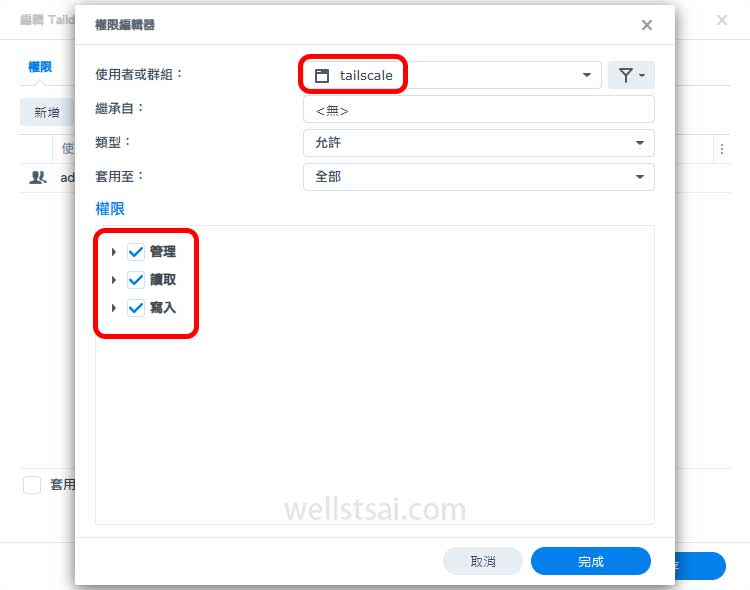
- Locate the
tailscaleuser and grant full access permissions
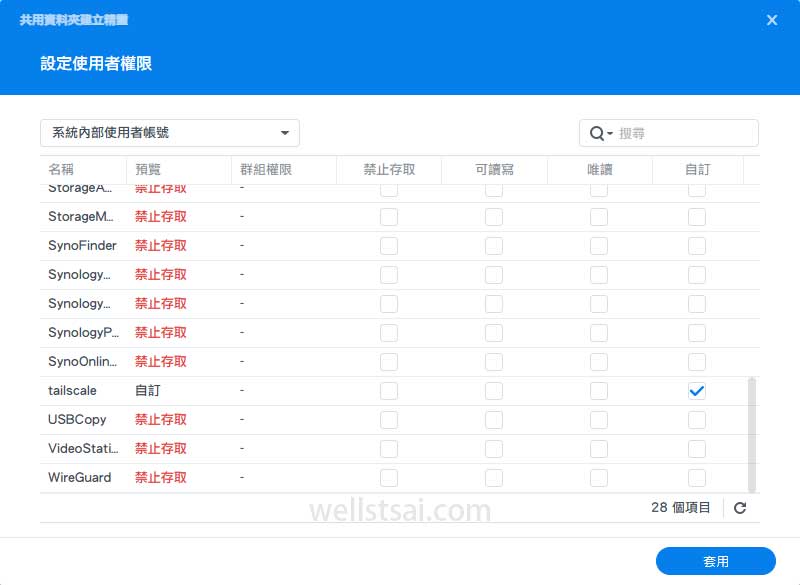
Finalizing the Setup
- Once
tailscalehas been granted read and write permissions, you can transfer files to the NAS using Taildrop. The transferred files will be stored in the Taildrop folder.
- Once
Transferring Files on Linux
On Linux, I typically use SCP + SSH for file transfers. However, if the server does not have SSH enabled, Taildrop can serve as an alternative solution.
When executing Tailscale commands, if the operator is not configured, each command requires sudo privileges. To simplify operations, you can set an operator to grant the current user Tailscale administrative rights, eliminating the need to use sudo frequently when running Tailscale commands:
| |
On Linux, you can use the tailscale file cp command to transfer files. The command format is:
| |
The colon (:) at the end of the command is a required format by Tailscale. For example, to send the gen_cert.sh file to the wells_home device, use the following command:
| |
The output after executing the command is as follows:
| |
To receive a file, first upload the file from Device A to the server using Taildrop on your computer. Then, on Linux, execute the following command to save the file in the current directory (.):
| |
Using Tailscale to Set Up an Exit Node for Traffic Forwarding and Bypassing Restrictions
In certain scenarios, we may want to route all or specific network traffic through a designated device, such as:
- Traveling abroad and being unable to access specific websites or services (e.g., ChatGPT).
- Certain websites restrict access based on IP address verification to ensure the device belongs to a specific institution, but the current device is outside the internal network.
- Enhancing privacy by routing traffic through a trusted device instead of using public networks directly.
For example, some SIM cards I purchased while traveling abroad roam to Hong Kong, where ChatGPT access is restricted. In this case, by setting up an exit node, I can route traffic through a server in Taiwan or another unrestricted region to bypass these limitations.
Setting Up an Exit Node
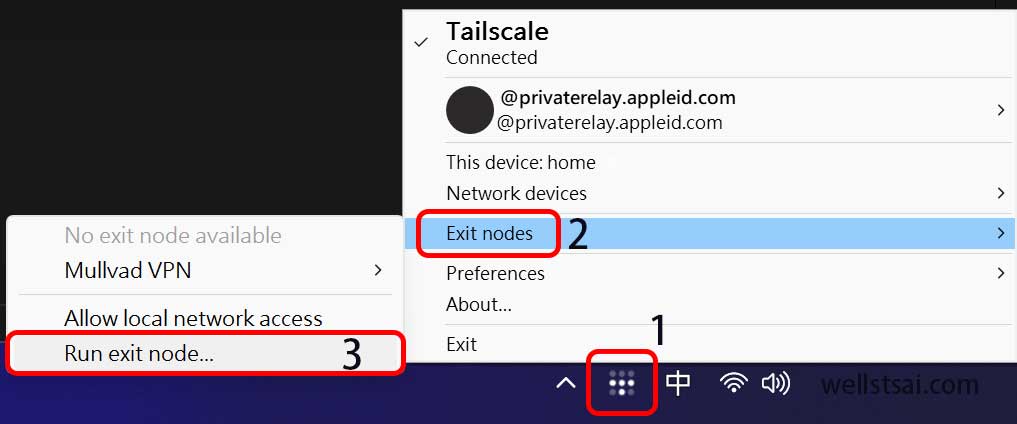
Using an exit node is straightforward. First, you need to configure the target device as an exit node.
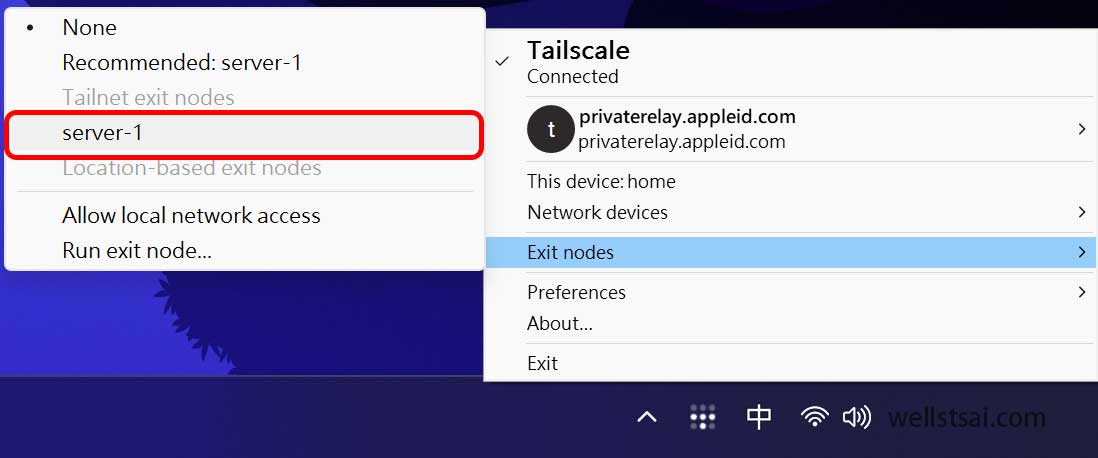
On Windows and macOS, you can right-click the Tailscale icon, then select Exit Nodes → Run Exit Node….
On Linux, you need to enable IPv4/IPv6 forwarding first by executing the following command:
| |
Since Tailscale is already running, we only need to append the --advertise-exit-node flag to configure the device as an exit node:
| |
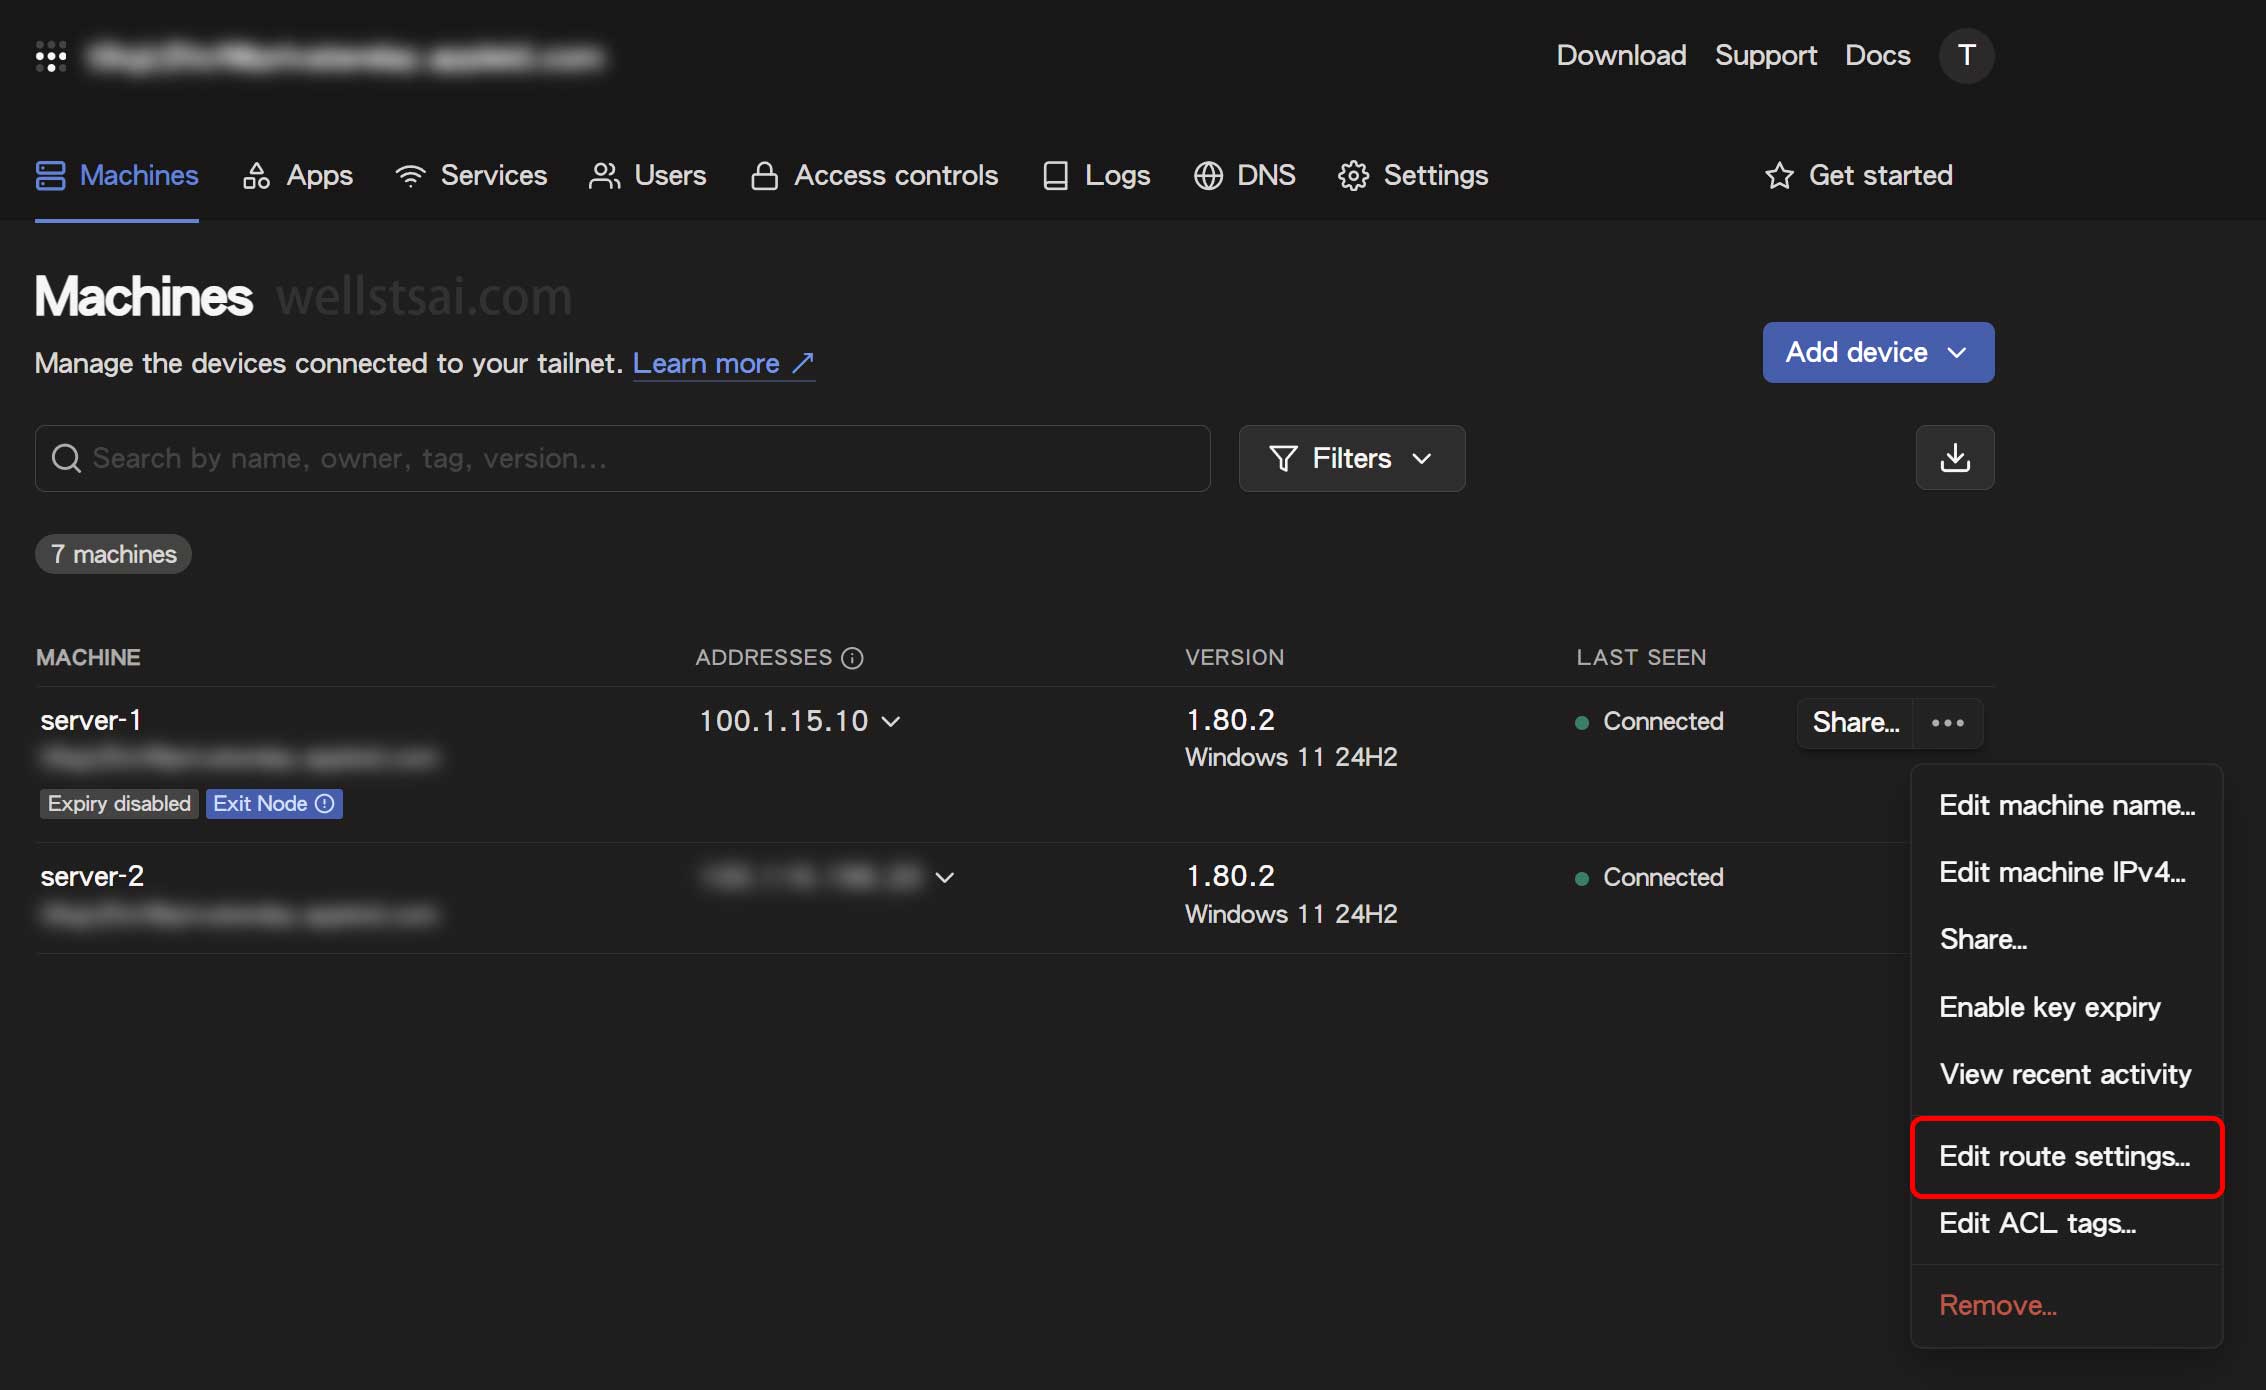
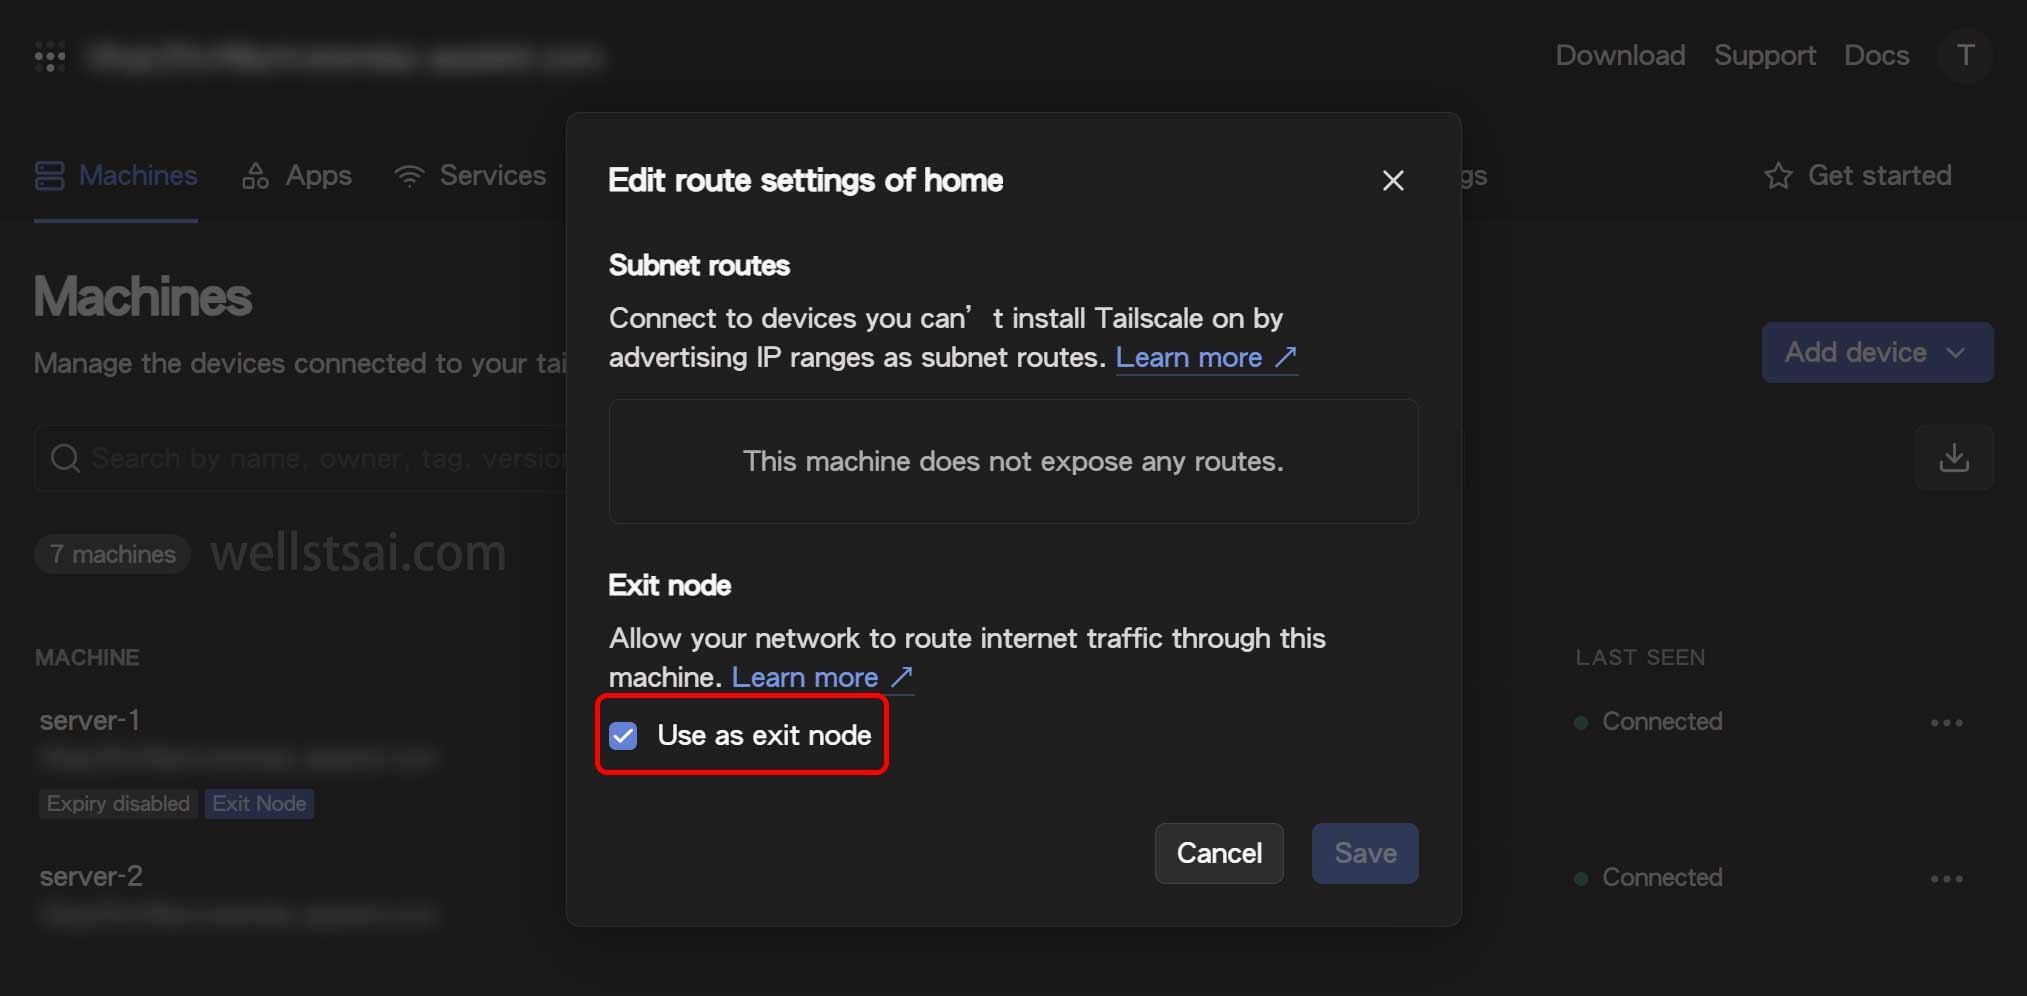
After declaring the device as an exit node, proceed to the Tailscale Admin Console and enable “Use as exit node” in the routing settings.
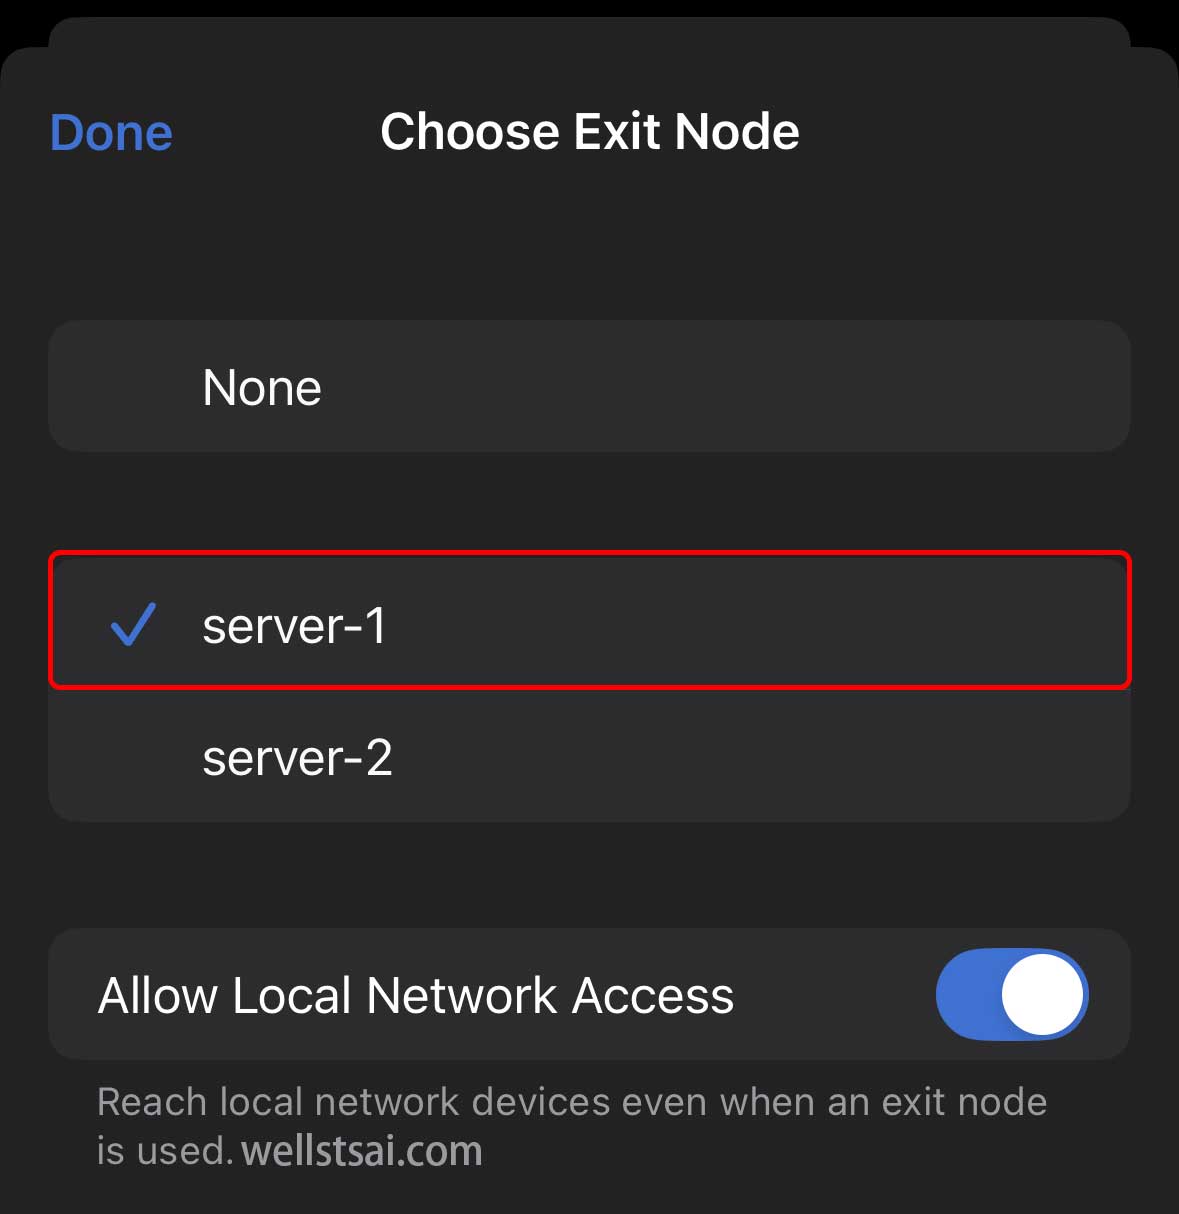
Connecting to an Exit Node
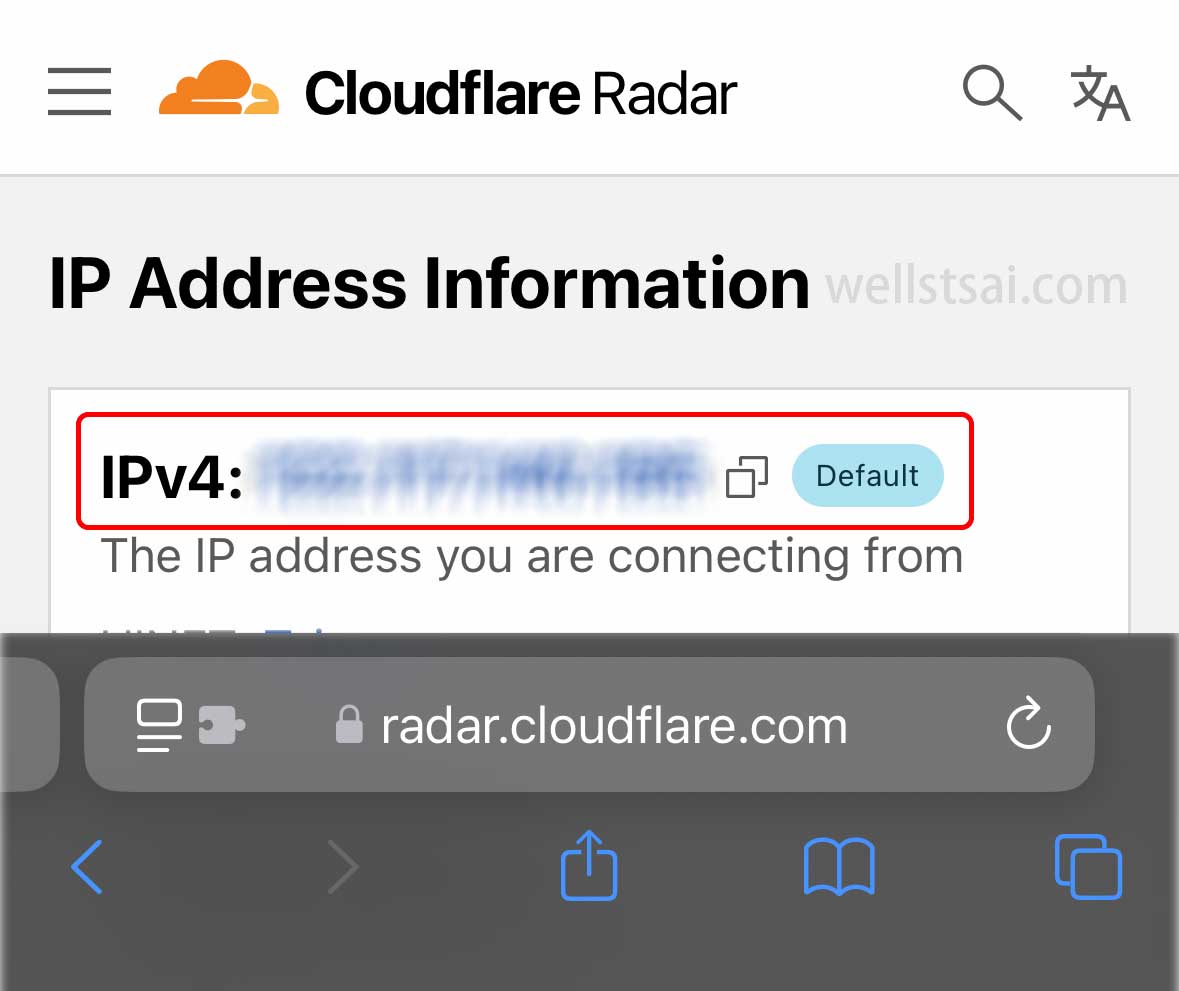
After the setup is complete, other devices (such as mobile phones) can connect through Tailscale and select the exit node. After selecting the exit node, you can check the IP address via Cloudflare Radar or enter curl checkip.amazonaws.com in the terminal to obtain the IP address and confirm whether it has changed to the exit node device (server-1)’s IP address.
On Linux, you can connect to the exit node using the following command:
| |
After that, all traffic will be routed through the selected exit node, allowing you to bypass restrictions in regions with network censorship.
Using Tailscale Subnet Routing
In enterprise or personal network environments, some devices (such as NAS, servers, printers, etc.) cannot install Tailscale directly. In such cases, you can use Subnet Routing to access these internal devices. Tailscale allows a specific device to act as a gateway, enabling other devices to access the entire internal subnet through it.
Announcing a Subnet
Assume that Device A can directly communicate with the internal router (IP address: 192.168.100.1). If you want Device B to access this web service through Tailscale, you can announce the subnet on Device A. Open a terminal and run the following command:
| |
In the above example, 192.168.100.0/24 follows the CIDR notation, representing the IP address range 192.168.100.0 ~ 192.168.100.255.
If you only need to share the range 192.168.1.1 ~ 192.168.1.10, you must specify the segments using CIDR notation in the command:
| |
You can use the CIDR Calculator to determine the optimal IP address range configuration.
On a Linux system, you need to enable IPv4/IPv6 forwarding by running the following command:
| |
After announcing the subnet, go to the Tailscale Admin Console and enable the Announced Subnet in the routing settings of the corresponding device:
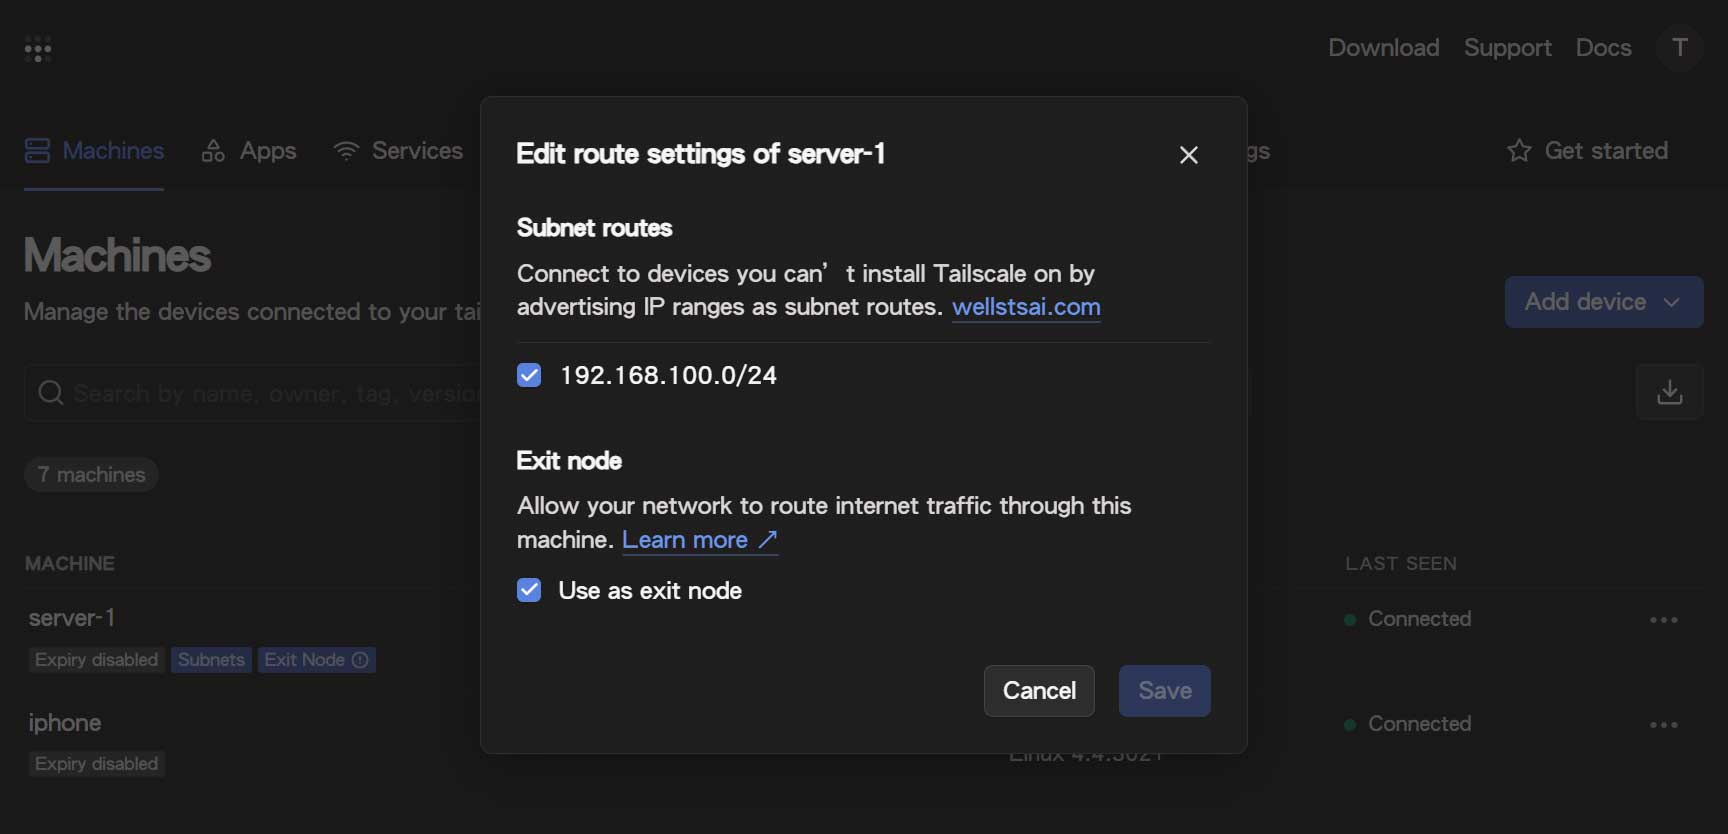
Once the setup is complete, all devices within the Tailnet can access devices under 192.168.100.xxx.
For example, you can perform a ping test on a Windows system:
| |
Using System Port Forwarding
In addition to announcing a subnet via Tailscale, you can also use built-in system functionalities for port forwarding. For example, in Windows, you can use netsh, while in Linux, you can use iptables to forward external ports to internal devices.
However, if you need more efficient access control and flexible user management across different subnets, Tailscale Subnet Routing is recommended. Tailscale’s built-in Access Control Lists (ACLs) allow you to define which devices can access the target subnet, eliminating the need for complex firewall and port forwarding rules.
Port Forwarding on Windows
For Windows, open the terminal in Administrator mode, then execute the following command to forward external port 9999 to 192.168.100.1:80:
| |
If you need to delete a rule, use the following command:
| |
After adding the route, users can simply enter http://server-1:9999 to access the web service.
To view all routing rules, execute the following command:
| |
Example Output:
| |
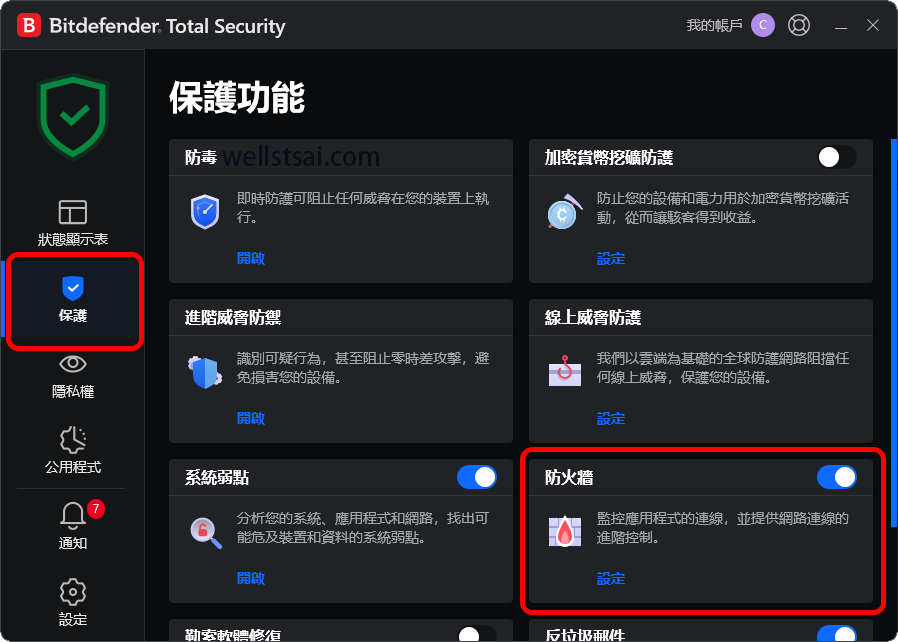
If the computer has additional firewall or antivirus software installed (such as Bitdefender), you need to allow inbound or bidirectional connections for port 9999 in the firewall rules:

Linux Port Forwarding
On a Linux system, you can use iptables for routing and port forwarding. The following commands must be executed in administrator mode:
| |
You can verify if the rules have taken effect by using the following command:
| |
After successful execution, you should see an output similar to the following:
| |
If the system has a firewall enabled (such as ufw), ensure that inbound traffic on port 80 is allowed:
| |
This allows access to specific services using the Tailscale device name + port number format.
Conclusion
This article explored advanced applications of Tailscale, including Taildrop file sharing, exit nodes, and subnet routing, addressing the needs of enterprises and individual users for NAT traversal, remote access, and network optimization.
Additionally, we covered port forwarding techniques using Windows netsh and Linux iptables. However, it is recommended to prioritize Tailscale’s built-in subnet routing, as it allows for easier access control via ACLs, ensuring better security without the complexity of firewall configurations.
For scenarios requiring access to specific subnets only for certain devices, refer to Manage permissions using ACLs, where the official documentation provides comprehensive instructions.
Finally, most work laptops running Windows are equipped with dual network adapters (wired and wireless). By setting fMinimizeConnections to 0, the computer can stay connected to both Wi-Fi and Ethernet simultaneously. Using route command, traffic can be split—default traffic routes through Wi-Fi (external network), while internal subnets (e.g., 172.x.x.x or 192.x.x.x) route via Ethernet. Note: Using this method to bypass internal network restrictions may introduce security risks, so be sure to carefully evaluate whether these routing requirements are necessary.