
Introduction
When you are away from home, how can you remotely connect to your home computer, work computer, or NAS at home?
This article will guide you step by step on how to use Tailscale to connect with internal network devices.
For Those Unfamiliar with Computers
To enable device intercommunication, the devices must first be able to connect to the network. Subsequently, Tailscale can be used to achieve device intercommunication.
First, register on the official website, then install and log in to Tailscale on computers A and B, mobile phones, NAS, or other devices to be networked.
After logging in, you will join the tailnet. These devices will obtain each other’s internal tailnet IP address.
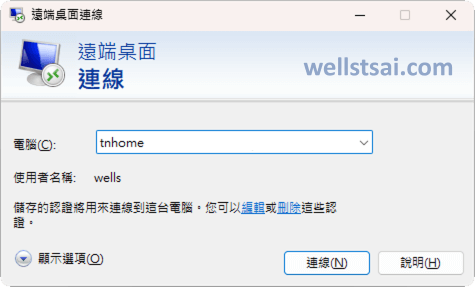
You can connect using device names for tasks like remote desktop connections, printing, accessing NAS, etc.
If you do not want to know about VPN backgrounds, you can skip directly to How to Install Tailscale, Renaming Devices, and Conclusion.
How to Access Devices Remotely?
In standard application scenarios, such as:
- Self-hosted web server (localhost:80)
- NAS-provided Web GUI (localhost:5000)
- Windows Remote Desktop Connection (localhost:3389)
- DNS Server (localhost:53)
- Other services…
If we want external users to access this server, we first need a public IP (WAN IP) address (IP Query). We can connect from the outside by inputting this public IP address.
Once connected, the router (router) will be found, and the router can be configured to forward external ports to the corresponding applications.
Using OpenWRT router interface as an example, the following is the router configuration to perform port forwarding to the local IP (LAN IP) address when connected via public IP address:
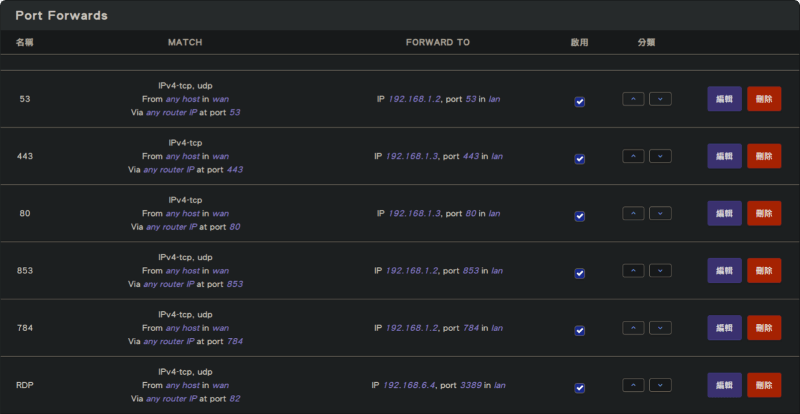
The purpose is to forward the public IP address:Port to the internal IP_ADDRESS:Port.
From the above figure, we can see:
- 192.168.1.2 is a DNS server handling Port 53, 853, 784 services.
- 192.168.1.3 is a web server handling web-related content.
- 192.168.6.4 is a remote server, forwarding from external Port 82 to internal Port 3389.
Once port forwarding is set up, you can access DNS, web, or perform remote desktop connections from outside. However, the above port forwarding method allows direct access to internal network resources via public IP address, which means anyone can connect. To allow specific users to access, you must establish a virtual private network (VPN).
Creating a Virtual Private Network (VPN)
A VPN is a service that creates a secure encrypted channel to connect users to remote servers, hiding users’ real IP addresses and encrypting data transmission.
For example, in Windows, based on Microsoft’s official tutorial, after creating a VPN using IKEv2, L2TP, or IPsec protocol on computer A, you can try to connect from another computer B.
After a successful connection, computer B can access NAS services, printers, and other internal network resources as if it were computer A.
Ensure that the router and computer do not block UDP Ports 500, 1701, 4500.
If the firewall blocks these ports, the VPN connection will fail.
Common VPN Protocols
- OpenVPN − Provides various authentication methods (key, certificate, username, and password) and can be used on different devices. It is open-source, secure, easy to use, and compatible.
- WireGuard − Integrated into Linux in 2020, a newer VPN protocol. Its features include using UDP transmission, faster and better performance than IPsec and OpenVPN, and cross-platform support. Some newer routers integrate WireGuard servers.
- L2TP/IPSec, proprietary protocol (Cisco & Microsoft), built into the system. No need to install software to set up and connect.
- PPTP, an obsolete point-to-point protocol.
What is Tailscale?
Tailscale is a VPN software based on the WireGuard protocol. It can connect multiple devices to form a virtual internal network.
Traditionally, setting up WireGuard is cumbersome, both in setup and maintenance. For example, on each device, you need to generate public and private keys using wg-quick, then install WireGuard, and set the relevant configuration files. The configuration files need to specify the listening port, private IP address, private key, and peer public key.
For example, a server and two clients with public and private key settings:
Device Private Key Public Key Configuration Server A B Own private key A, client public key D and F Client 1 C D Own private key C, server public key B Client 2 E F Own private key E, server public key B More clients or servers mean more complex settings, and the above example is for one server. Multiple servers would be even more complicated.
Using Tailscale, you can essentially set up a private VPN effortlessly and with a complete Web GUI showing connected devices.
Key features of Tailscale include:
- Uses a mesh network instead of hub-and-spoke networks for better device communication. This is also a distinguishing feature of WireGuard compared to other VPN protocols.
- Supports NAT[*] hole punching, allowing two nodes behind different NATs to communicate directly without a central server, achieving peer-to-peer (P2P) connections.
- If NAT hole punching fails, it falls back to relay mode using DERP (Detour Encrypted Routing Protocol) servers to establish connections.
- During Tailscale login, coordination servers (coordination servers / DERP Servers) are used to exchange user information such as IP address, port, and device status.
- Simple Web GUI management interface to manage access levels between devices.
- Provides features like MagicDNS[**], TailDrop, and Tailscale Funnel for easier device access.
* Network Address Translation (NAT) translates IP addresses in IP packet headers to reuse addresses, allowing all internal networks to use the same IP address to connect to external networks.
** MagicDNS allows accessing devices using their names instead of remembering IPs. TailDrop functions like AirDrop, allowing file transfer between devices. Tailscale Funnel provides reverse proxy functionality, enabling external access to specified internal devices.
Tailscale Competitors
Similar products for creating remote networks include:
I have used Zerotier, which uses its own protocol instead of WireGuard. My experience is that after connecting devices to Zerotier private network, there will be a set of internal IP addresses. Without DNS resolution, you must directly input IPs to access these devices. Although ZeroNSD is provided, it requires setup, so I switched to Tailscale.
How to Install Tailscale
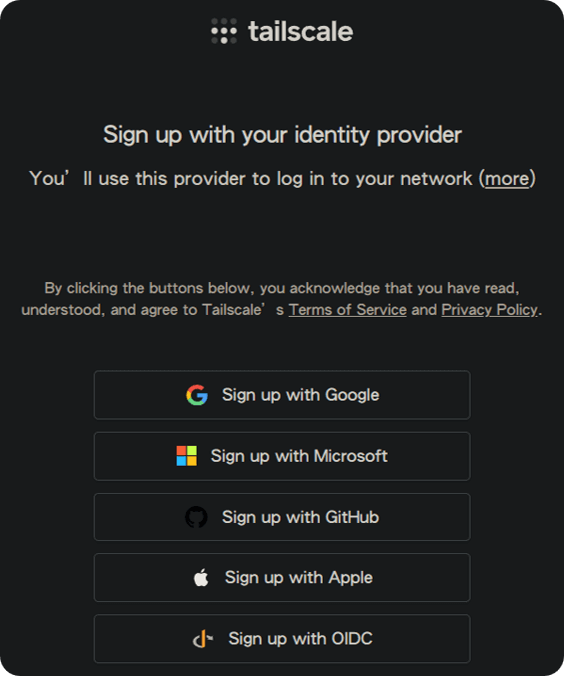
First, register on the official website (https://tailscale.com/), which uses Google, Microsoft, GitHub, Apple identity providers (IdP) for registration. Tailscale itself does not offer registration, so no passwords are stored on Tailscale.
Using these IdPs, you can enable two-factor authentication for added security.
Essentially, no one can directly access your private network.
After logging in, Tailscale will offer various installation methods. Follow the official instructions to install and download. Although only Synology has an official installation package listed, Docker can be used to install on other NAS.
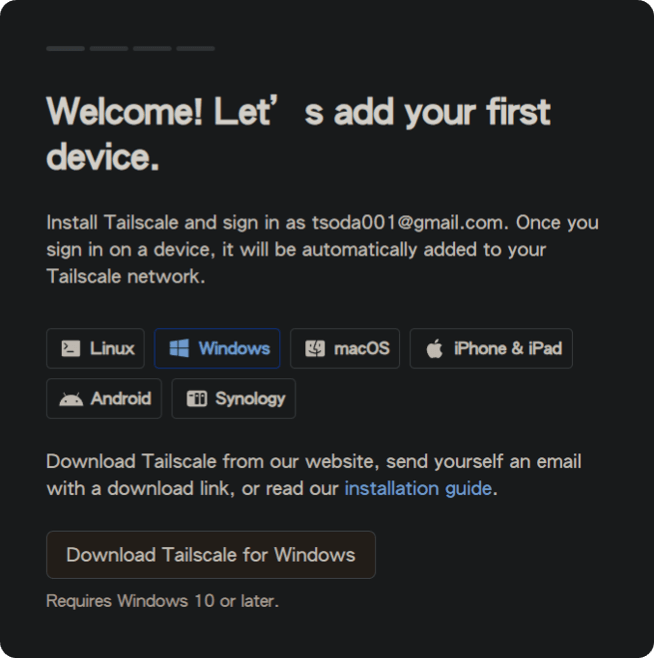
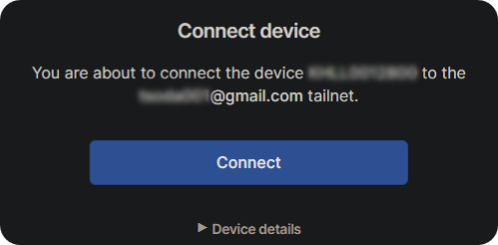
After downloading and installing, Tailscale icon will appear at the bottom right of your computer. Right-click and select Log in… to bring up the login interface. After logging in, click Connect to join the private network (tailnet).
Repeat the steps to download Tailscale on iOS or Android, log in, and click Connect. The device may prompt to add VPN, click add VPN to join the private network.
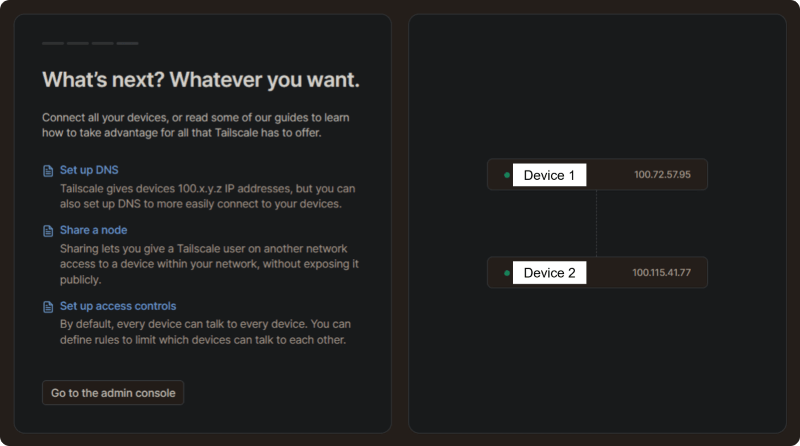
You can see newly added devices in real-time on the Web GUI.
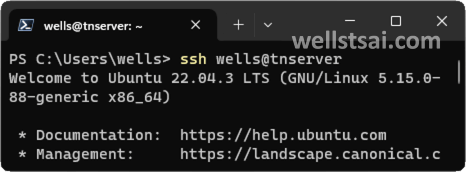
For Linux, it is the same process but using the command line. Follow the official Linux installation tutorial. During the login process, a URL will appear, asking the user to input this URL in the browser to log in. After successful login, the terminal will display Success.
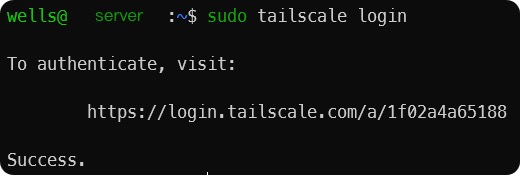
Now, the Tailscale installation and enabling device interconnection are complete. You can enter tailscale status or tailscale ping IP in the command prompt to check connection status.
If it shows active; direct, it means direct connection with a ping of 10-15 ms. Otherwise, active; relay “xxx” indicates relay server connection with a latency of about 80-300 ms.
Relay connection might be due to firewall blocking UDP port, making Tailscale fall back to relay. However, this provides a solution when direct connection is not possible.
To improve ping latency, you can check router settings or firewall for direct connection:
- Enable UPnP and NAT-PMP (less secure, but provides automatic configuration).
- Adjust firewall rules: Disable UPnP and allow internal devices to use UDP communication. Open local port 41641 (target port varies by router manufacturer). See Firewall Configuration Guide for details.
- On Linux, if the port is blocked, open a terminal and run:
sudo ufw allow 41641/udp.
| |
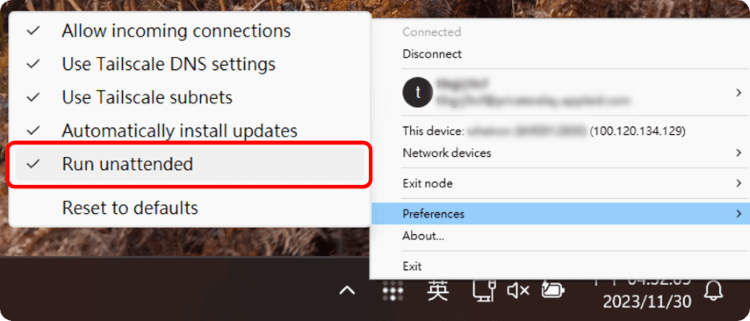
To complete this process, right-click on the icon in the bottom right corner and navigate to Preferences → Run unattended to enable automatic connection to the tailnet on startup.
Renaming Devices
Tailnet has a built-in DNS feature that allows you to convert hostnames or device names to IP addresses (though you can still use IP addresses if you prefer 🙃).
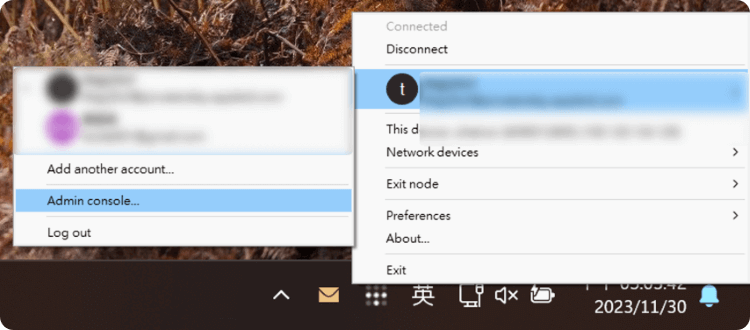
Right-click on the icon in the bottom right corner and go to the Admin console.
By default, device names are set using hostnames. If you wish to customize the device name, you can click the … button next to the device and rename it.
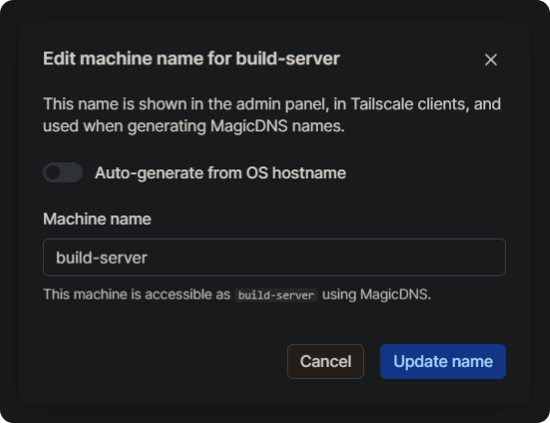
Once renamed, you can connect to devices directly using their names.
| |
Tailscale Commands (CLI)
The Tailscale CLI allows you to enable or disable settings in a Linux environment. On Windows, there is a graphical interface, so most commands are not needed (except for some advanced features that require CLI configuration). However, it is useful for checking connection statuses. Below is a table of the commands I frequently use. For more detailed instructions, please refer to the official website.
| Commands | Description |
|---|---|
| tailscale status | Check the current network status to see if it’s relayed or direct |
| tailscale ping [IP_ADDRESS/device] | Check if the device is directly connected; if “DERP” is shown, it means the connection is relayed |
| tailscale up [flags] | Connect to tailnet with various flags |
| tailscale netcheck | Check the current status of DERP |
| tailscale update | Update the Tailscale version on this device |
These are the commands I commonly use. More advanced options can be explored as needed in the future.
Here are the tailscale up settings I have used:
--advertise-exit-node: If computer A enables this flag, computer B can use computer A as an exit node, meaning computer B’s internet traffic will appear to come from computer A’s IP address.--advertise-routes=<ip>: Publicize subnet routes. For example, if computer A has a local network 192.168.1.50, computer B can access the 192.168.1.xx segment directly by setting this option.
2025/5/18: An advanced article has been published detailing the relevant configuration. Please refer to “Advanced Tailscale Applications: Taildrop, Exit Nodes, and Subnet Routing Configuration” for complete setup details.
Conclusion
Installing Tailscale is very straightforward. It takes care of complex tasks such as firewall and NAT traversal for you.
After registering, simply download Tailscale on each device and log in to your account to join the tailnet. This allows interconnectivity between devices.
Each device has a hostname that can be modified or monitored via the Admin console.
Additionally, devices that have joined the tailnet can be used to create a subnet and broadcast that segment within the tailnet.
Moreover, devices within the tailnet can share their nodes (Sharing nodes) with other accounts, facilitating more complex networking applications.
For more advanced configurations, refer to the official website for detailed explanations and further information.