
Introduction
Secure Shell (SSH) is a secure protocol that allows two computers to exchange data (execute commands, transfer files) over a secure connection, ensuring data security and integrity through encryption.
SSH is commonly used for remote login between two computers. It replaces older remote access protocols, such as Telnet, which transmitted passwords and data in plain text without encryption. In 2020, PTT also discontinued the insecure Telnet protocol, switching to SSH or WebSocket protocols to ensure encrypted communication, preventing eavesdropping and tampering, and enhancing security and privacy.
Besides remote connections, SSH can also:
- Establish SSH tunnels for port forwarding, securely accessing network resources.
- Use SFTP and SCP for secure file transfers.
- Utilize rsync for file synchronization, reducing transfer volumes.
- And more…
By default, Linux, macOS, and Windows integrate the OpenSSH package. OpenSSH is an open-source implementation of SSH, allowing users to use tools implemented via the SSH protocol, which includes:
Remote operation tools:
- ssh, for remote login to other hosts and command execution.
- scp, for file transfer between local and remote hosts.
- sftp, similar to FTP but with encrypted transfers.
Key management tools:
- ssh-add, adds private keys to the SSH agent, allowing password-free authentication using private keys.
- ssh-keysign, for signing SSH certificates for authentication.
- ssh-keyscan, for retrieving SSH public keys from remote hosts.
- ssh-keygen, for generating SSH key pairs (public and private keys).
Server-side components:
- sshd (SSH Daemon), a daemon running on the server, responsible for accepting SSH connection requests from clients.
- sftp-server, handles requests from sftp clients for file transfers.
- ssh-agent, manages the user’s SSH keys and provides these keys for authentication when needed.
This article will focus on how to create public and private keys and use them to achieve password-free authentication. It will also cover how to run SSH services on the server side and allow the client to connect via SSH.
Traditionally, password login involves entering the correct user password for authentication. If the server is exposed to the public network, it may face brute force attacks, leading to data leakage.
To enhance security (and avoid entering passwords?), you can use public and private keys for authentication. This way, you don’t need to enter a password to connect, and hackers cannot log in without the private key.
💡 This article uses Tailscale to establish a local network, enabling connections between the local and server computers via hostname or IP address.
Both computers need an IP address to connect. If it’s a public IP address, you need to set up port forwarding on the router to the local network, which exposes the SSH port to danger. If you don’t want to expose the port, don’t have a public IP address, or can’t modify router settings, you can read Using Tailscale to Easily Create Secure and Private Tunnels to achieve connections between two computers.
SSH Key Points Summary
SSH mainly supports two authentication methods:
- Password-based authentication
- Public-key authentication
After implementing SSH keys, you can use key-based login without needing to enter a password.
Public key content will be placed in authorized_keys on the remote server.
Private key will be kept on your local system. Protect this private key and do not share it.
The public key can be shared with anyone, but only you should have access to the private key.
SSH can use different encryption algorithms. RSA is the default, widely used, and most compatible method. On the other hand, ED25519 offers better performance but less compatibility compared to RSA. Currently, most servers gradually support ED25519, which is my preferred choice for generating keys. Ensure that communication between the local and server is normal.
Most Git transmission protocols use SSH. This means remote operations like clone, push, pull will require authentication.
Although RSA is more compatible than Ed25519, it is recommended to generate Ed25519 keys for better security and speed.
SSH Key Creation and Connection Process
Assuming nodeA is the local client (user) and nodeB is the server.
NodeA is the working computer, used for tasks like git clone or SSH connections to other computers.
NodeB is the connected computer, such as a git server, web server, proxy server, or VPS…
- Generate keys (public and private) on either nodeA or nodeB.
- Place the private key on nodeA and the public key on nodeB.
- On nodeB, create ~/.ssh/authorized_keys and add the public key.
- On nodeA, create ~/.ssh/config and add connection information, including the server’s IP address and private key path.
- By default, SSH will use keys for connection when attempting to connect.
💡 Notes:
- Ensure the private key is only accessible to you and that nodeB does not have the private key.
- If nodeB is Windows and you’re an admin, change the path to:
C:\ProgramData\ssh\administrators_authorized_keys- If the connection fails or prompts for a password after setting up keys, use -vvvv during SSH connection for debugging.
Verifying SSH Environment
Linux and Windows have the client installed by default; you can connect to other servers using ssh USER@IP_ADDRESS.
To set up an SSH server, you need to install it and run the SSH service.
Linux
| |
You can see the installed version of OpenSSL on Linux.
| |
To allow other computers to connect via SSH, install openssh-server:
| |
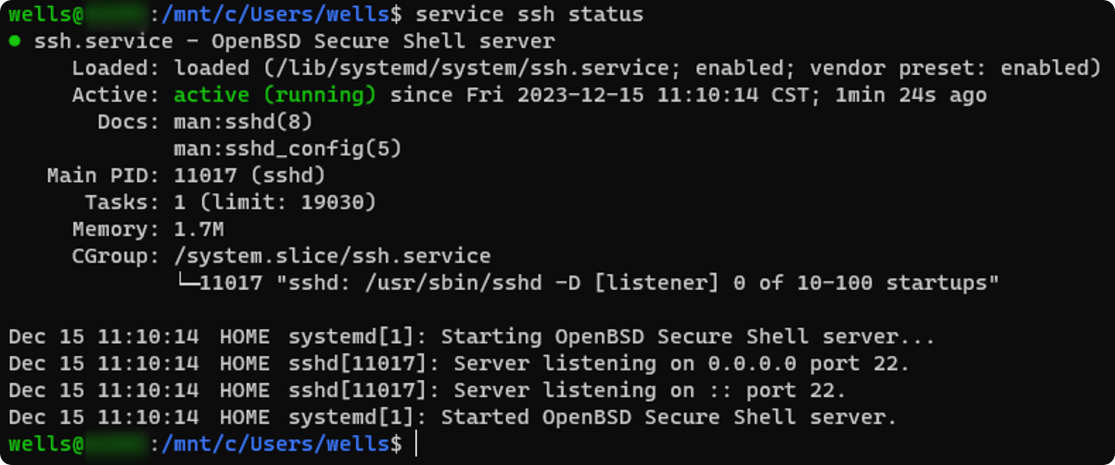
Use systemctl to start and check the service.
| |
If successful, you will see the service as active.
Windows
Under Windows, besides checking the client installation using ssh -V, you can also check and install via PowerShell:
| |
“Installed” indicates that OpenSSH is installed, while “NotPresent” means it is not installed.
Currently, this Windows system shows that the Client is installed, meaning you can connect to other servers via SSH.
| |
sshd is not currently installed. To allow other computers to connect to this computer via SSH, you need to install it using PowerShell.
Below are the installation commands for OpenSSH.Client and OpenSSH.Server:
| |
Installing OpenSSH.Server will take some time. Once the installation is complete, you will see RestartNeeded: True. Please restart your computer.

Using Microsoft Defender Firewall, open port 22 for private networks.
If your system is managed by antivirus software, this step is not necessary. However, ensure that the antivirus software’s firewall is configured to allow traffic through port 22.
| |
Next, enable the SSH service and configure it to start automatically at boot:
| |
You should see the status of sshd, which should be Running.
| |
At this point, you can try connecting from another computer, and you should be able to successfully connect to the server terminal.
| |
Connection Troubleshooting
If remote connection fails, you can add -vvvv during the connection attempt to troubleshoot, for example:
| |
You might see Connection timed out, which indicates possible reasons such as:
- The server’s firewall is blocking the connection (computer, antivirus software, router).
- sshd is not running.
- Port 22 is blocked on the client side.
- DNS resolution error.
These issues need to be debugged step by step. For further troubleshooting, you can refer to Google’s resources for assistance.
Generating SSH Keys
From the previous SSH connection behavior, it is evident that the key pair has not been set up, so the default login is using a password.
Generating SSH keys is very simple and can be done on either the client or server side.
On both Windows and Linux, you can generate keys using the ssh-keygen command.
Parameters include:
-t ed25519generates an ed25519 key pair. Alternatively, you can use-t rsa -b 4096to generate an RSA key with a length of 4096 bits.-C "xxx"allows you to add a comment to help identify the key, wherexxxis any value you choose.
| |
During the key generation process, you will see a prompt Enter file in which to save the key. By default, this path is under the .ssh folder in your home directory.
After deciding on the path, you will be prompted for a passphrase (key password). If left empty, you will not need to enter a password when using the key for authentication in the future. However, if a hacker obtains the private key, there is an additional layer of security they need to bypass.
The key is stored on your personal computer and under your personal account, so the risk of it being leaked is generally low. If you are concerned about the key being leaked, you can enter a non-empty passphrase. This way, even if the private key is compromised, a password is still required for authentication. However, this adds an extra step each time you use the key…
The passphrase can be cached using
ssh-agent, so you do not need to enter the passphrase within the cache time.It is recommended to set a passphrase for the key to enhance security. Use key passphrase with ssh-agent for caching.
| |
After generating the key pair on nodeA, you can check the personal .ssh directory:
| |
In this directory, the private key has no file extension (e.g., nodeA_ed25519), while the public key has a .pub extension (e.g., nodeA_ed25519.pub).
Once the key pair is generated, you can begin deploying the keys.
⚠️ Note:
The private key should remain on the local machine, while the public key should be placed on the server. If you generate the key pair on nodeB, remember to delete the private key on nodeB after copying it to nodeA.
Ensure that the private key is accessible only by you. On Linux, if the permissions are set to 777, use
chmod 400to restrict access.
1chmod 400 ~/.ssh/nodeA_ed25519
Establishing a Connection Between Two Computers Using SSH Keys
We need to copy the public key (nodeA_ed25519.pub) to the server. This can be done using the scp (secure copy) program.
The usage is: scp local_file_path username@server:server_path
Copying the public key from Windows to Windows
| |
Copying the public key from Windows to Linux
| |
After entering the password, you can use scp to copy the public key to the server.
| |
After copying, on nodeB (the server), create a new file and add the public key content.
User paths depend on the user on nodeB
- Windows regular user:
C:\Users\wells_nodeA\.ssh\authorized_keys- ⚠️ Windows system user:
C:\ProgramData\ssh\administrators_authorized_keys- Linux regular user/root:
~/.ssh/authorized_keys
- Open the public key file (
nodeA_ed25519.pub) with a text editor. - Select and copy the entire content.
- Create the appropriate file as listed above.
- Paste the public key content into the new file and save.
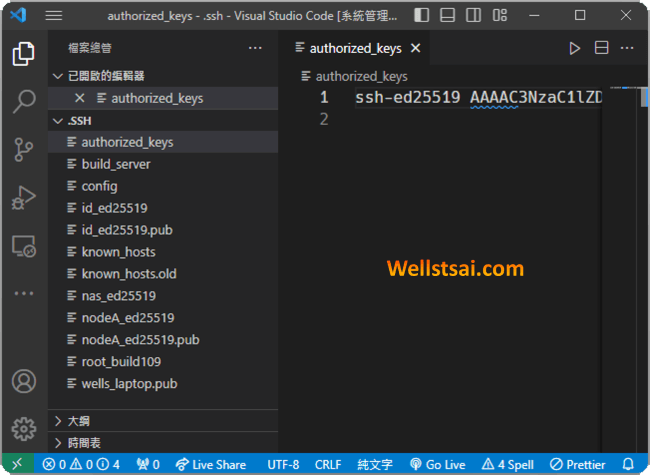
Finally, add and save the config file on the local machine nodeA:
- Windows:
C:\Users\wells_nodeA\.ssh\config - Linux:
~/.ssh/config
| |
Configuration file details
Hostis a user-defined name for easy identification.Useris the username on the server.HostNameis the server’s IP address or hostname.IdentityFileis the path to the private key. You can use~/to denote the home directory on both Windows and Linux.
After saving, you should be able to log in using the key. If the login fails and asks for a password, check the following:
- Ensure the key is correct.
- Verify that the
authorized_keyspath is correct.
Once these are confirmed, you should be able to establish an SSH connection without being prompted for a password.
| |
Accessing a Git Server on Synology Using SSH Keys
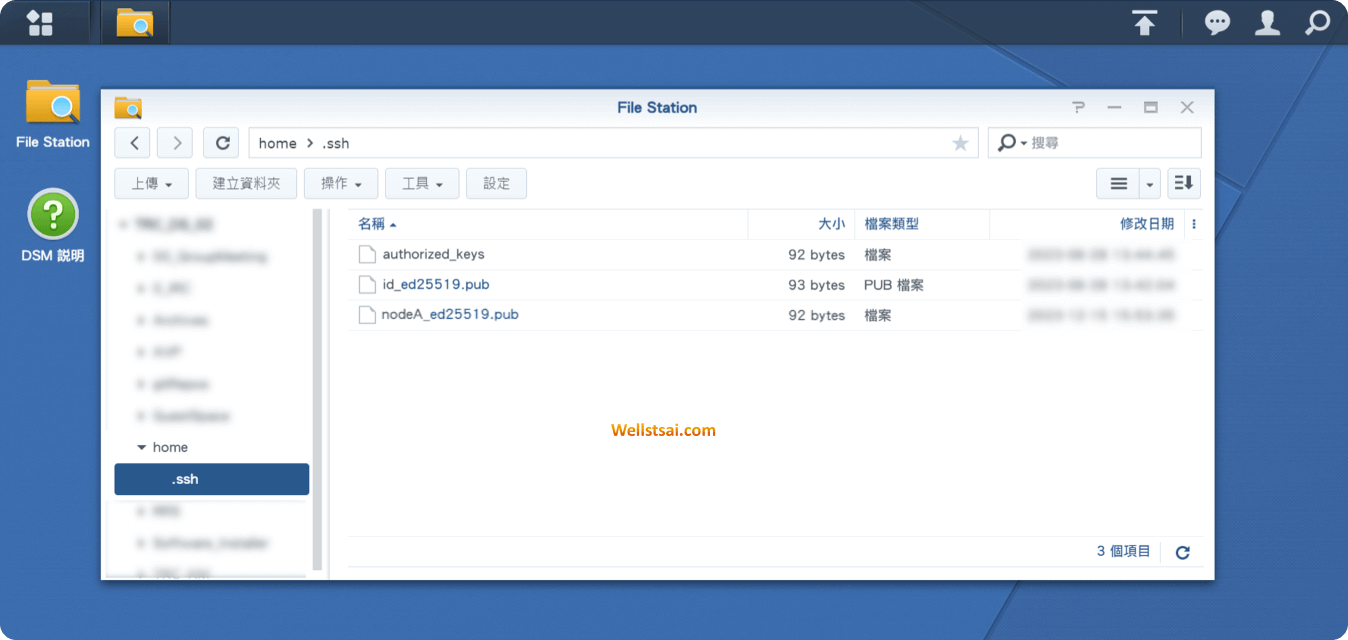
After generating the key pair on your local Windows/Linux machine, place the public key in the .ssh directory under your personal user directory on Synology. If the directory does not exist, you will need to create it. Then, create an authorized_keys file and add the public key content to it.

On your local machine, add the host information to the config file:
- Windows:
C:\Users\wells\.ssh\config - Linux:
~/.ssh/config
| |
Configuration file details
Hostis a recognizable name for the server.Useris the NAS login username.HostNameis the NAS IP address.IdentityFileis the path to the private key.
When executing git remote related commands, the key will be used for authentication first, eliminating the need to enter a password.
Accessing GitHub Using SSH Keys
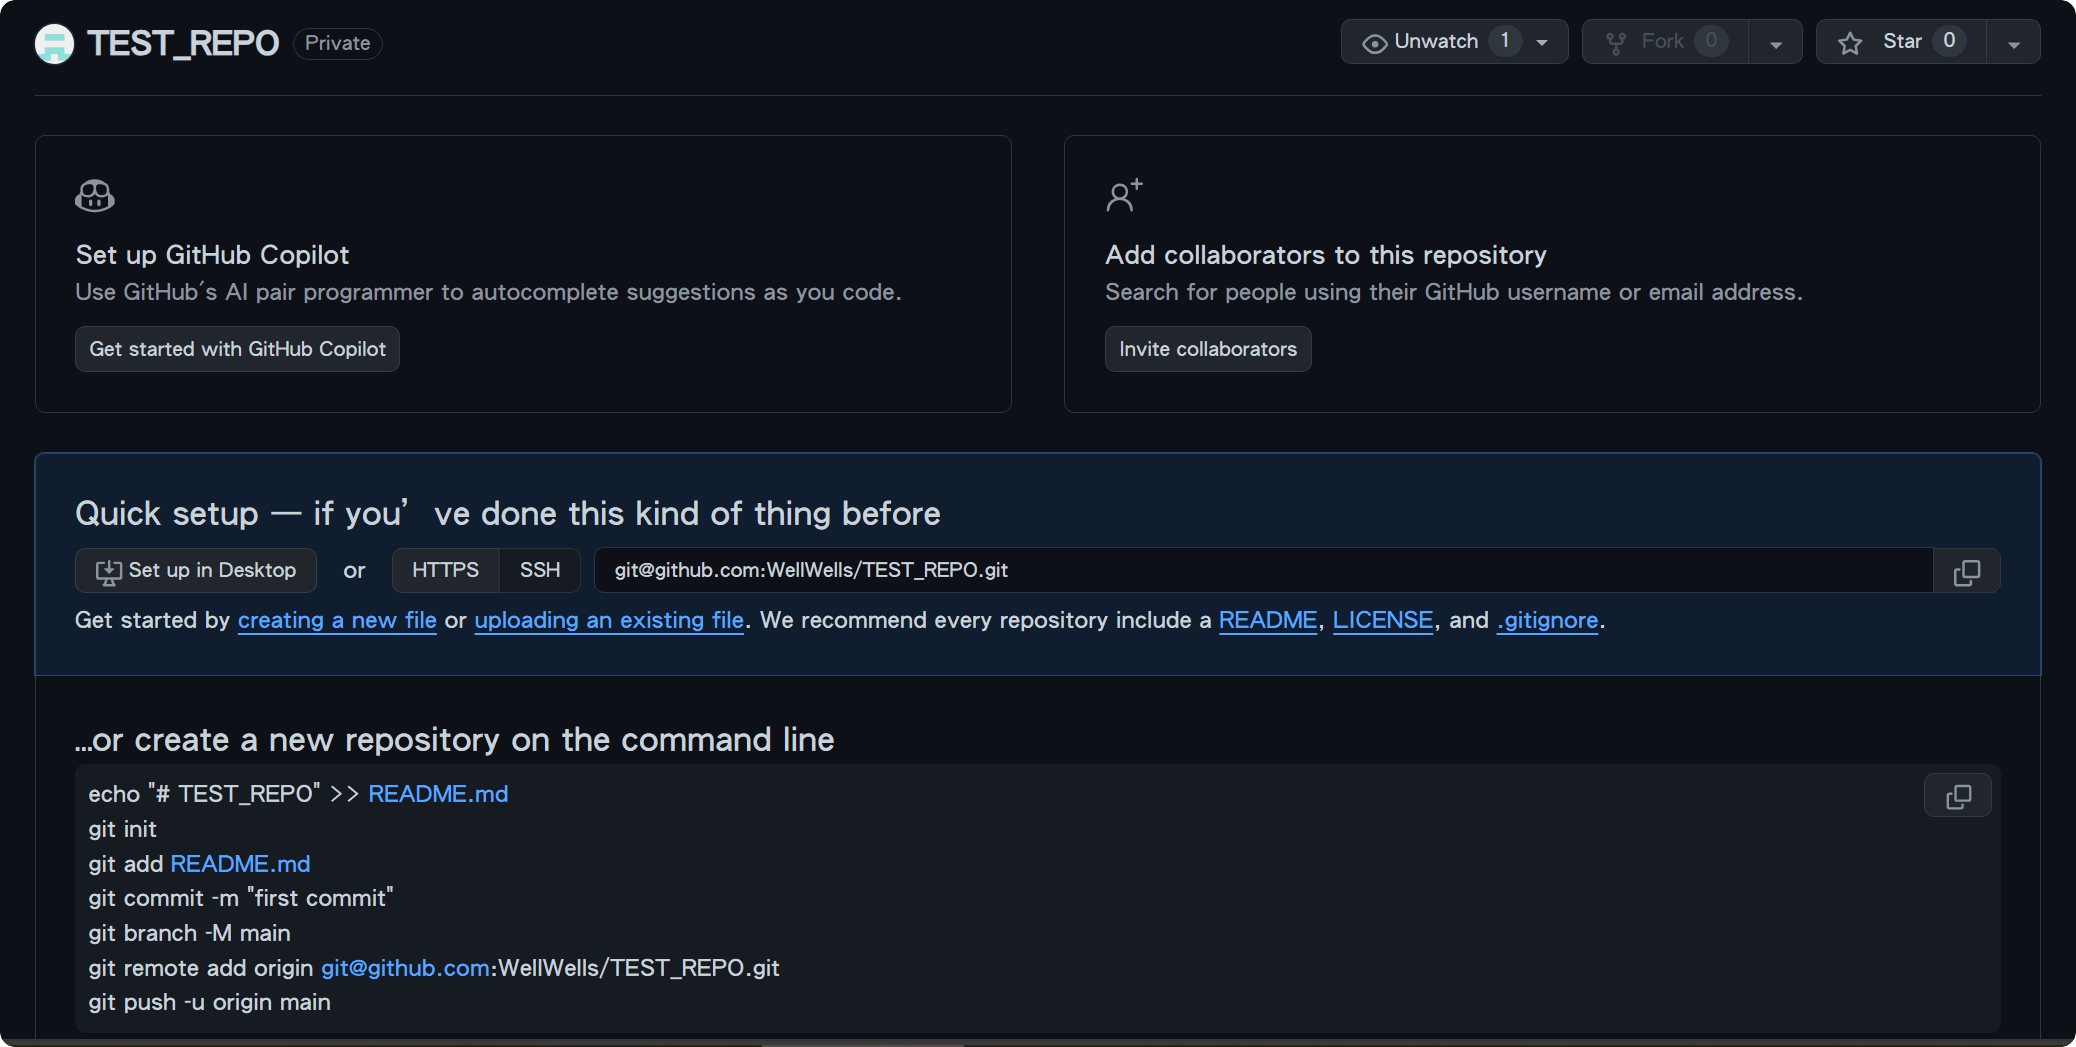
First, create a new repository on GitHub. If you already have a repository, you can skip this step.
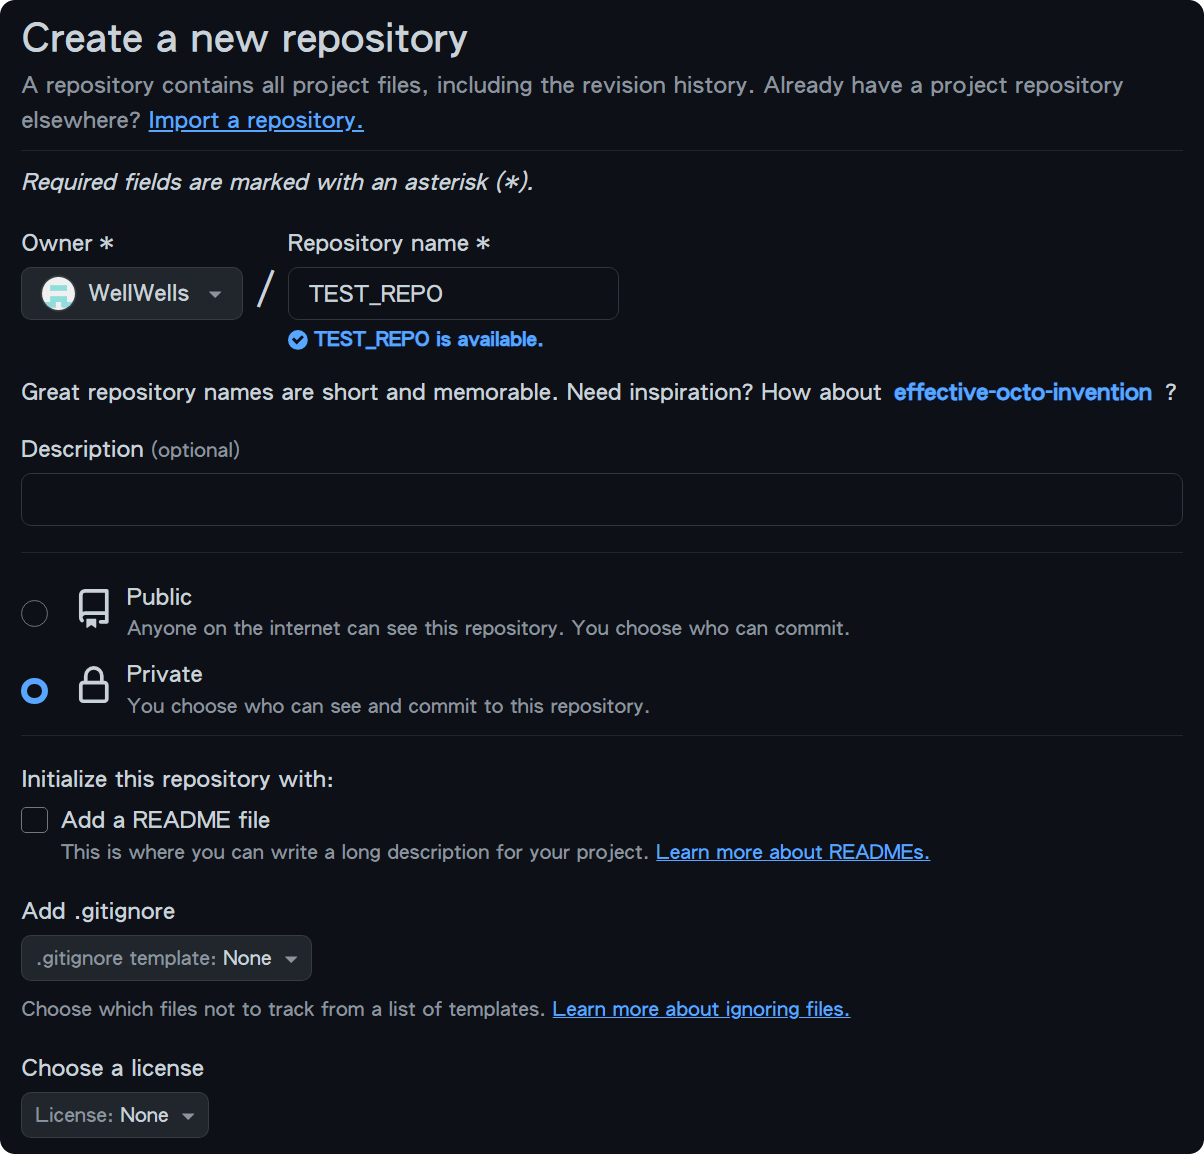
After creating the repository, GitHub will provide an SSH link.
| |
If you attempt to clone the repository directly on your local machine, you will encounter a permission error:
| |
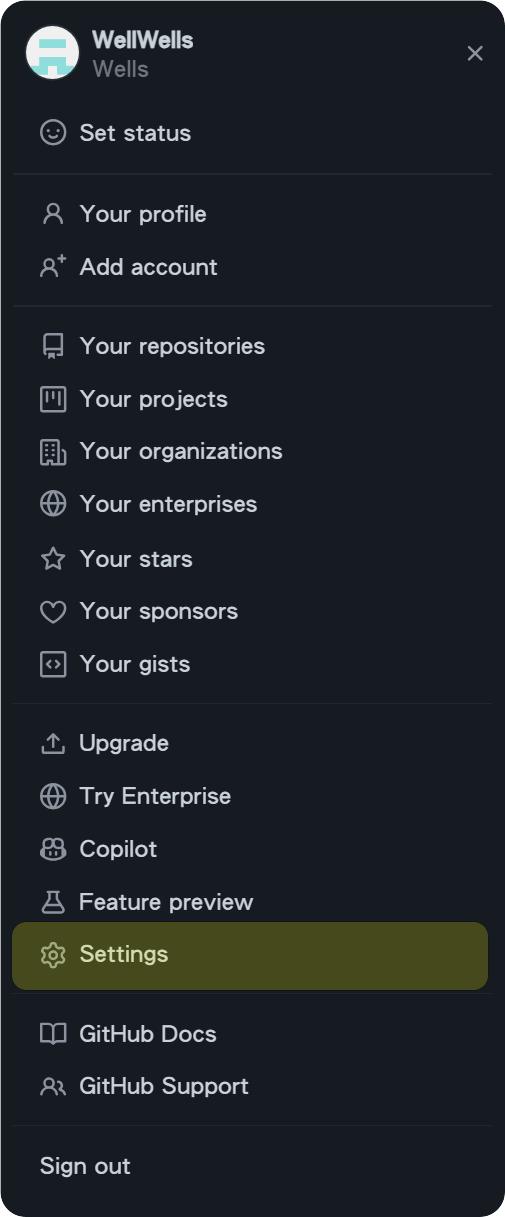
Click on the personal icon in the top right corner to open the menu, then select “Settings” to go to the settings page.
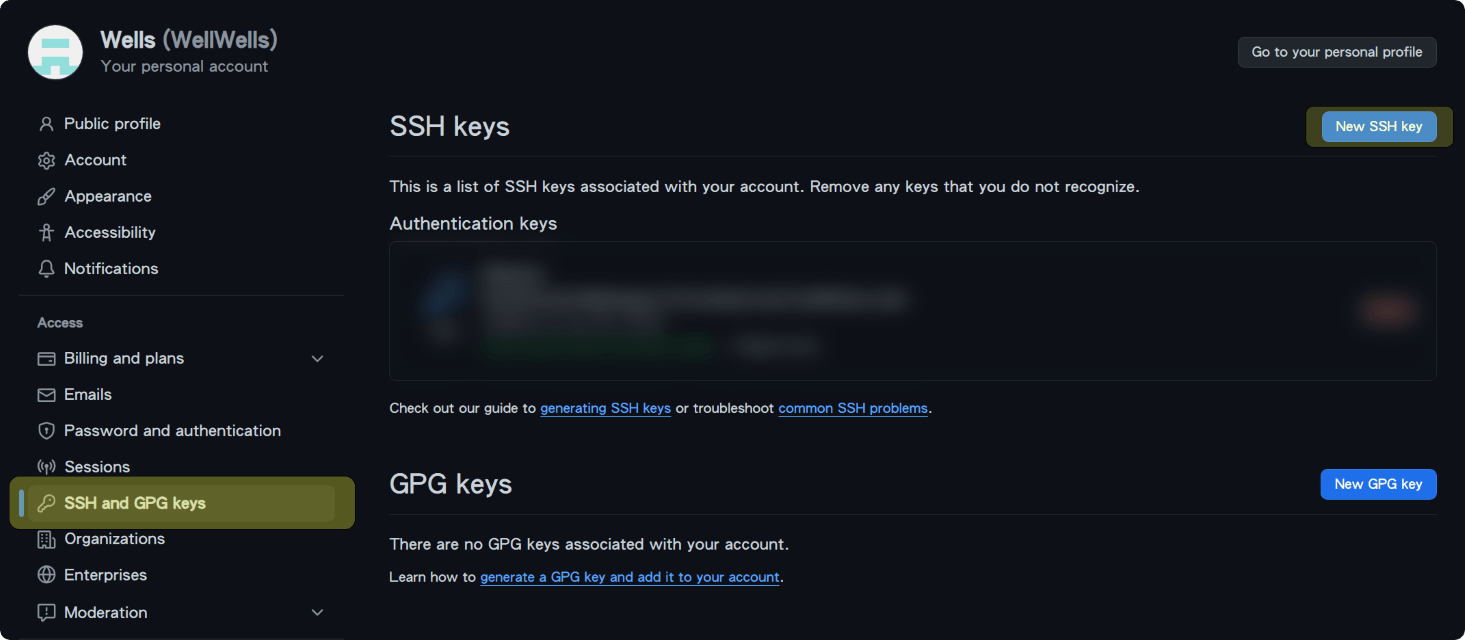
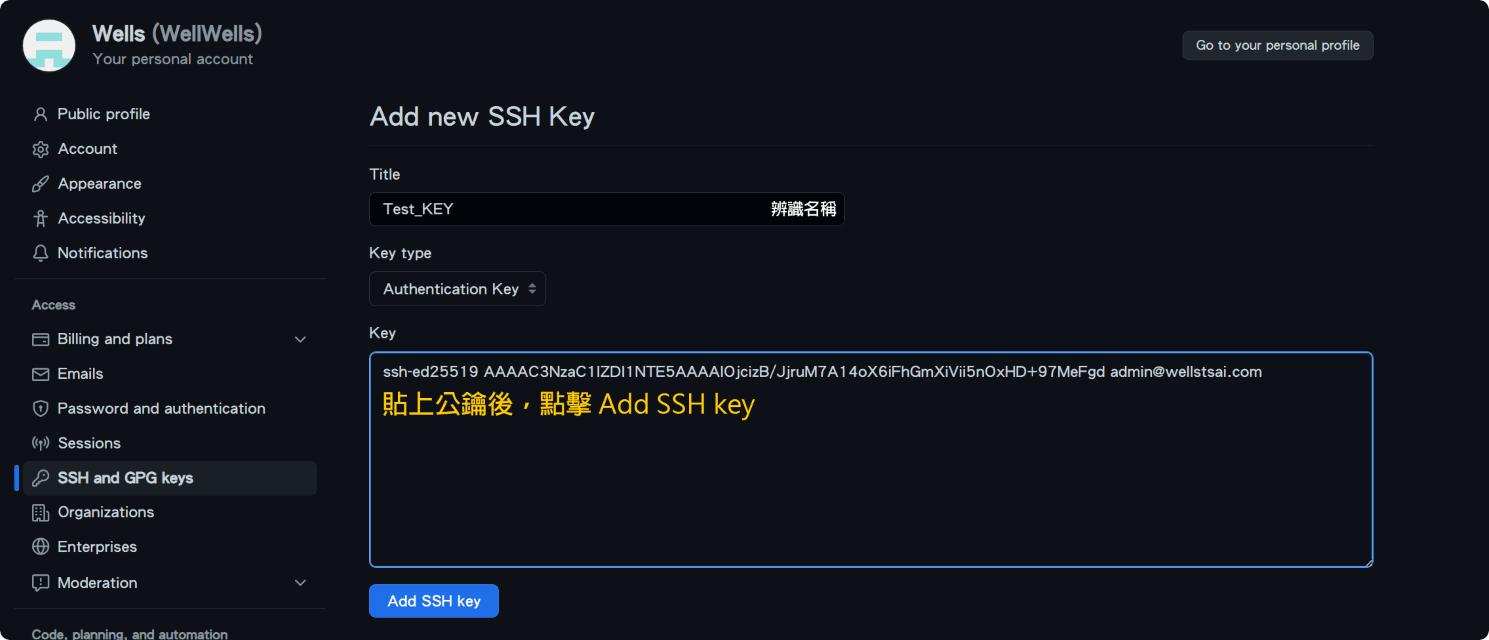
On the left, select “SSH and GPG keys” to enter the SSH Key page, then click “New SSH key” to add your public key.
On your local machine, add the host information to the config file:
- Windows:
C:\Users\wells\.ssh\config - Linux:
~/.ssh/config
| |
Configuration file details
Hostis a recognizable name for the server.HostNameshould always begithub.com.IdentityFileis the path to the private key.
Now, when you clone the repository again, you should be able to access the GitHub repo using the SSH key without any issues.
| |
Advanced Security Settings
This section is for users who are sensitive to security concerns. It is recommended to configure the following settings to achieve higher security.
Disable Password Authentication
If the default remote server (nodeB) uses password authentication, you can increase security by disabling password authentication after ensuring key-based login is successful.
Configuration file paths:
- Windows:
C:\ProgramData\ssh\sshd_config - Linux:
/etc/ssh/sshd_config
Locate the line around line 50 and change PasswordAuthentication to no, and remember to remove the preceding #.
| |
After making the changes, restart sshd:
| |
Restart sshd on Linux:
| |
Key Passphrase with ssh-agent
In the Generating SSH Keys section, it was mentioned that the passphrase can be left empty by default, so no password is required when using SSH. However, if the private key is compromised, a hacker can use this key to connect via SSH directly.
Here, you can add a passphrase when generating the key and use ssh-agent to cache the private key in memory. After entering the passphrase once, the key authentication will use this cache.
The following steps use Windows as an example, but the process is generally the same for Linux.
The main difference is that on Windows, the SSH executable is divided into two packages:
- OpenSSH located at
C:\Windows\System32\OpenSSH - Git located at
C:\Program Files\Git\usr\bin
Therefore, you need to change Git’s sshCommand to the OpenSSH path.
Windows:
| |
Linux:
| |
The commands on macOS might differ slightly. Please refer to the solution for details.
Ensure that ssh-agent has successfully loaded the private key. You can back up the private key to a secure location and remove it from this computer.
As long as ssh-agent is running, key authentication will be handled through the agent by default.
Finally, the .ssh folder on the local machine (nodeA) should only contain known_hosts and config.
You can also remove the IdentityFile path from the config file.
| |
By default, ssh-agent keeps the keys loaded indefinitely. For enhanced security, you can set a cache timeout period.
| |
Using SSH Agent Forwarding
The public key has been added to both GitHub and nodeB, and the private key has been added to ssh-agent on the local machine (nodeA) using ssh-add.
This setup allows the local machine to SSH into nodeB or use git commands to clone repositories from GitHub to nodeA.
Now, if you want to git clone a repository from GitHub on nodeB, you don’t need to place the private key on nodeB.
You can achieve this through SSH agent forwarding.
| |
If you find it cumbersome to add the -A option every time you SSH, you can add ForwardAgent to your config file.
| |
After connecting, you can use ssh-add -l on the remote server to check if the private key has been loaded.
If the private key is loaded, you can then perform a git clone on nodeB using that key.
The default version on Windows is 8.6p1, and after agent forwarding, the private key appears to be loaded on the server.
However, performing a
git clonemay result in public key authentication failure due to an OpenSSH bug.Windows users can manually install version 8.9p1 from Microsoft’s OpenSSH Release to resolve this issue and perform git operations normally.
Additionally, if the trust level of the remote server is low, consider using ProxyJump for intermediate hopping. The basic principle is to store the private key on nodeA and configure nodeA as a jump host when accessing GitHub from nodeB.
The advantage of using a proxy is that it does not forward the private key from nodeA to nodeB but instead performs SSH operations directly on nodeA and returns the results to nodeB.
If the trust level of nodeB is low (e.g., other users have higher root privileges), consider using ProxyJump for proxy operations.
References
- 允許遠端電腦取用你的 Mac
- 開始使用 OpenSSH for Windows
- OpenSSH Server
- 如何在 Windows 正確的安裝與設定 OpenSSH Server 服務
- 使用命令列管理 Windows 防火牆
- SSH 複雜密碼
- Adding a new SSH key to your GitHub account
- How to maintain ssh-agent login session with Windows 10’s new OpenSSH and PowerShell
- Automatically starting ssh-agent when powershell or git-bash are started
- 適用于 Windows 的 OpenSSH 中的金鑰型驗證
- Using SSH agent forwarding
- Ssh fails to use private key from ssh-agent: communication with agent failed
- SSH Agent Forwarding considered harmful