Introduction
Recently, I stumbled upon an intriguing project online: LivePortrait.
This project is an enhancement of face-vid2vid, capable of merging static photos with dynamic facial images to produce lifelike head animations.
You can try out the synthesis online through Live Demo.
However, for privacy concerns, it’s preferable to install and generate locally. This not only speeds up the process but also removes any usage limitations.
The installation process requires at least 4 GB of local space and approximately 30 minutes.
This article will focus on how to install and use it locally, and finally output the results.
Pre-installation
If you are unfamiliar with winget, please refer to Installing winget.
| Tool | Description | Installation Command |
|---|
| Git | Mainly used for downloading related code. | winget install --id Git.Git |
| FFmpeg | Used for video output merging and conversion. | winget install --id Gyan.FFmpeg |
| conda | Creates independent Python environments. | winget install --id Anaconda.Miniconda3 |
Installing LivePortrait
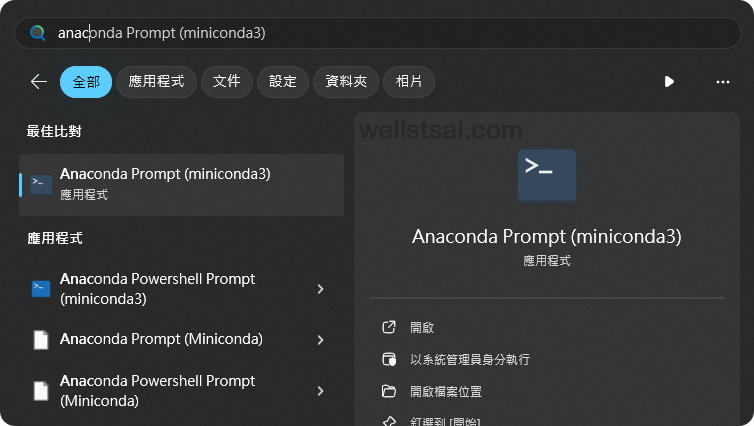
Start by locating Anaconda Powershell Prompt (miniconda3) and run it to load conda.
Execute the following commands to download and install:
 1
 2
 3
 4
 5
 6
 7
 8
 9
10
11
12
13
14
15
16
17
18
19
20
21
| # Copy the code
git clone https://github.com/KwaiVGI/LivePortrait
# Enter the LivePortrait directory
cd LivePortrait
# Create a Python 3.9 environment named LivePortrait
conda create -n LivePortrait python==3.9.18
# Activate the LivePortrait environment
conda activate LivePortrait
# Install dependencies
pip install -r requirements.txt
# Install git lfs
git lfs install
# Delete the pre-copied empty directory, using Powershell here. You can also manually delete this empty directory
Remove-Item -Recurse -Force pretrained_weights
# Copy the pretrained content
git clone https://huggingface.co/KwaiVGI/liveportrait pretrained_weights
|
The above steps need only be performed once, with conda activate LivePortrait necessary each time you open the terminal to switch to the LivePortrait environment.
After completion, you can start generating videos.
Synthesizing Videos
| Name | Path |
|---|
| Static photo | C:\Users\USER_NAME\LivePortrait\assets\examples\source |
| Dynamic video | C:\Users\USER_NAME\LivePortrait\assets\examples\driving |
| Output directory | C:\Users\USER_NAME\LivePortrait\animations |
In the terminal, navigate to the LivePortrait directory. Input python inference.py to load test images, videos, and produce the output.
 1
 2
 3
 4
 5
 6
 7
 8
 9
10
11
12
13
14
15
16
17
18
19
20
21
22
23
24
25
26
27
28
29
30
31
32
33
| (LivePortrait) C:\Users\wells\LivePortrait>python inference.py
[02:19:04] Load appearance_feature_extractor done. live_portrait_wrapper.py:36
Load motion_extractor done. live_portrait_wrapper.py:39
Load warping_module done. live_portrait_wrapper.py:42
[02:19:05] Load spade_generator done. live_portrait_wrapper.py:45
Load stitching_retargeting_module done. live_portrait_wrapper.py:49
[02:19:06] LandmarkRunner warmup time: 1.006s landmark_runner.py:89
[02:19:07] FaceAnalysisDIY warmup time: 1.328s face_analysis_diy.py:79
Load source image from live_portrait_pipeline.py:49
C:\Users\wells\LivePortrait\src\config\../../assets/examples/source/s6.jpg
[02:19:09] Load video: live_portrait_pipeline.py:99
C:\Users\wells\LivePortrait\src\config\../../assets/examples/driving/d0.mp4
The FPS of live_portrait_pipeline.py:104
C:\Users\wells\LivePortrait\src\config\../../assets/examples/driving/d0.mp4 is:
25
Load video file (mp4 mov avi etc...): live_portrait_pipeline.py:106
C:\Users\wells\LivePortrait\src\config\../../assets/examples/driving/d0.mp4
Start making motion template... live_portrait_pipeline.py:110
Making motion templates... ━━━━━━━━━━━━━━━━━━━━━━━━━━━━━━━━━━━━━━━━ 100% 0:00:00
[02:19:10] Dump motion template to live_portrait_pipeline.py:127
C:\Users\wells\LivePortrait\src\config\../../assets/examples/driving\d0.pkl
Prepared pasteback mask done. live_portrait_pipeline.py:139
🚀Animating... ━━━━━━━━━━━━━━━━━━━━━━━━━━━━━━━━━━━━━━━━ 100% 0:00:07
Concatenating result... ━━━━━━━━━━━━━━━━━━━━━━━━━━━━━━━━━━━━━━━━ 100% 0:00:00
Writing ━━━━━━━━━━━━━━━━━━━━━━━━━━━━━━━━━━━━━━━━ 0% -:--:--[swscaler @ 0000021de7021b80] Warning: data is not aligned! This can lead to a speed loss
[02:19:18] Animated template: live_portrait_pipeline.py:248
C:\Users\wells\LivePortrait\src\config\../../assets/examples/driving\d0.pkl,
you can specify `-d` argument with this template path next time to avoid
cropping video, motion making and protecting privacy.
Animated video: animations/s6--d0.mp4 live_portrait_pipeline.py:249
Animated video with concact: animations/s6--d0_concat.mp4 live_portrait_pipeline.py:250
(LivePortrait) C:\Users\wells\LivePortrait>
|
In the output directory, you will find the completed videos:
- Comparison video (s6–d0_concat.mp4), which includes the original video, static image, and the synthesized result.
- Final product video (s6–d0.mp4), containing only the final synthesized result.
The final product video is as follows:
You can place the original photo in ./assets/examples/source (or your preferred path), and apply related example videos (./assets/examples/driving) for synthesis.
For instance, this article uses a virtual face generated by DALL·E and applies an example video (./assets/examples/driving/d10.mp4), with the following command:
1
2
| python inference.py -s assets/examples/source/dalle.webp -d assets/examples/driv
ing/d10.mp4
|
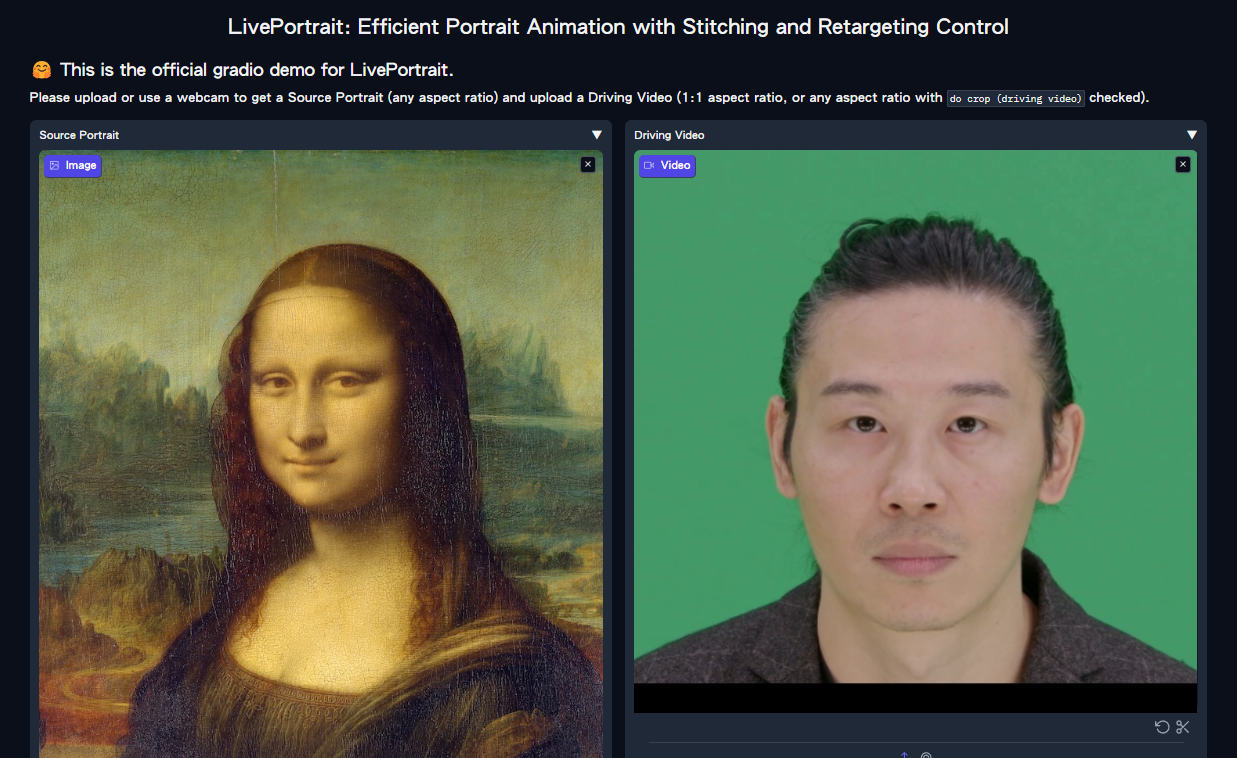
The comparison video, from left to right, shows the dynamic image, static image, and synthesized result:
Using the Web GUI
Entering python app.py in the terminal sets up a local server, similar to the Live Demo page. Using the Web GUI simplifies operations as it eliminates the need for command inputs.
 1
 2
 3
 4
 5
 6
 7
 8
 9
10
11
| (LivePortrait) C:\Users\wells\LivePortrait>python app.py
[02:47:14] Load appearance_feature_extractor done. live_portrait_wrapper.py:36
[02:47:15] Load motion_extractor done. live_portrait_wrapper.py:39
Load warping_module done. live_portrait_wrapper.py:42
Load spade_generator done. live_portrait_wrapper.py:45
Load stitching_retargeting_module done. live_portrait_wrapper.py:49
[02:47:16] LandmarkRunner warmup time: 1.055s landmark_runner.py:89
[02:47:18] FaceAnalysisDIY warmup time: 1.336s face_analysis_diy.py:79
Running on local URL: http://127.0.0.1:8890
To create a public link, set `share=True` in `launch()`.
|
Access the GUI through the browser at http://127.0.0.1:8890.
Insights
This project is incredibly fun and interesting, but its use is mainly limited to sharing images among friends. Be sure not to use it on public figures or disclose it publicly to avoid legal issues.
Additionally, generating images consumes a significant amount of power, so please ensure your computer’s performance is adequate and that the external power supply is stable.
The hardware configuration used in this instance was an i7-13700 + GeForce RTX™ 3060 Ti, which took a total of 63 seconds to synthesize a 15-second video.
This equates to an output video duration to processing time ratio of 1:4.2 (seconds).
References
- KwaiVGI/LivePortrait: Bring portraits to life!