
Introduction
Following the previous article, Getting Started with Git for Project Management, we learned how to create a repository, add files to the staging area, and commit them to the local repository using Git and VS Code.
In this article, we will focus on branch operations, including switching, creating, and deleting branches using VS Code and Git Graph.
What is a Branch?
Branches play a crucial role in Git. For example, when developing a new feature, you can create a new branch (e.g., feature/user-login) without affecting the main branch (e.g., main/master). Once the new feature is complete, it can be integrated into the main branch.
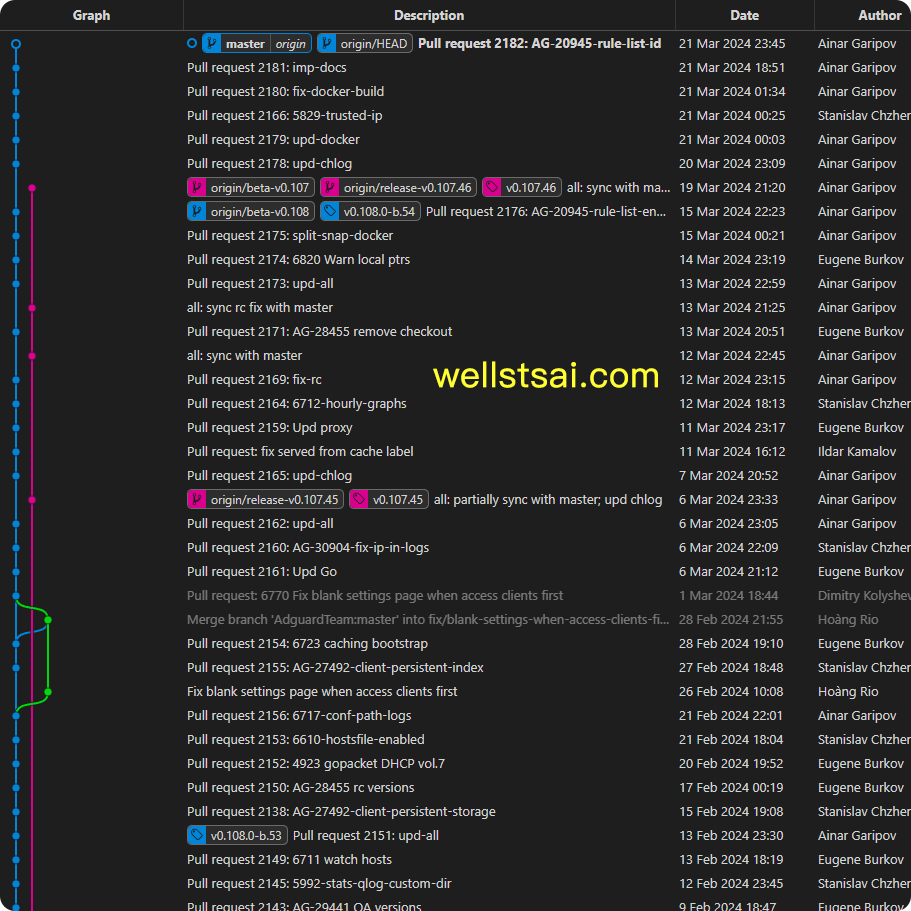
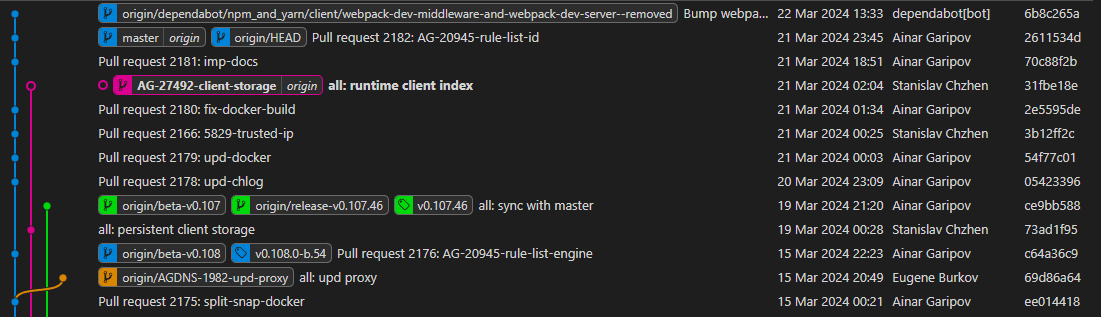
Take the AdGuardHome project on GitHub as an example:
The master branch (blue) represents the development of the new version v108, while the current stable version is v107 (red). Each beta or release version is recorded by creating a new branch.
The benefits of creating branches include:
- Allowing team members to work independently without interfering with each other and easily synchronize progress.
- Making modifications and tests without affecting the main branch, ensuring its stability.
- Easily switching between different branch versions to verify differences, thereby better managing the entire development process.
- When errors occur, restoring the original state more intuitively for repairs. Although
reflogcan also restore states, it is more complex and less intuitive.
When should you create a branch?
- When developing a new feature or fixing a bug.
- When unsure how an operation will affect the project or when performing complex operations.
- When creating a new branch for milestones to ensure each version is independent and controllable.
- 🚩When modifying a new feature after cloning the remote repository locally. 🚩
👉 Although point 4 is similar to point 1, it’s worth discussing separately:
When first learning Git, if this step is overlooked, conflicts can easily arise due to changes in the main branch during future commits.
Additionally, in collaborative development, it is usually preferred that a single responsible person handles the integration and confirmation of the main branch. Therefore, it is recommended to create a new branch for pushing changes without affecting the main branch, and then let the responsible person integrate them (merge or cherry-pick).
Cloning a Remote Repository (git clone)
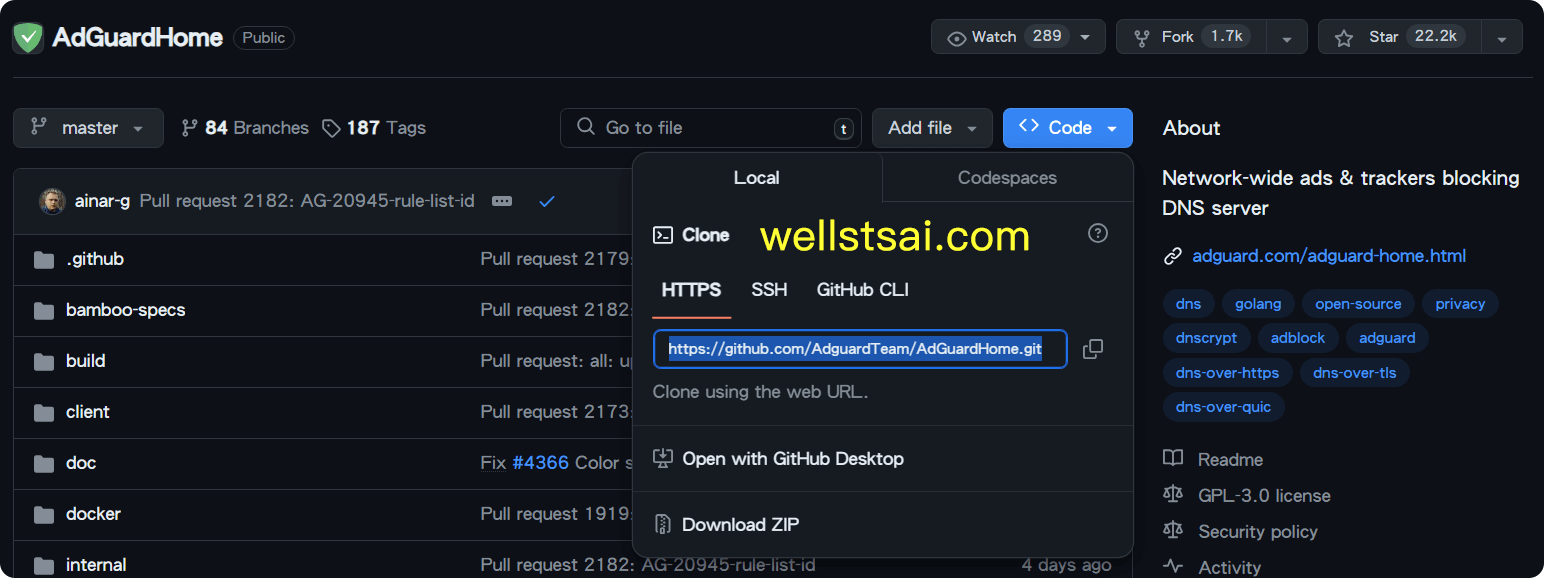
First, clone an existing remote repository from GitHub. Here, we use the AdGuardHome project. The choice of project is not limited; you can use your own new project or any other relevant project.
On the project page, click the blue Code button, and under the Local tab, find the HTTPS repository URL in the Clone options: https://github.com/AdguardTeam/AdGuardHome.git.
If using SSH, configure a set of keys for GitHub by referring to the previous article: Using SSH Keys for Password-Free Remote Connections.
In VS Code, open the terminal with Ctrl + ` and enter git clone repository_URL to clone the repository:
| |
You can also open the command palette with F1, type git clone, press enter, provide the URL, and select the repository path. However, I rarely use this method since directly typing git clone in the terminal is faster.

Afterwards, open the project folder by entering code AdGuardHome in the terminal or using Ctrl+K, Ctrl+O, and selecting the AdGuardHome folder.
| |
Switching Branches (git checkout)
Switching to an Existing Branch
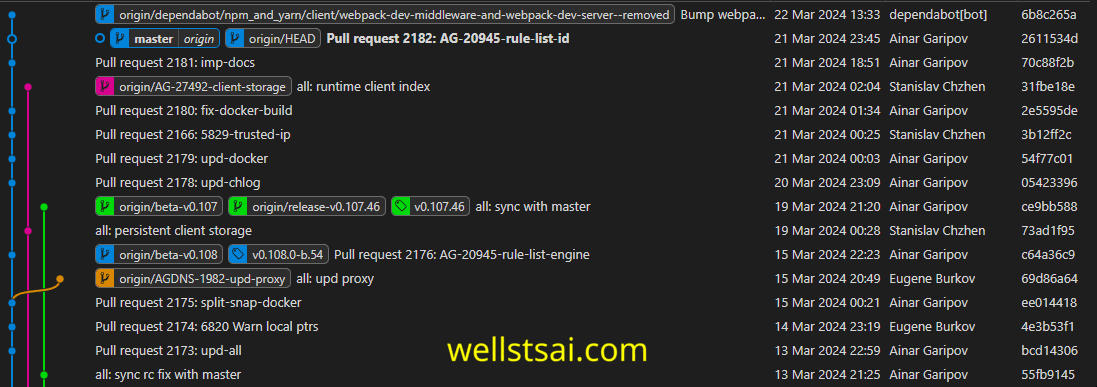
Open Git Graph to see:
- The hollow blue dot indicates the local pointer, showing our current operation position, currently pointing to the commit ID 2611534d.
- Bold text indicates the selected branch, currently master/origin. There is also a local master branch.
- The remote pointer (origin/HEAD) points to master/origin, indicating the default main branch. The pointer itself cannot be checked out.

To switch branches, point the HEAD pointer to a branch or commit.
Double-click the branch box or right-click → Checkout Branch… to switch to the corresponding branch. If the branch has files A and B, switching to a branch without these files will automatically delete them (unless ignored).
Detached HEAD
You can also switch to a commit by right-clicking any commit and selecting checkout, resulting in a detached HEAD state. This means the HEAD is not pointing to a branch, making future pushes unsuccessful.
Additionally, committing in a detached HEAD state and then switching branches without first creating a branch results in orphan commits. Use git reflog --all to find them.
⚠️ Detached state → Add 2 new commits → Push fails → Switch to an existing branch → The 2 commits become orphan commits
✅ Ensure to switch to branches, not commits, to avoid unnecessary trouble and processing. Orphan commits can be cleared under certain Git conditions.
Creating a New Branch (git branch)
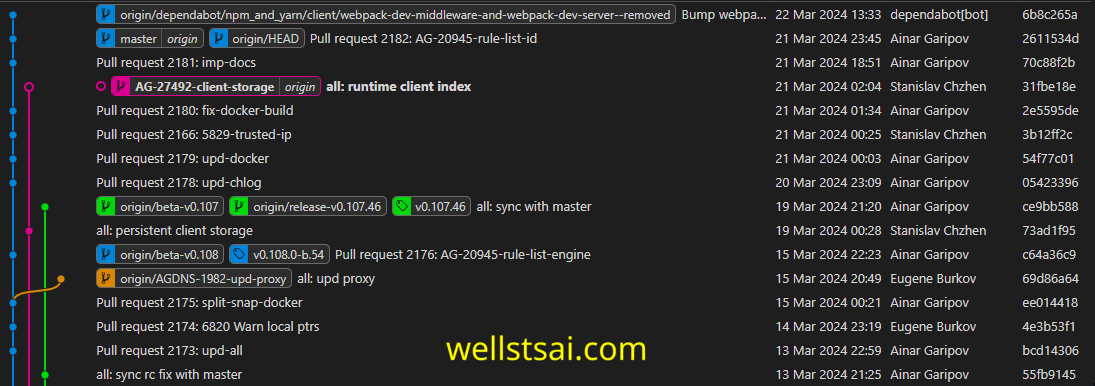
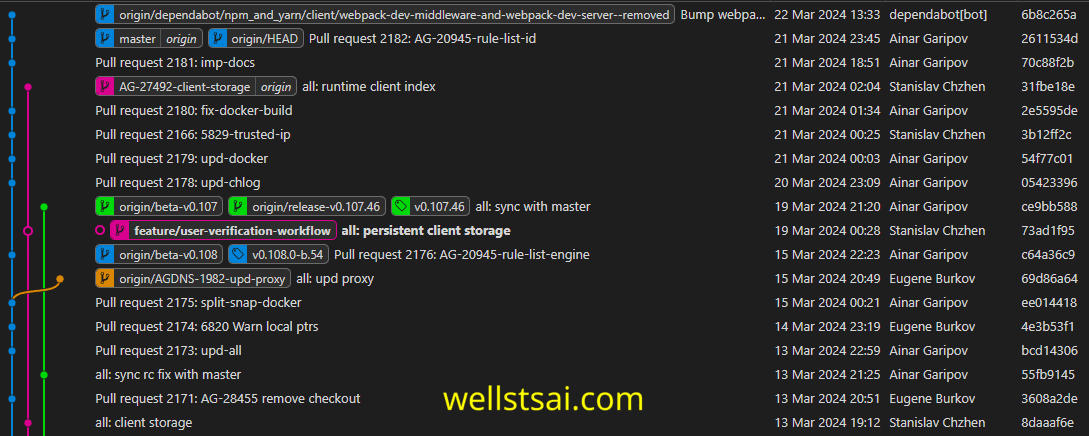
To develop a new feature or attempt an error fix from a specific commit (e.g., 73ad1f95), right-click the commit → Create Branch…. Check the check out option to switch to the new branch automatically. Without checking it, the branch is simply created.
In the example, the newly created branch has checkout checked, so HEAD points to the new branch.
Deleting a Branch
To delete the newly created branch, switch to another branch first. Right-click the target branch → Delete branch.
The delete option includes Force Delete, which checks if the branch’s commits are applied to other branches. For example, if feature/test has 3 new commits and deleting it prompts a confirmation that these commits are not merged elsewhere, selecting Force Delete confirms deletion.
Conclusion
We learned how to clone a remote repository from GitHub and switch, create, and delete branches. We also learned to handle detached HEAD states.
Accidentally switching to a commit instead of a branch causes a detached HEAD state, leading to push failures. Switching to an existing branch results in orphan commits, recoverable via git reflog. The recommended practice is to create a temporary branch before switching, operate on it, then cherry-pick, and finally delete the temporary branch.
Detached state → 2 new commits → Push fails → Create temporary branch → Switch to existing branch → Cherry-pick 2 commits → Push → Delete temporary branch.
When cloning a remote repository, creating a new branch is essential to ensure the main branch remains unaffected. For confirmed working features or single-person operations, a new branch might not be necessary. However, for operations, organization, or uncertainties, creating a new branch is recommended. This way, errors can be reverted by switching to the normal branch and deleting the failed branch.
After mastering branch switching, creation, and deletion, you can start learning git rebase to organize committed content.