
Introduction
This article will introduce the development tools I commonly use on Windows, explaining why they are installed and how they are beneficial.
In addition to the built-in Notepad, Paint, and Command Prompt (cmd), using other tools can significantly enhance development efficiency on Windows. Although the focus is primarily on tools used during the Windows development process, some techniques can also be applied in a Linux environment.
It is particularly noteworthy to always have your left hand ready. The left hand is indispensable for quickly completing certain tasks, as it is responsible for most shortcut key operations.
Shortcuts
Windows provides a vast array of shortcuts, with basic ones including:
⊞ Win+R: Open the Run window (can be replaced by PowerToys Run or Everything)Enter
cmd,calc(Calculator),notepad(Notepad),regedit(Registry Editor),mstsc(Remote Desktop Connection),mspaint(Paint) to quickly open the corresponding applications.⊞ Win+D: Quickly return to the desktop, and press again to restore all windows⊞ Win+Shift+S: Free screenshot (can be replaced by ShareX)Alt+Print Screen: Window screenshot⊞ Win+L: Lock the computer without logging out⊞ Win+;: Emoji panel to type emojis (semicolon key is to the right of the L key)Ctrl+Shift+Esc: Directly open Task Manager, which can be done solely with the left hand, unlikeCtrl+Alt+Delwhich requires calling up a menu and then clicking Task Manager with the mouse.
Some features like the Emoji panel are built into Windows 10 and above, while most other shortcuts have existed since the XP era.
Additionally, standard commands like Ctrl + X / V / Z / F / S / A correspond to cut, paste, undo, search, save, and select all. These ancient Ctrl commands are not elaborated here.
Installing winget
Windows Package Manager (winget) is an application provided by Microsoft for Windows 10 and Windows 11, offering a way to search, install, remove, and update necessary software.
With winget, we can quickly and uniformly install related software, avoiding unnecessary steps (searching for the software’s official website → finding the download link → downloading → installing → deleting the installation file).
To check if your system supports it, open the command line (press ⊞ Win + R, then type cmd and hit Enter), and enter the following command:
| |
If the result returns as version v1.6.3133:
| |
If no version is found, it indicates that winget is not yet installed. You can install winget from the Microsoft Store.
After installation, remember to restart cmd and check the version again. If the installation is successful, you will see the version number.
Recommended Software
The following introduces software that can help us quickly complete tasks, listed in alphabetical order.
Everything
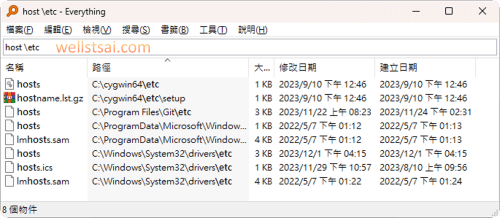
Everything is a Windows desktop search engine based on the C programming language, capable of quickly searching for file names or content within NTFS disks.
It can essentially replace the built-in Windows search function for daily use, with its primary feature being instant file search.
The working principle involves creating a database index of all files and folders on the computer from the Master File Table (MFT). When Everything is launched, it loads the database into memory to provide real-time search. It also continuously updates the database in the background by tracking the Update Sequence Number (USN) Journal in Windows.
Everything can be installed via winget in cmd, or you can download it manually from the official website.
| |
During installation, administrative privileges are required due to the need to access the USN Journal. The default installation sets it up as a service, running automatically in the background on startup.
After installation, the first launch will index the computer, after which you can start searching for files.
By default, spaces act as an “and” operator. To search for PNG images with the filename containing ABC, you can search: ABC .png
To search for filenames containing abc, and extensions either png or txt, you can search: abc .png|.txt
For more complex searches, regular expression syntax can be used.
For more rules, refer to the documentation → Search Syntax. It also explains how to search within document contents.

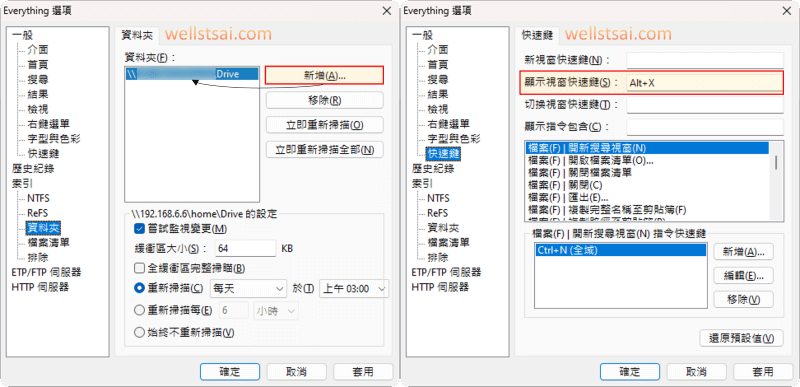
Additionally, you can configure shortcut keys in the settings. Personally, I like to use Alt + X to bring up the Everything window, but you can customize the shortcut key as per your preference.
You can also manually specify server directories for Everything to index.
Git
When I had not yet encountered Git (during my younger years), I used to back up code periodically by compressing all files and adding a timestamp. This method was inefficient, ineffective, and incapable of tracking history. Months later, it was impossible to know what had changed just by looking at the file names.
Git is a free, open-source distributed version control system. Using Git to manage files allows you to record differences between files, and it provides the ability to revert to historical versions or merge changes, offering a fast and reliable way to track the state of files.
Using Git can be simple or complex. In most cases, it involves committing and merging actions. The ultimate goal is to ensure files are accurately recorded and the program functions correctly.
Git can be installed via winget in cmd.
| |
To confirm if Git is successfully installed on your computer, open cmd and enter:
| |
The returned version number is 2.43.0.windows.1:
| |
Further detailed Git operations will be discussed and shared in future topics.
Notion
Notion is a versatile note-taking application that is essentially free for individual users. I believe its ability to quickly and neatly create tables, images, and multi-column layouts surpasses many other note-taking apps. Additionally, it allows users to share notes as public URLs, save them as PDFs, or export them in Markdown format.
Previously, I organized my notes by using Word and synchronizing with Microsoft 365 cloud services. However, Word is limited to standard formats and A4 size paper, often causing issues like tables extending beyond a single page or needing to split content into multiple columns on one page. Implementing these in Word requires using sections or tables with hidden borders, which is cumbersome.
In contrast, Notion resolves all these issues. The biggest drawback is that the free version does not provide version history.
I have tentatively used Microsoft OneNote for note-taking, but I can’t accept its logic.
A note file is blatantly stored on OneDrive and can be moved arbitrarily.
When the notebook is opened, it is divided into sections and pages, and the note parts can be arranged freely, similar to Apple’s Freeform on iOS. Basically, there is no sequential logic.
Microsoft’s Loop is a competitor to Notion, though it is currently in beta.
Microsoft’s biggest advantage is its immediate support for Traditional Chinese upon release, whereas Notion’s support for Traditional Chinese is quite poor.
However, my personal experience with Loop on iOS has not been very good, and it may still need some optimization from Microsoft.
You can install Notion via winget in the command line:
| |
After installation and registering on Notion, you can start writing notes. The experience is quite consistent across both mobile and desktop versions.
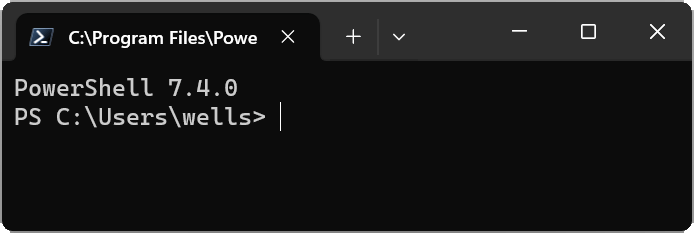
Powershell 7
In the Windows system, besides the built-in Command Prompt (cmd), there is also a built-in version of PowerShell, which is PowerShell 5.1 based on .NET Framework. You can open it by typing powershell in the command prompt.
PowerShell 7, on the other hand, is based on .NET Core for better cross-platform compatibility. You can open it by typing pwsh. It supports new Cmdlets, cross-platform functionality, and new module extensions and installations. It also features automatic command completion (cmd can achieve this through clink). PowerShell 7 is one of Microsoft’s actively updated software, and it is recommended for every developer to install it.
PowerShell 7 can be installed via winget in the command prompt, or you can refer to other installation methods.
| |
PowerToys
Microsoft’s utility suite includes many tools, all bundled within PowerToys.
Below are some tools I frequently use:
| Tool Name | Description |
|---|---|
| Always on Top | Allows you to pin windows on top of others using the shortcut (⊞ Win + Ctrl + T). |
| PowerToys Awake | Keeps your computer awake on demand. |
| Color Picker utility | A system-wide color picking utility. |
| FancyZones | A window manager that makes it easy to create complex window layouts. |
| File Explorer Add-ons | Enables preview pane and thumbnail rendering in File Explorer. |
| Image Resizer | Quickly resize images via the right-click context menu. |
| Find My Mouse | Quickly locate your mouse position by pressing Left Ctrl twice. |
| Mouse Without Borders | Allows interaction with multiple computers using the same keyboard and mouse. |
| PowerToys Run | Helps you quickly search and launch applications. |
| Text Extractor | Extracts text from images using OCR. |
You can refer to the Microsoft PowerToys official documentation for detailed descriptions of each tool. Additionally, after installation, an intro will guide you on how to use each feature.
PowerToys can be installed via winget in the command prompt:
| |
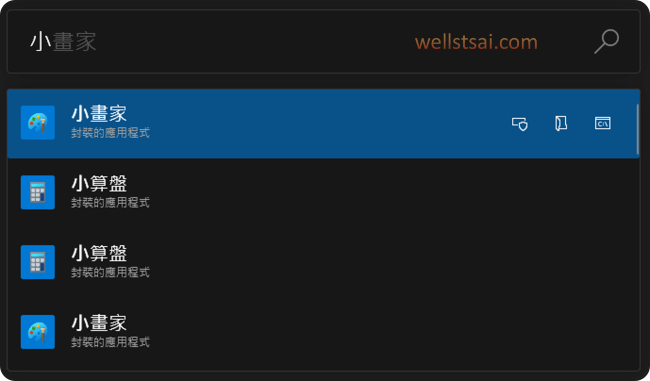
We initially launched the Run window using ⊞ Win + R. If an incorrect command was entered, the program would fail to start properly and an error window would pop up indicating that the related program could not be found.
After installing PowerToys, it includes a feature called PowerToys Run, which can be activated with Alt + Space on the keyboard. This tool supports fuzzy search, Chinese input, and even simple calculations.

Additionally, PowerToys includes other tools, such as ColorPicker, which is particularly useful for web development. The shortcut for ColorPicker is ⊞ Win + Shift + C.
Another notable feature is OCR text recognition for images, activated by pressing ⊞ Win + Shift + T.
PowerToys is seamlessly integrated with Windows. Though its presence is subtle, it offers a range of highly valuable functions.
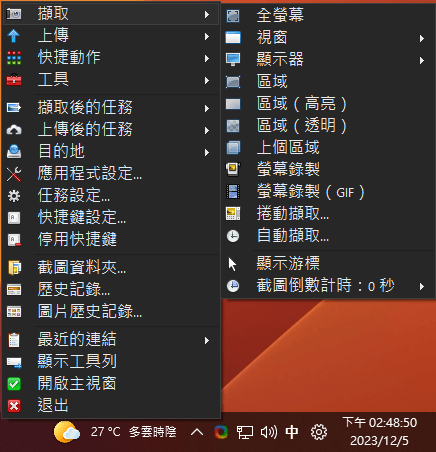
ShareX
ShareX is an open-source screenshot and recording software that can capture videos in MP4 or GIF formats. It integrates features such as upload functionality, OCR, watermarking, and other effects, and includes a built-in editor. This makes ShareX a powerful yet lightweight tool.
You can install ShareX by downloading it from GitHub or via winget:
| |
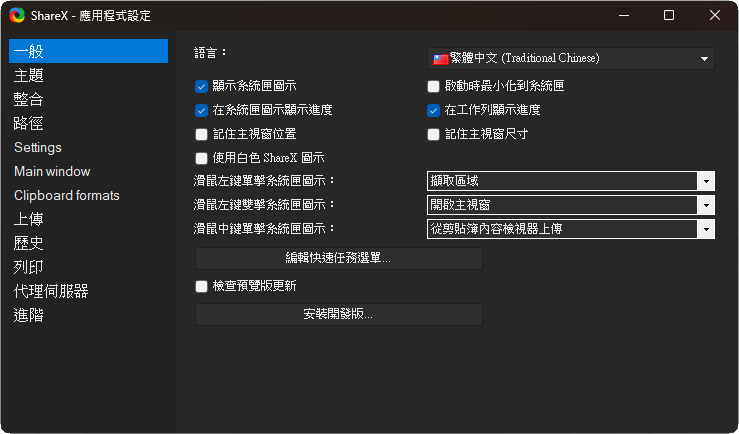
After installation, the ShareX icon will appear in the bottom-right corner of your screen. You can configure various settings, such as language, hotkeys, and post-screenshot actions (e.g., opening a folder, uploading, printing, etc.).
The software supports Traditional Chinese, but the default language is English.
To change the language, right-click the ShareX icon, navigate to Application Settings → General, and set the language from Automatic to Traditional Chinese.
There should be no significant difficulties in using the software. For more meticulous users, under Task Settings → Capture, you can enable “Capture Window Transparency” to handle the rounded corners in Windows 11 properly, ensuring no background color interference.
Tailscale
Tailscale enables secure access between devices without exposing them to the public internet, quickly setting up a personal VPN that can penetrate firewalls in various ways.
Users do not need to understand the underlying principles. They simply need to log multiple devices into their tailnet to facilitate communication between them.
Some potential use cases include:
- Accessing resources on Computer B from Computer A, such as network shares (Samba) or NAS resources.
- Point-to-point connections, like SSH or remote desktop.
- Subnet routing. For example, an internal IP address: 192.168.6.XX can be accessed by a phone on a different network using the same IP address.
- Traffic routing. Specify that the traffic of a device goes through another node.
- Public internet access. Using Funnel to allow public internet access to a specific device.
- Point-to-point file transfer.
- And more…
For additional configuration and settings, refer to Using Tailscale to Easily Create Secure and Private Tunnels.
Visual Studio Code
Visual Studio Code (VS Code) is a cross-platform editor developed by Microsoft with extensive capabilities, making it indispensable for developers.
Installing VS Code can effectively replace other software like Notepad++ and Eclipse under certain conditions.
VS Code features include:
- Intellisense code completion
- Git version control
- Support for multiple languages with syntax highlighting and linting, such as JavaScript, TypeScript, Python, C++, etc.
- Cross-platform support (Windows, macOS, Linux).
- Built-in code formatting, refactoring, and debugging capabilities.
- Task definitions using tasks.json, such as compiling and running.
- A rich ecosystem of extensions (unsupported syntax? Just install an extension!).
- SSH remote development with port forwarding support.
- Integration with WSL for Linux development on Windows
- A variety of customizable themes.
The content is extensive and requires some time to learn, but it can also serve as a basic text editor for beginners.
We’ll discuss more about VS Code operations in the future.
To install, download from the official Microsoft website or via winget:
| |
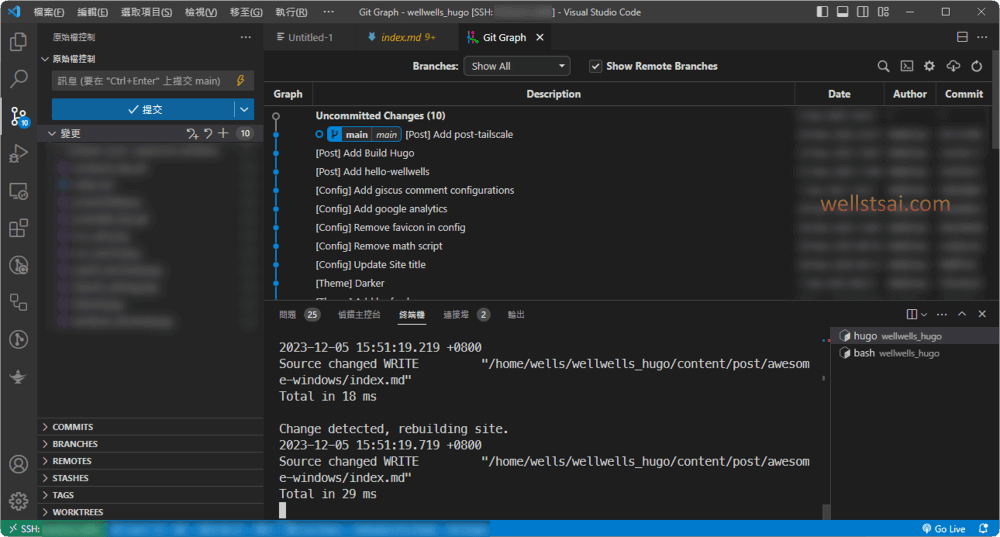
After installation, you can open VS Code and start editing folders (projects) or individual files. If you open a folder containing Git-related files, VS Code will automatically parse the Git status.
For example, when writing Hugo articles on Linux, I connect remotely to a Linux server from Windows using SSH and open directories on the Linux system. By switching to VS Code’s built-in Git management, I can see which files have been added, edited, or deleted. Additionally, I have installed the Git Graph extension, which allows me to view the current Git branch status graphically.
WinCompose
For special characters, the system does not have a compose key like macOS. With the open-source WinCompose, you can quickly type special characters.
Previously, I used to refer to a Unicode table, and even printed out a list of commonly used Unicode characters, to type special symbols.
First, switch to the New Zhuyin input method, press the leading character ` on the keyboard, then press U to indicate Unicode, followed by entering the character code (e.g., 2605) and pressing the spacebar to output the special symbol.
For example: `u2605 outputs ★ | `u2606 outputs ☆ | `u00b0 outputs °

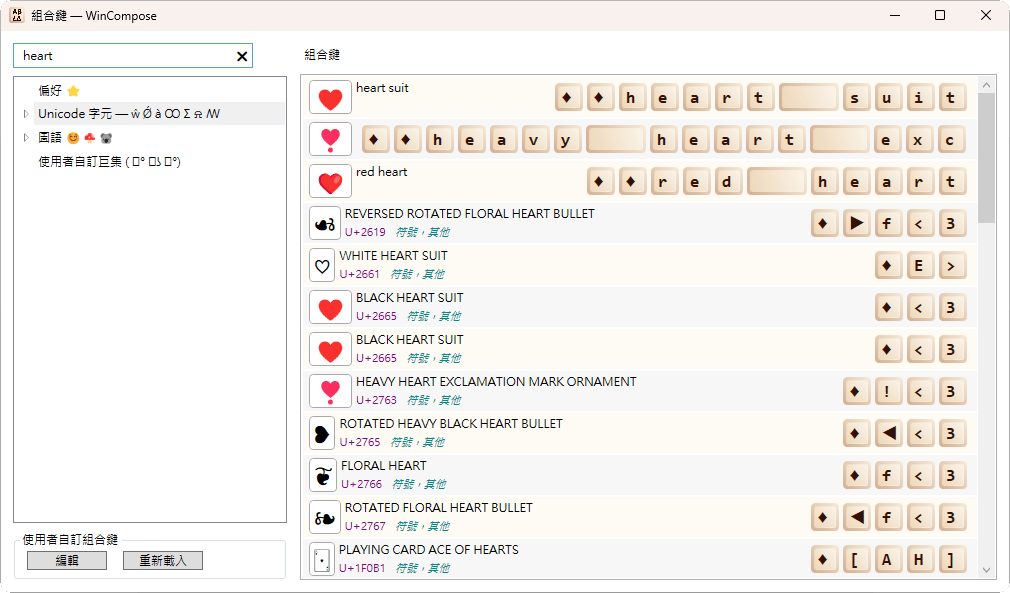
With WinCompose, you can use the compose key (Right Alt) + defined characters to quickly type special symbols.
For example:
- ♥: Press
Right Altonce, then type <3 to get a heart (type<usingShift+,). - ♢: Press
Right Altonce, then type <> to get a diamond. - √: Press
Right Altonce, then type sq (rt is omitted). - ★: Press
Right Altonce, then type ** (type*usingShift+8). - ¼: Press
Right Altonce, then type 14 to get ¼.

You can install WinCompose via winget in the command prompt or download it from the WinCompose Release page:
| |
After installation, the WinCompose icon will appear in the bottom-right corner of your screen. Right-click the icon and select “Show Compose Key” to view the predefined rules.
In the bottom-left corner, you can customize your compose key. The usage is straightforward, so we won’t go into further detail here.
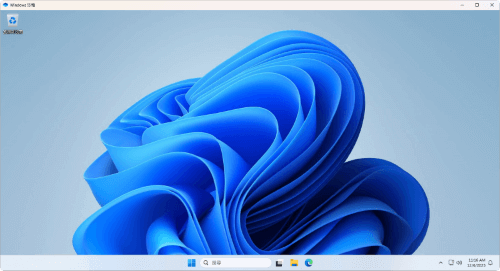
Windows Sandbox
Windows Sandbox provides a lightweight desktop environment to safely run applications in isolation. It is very useful for testing software in a clean OS environment, checking files for viruses, or temporarily installing trial software.
Once you close the sandbox, all the data is removed. Every time you open a new sandbox, it is as clean as a fresh Windows installation.
Key points to note:
- Virtualization must be enabled in the
BIOS. - Windows Sandbox is not supported on Windows Home edition (you can bypass this limitation).
- A minimum of 4 GB of RAM is required, but 8 GB or more is recommended.
To install, open cmd and enter the following command to enable the Windows Sandbox feature, then restart your computer.
| |
After executing the command and restarting your computer, you will be able to see a clean version of Windows when you open Windows Sandbox.
Windows Subsystem for Linux
Deploying a Linux development platform on Windows can be achieved through the following approaches:
- Virtual Machine: Install a complete operating system using the built-in Hyper-V or third-party software VirtualBox.
- Dual Boot: Configure multiple boot options on a single computer to install both Windows and Linux, allowing you to choose the desired operating system at startup. (This approach is discouraged due to potential risks to system stability and security.)
- Remote Development: Set up a dedicated Linux host machine and connect remotely to perform development tasks.
- Windows Subsystem for Linux (WSL): Install the Linux subsystem directly within Windows, eliminating the need for a virtual machine or dual boot setup, and easily establish a Linux development environment.
The advantage of WSL is that it uses fewer resources than a virtual machine, and you can use both Windows and Linux simultaneously. Additionally, various Linux distributions can be installed and run, such as Ubuntu, Debian, Kali, etc.
The installation process is divided into two parts: installing WSL and installing a Linux distribution.
First, enter the following command in cmd to install WSL:
| |
After installation, reboot your system. Once rebooted, enter cmd again and type wsl –help to check if WSL is enabled:
| |
Next, to install a Linux distribution, you can list the available Linux versions with the following command:
| |
You will see many different distributions available.
| |
My development environment requires Ubuntu 18.04, so I will install the corresponding version.
| |
The installation process takes about 5 minutes. During the installation, you will be prompted to enter a Linux username and password.
If you encounter the error “Unable to resolve server name or address” during the installation, try switching networks or using a VPN to resolve the issue.
| |
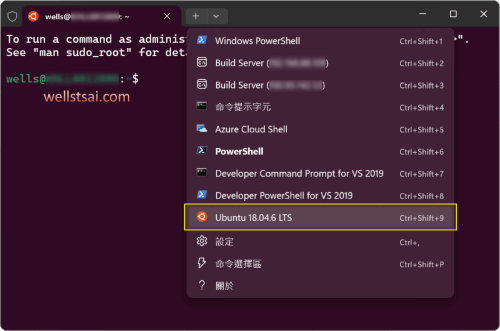
At this point, WSL and the corresponding Ubuntu version have been successfully installed. Entering wsl will open the Ubuntu bash terminal.
If you have Windows Terminal installed, you will see a new Ubuntu 18.04 profile added when you create a new tab.
If you already have VS Code installed, you can access it by connecting to WSL. Once VS Code sets up the necessary resources on Linux, you can browse files in WSL and integrate the bash terminal. The usage is essentially the same as installing VS Code on a native Ubuntu system.
Windows Terminal
Windows Terminal is a cross-platform terminal application developed by Microsoft, often referred to simply as “Terminal.” It supports multiple shell environments, including cmd, PowerShell, and the Windows Subsystem for Linux (WSL). Additionally, it supports tabbed and split-pane displays, as well as the Acrylic material in Windows 11.
To install Windows Terminal, you can download it from the Windows Store or use winget:
| |
After installation, find Terminal in the Start menu and launch it to begin using it.

Click the drop-down arrow (ˇ) at the top of the window to find settings, where you can modify the default configuration. For instance, you can set the default profile to PowerShell or any other preferred shell.
You can change the default terminal application to Windows Terminal, so that any future openings of cmd or other shells will be done through Terminal.

For additional settings, refer to the official detailed documentation to customize the font, appearance, and achieve a better and more aesthetic terminal experience.
Moreover, you can customize configuration files to automatically connect to SSH or perform other operations when opening a new tab.
Other Software
Additional software is classified as non-essential but can be very useful in certain development scenarios. However, since not everyone requires these tools, they are categorized here.
Detailed download or installation processes are not provided; only the official links for reference are given so you can download them as needed.
For Personal Use
| Software Name | Description |
|---|---|
| 7-Zip | Free, commercial-use compression software. |
| Autoruns | A tool to detect which programs are automatically loaded at Windows startup, and allows deletion or temporary disabling. |
| CopyTransHEICforWindows | Converts HEIC images to the more widely used JPG format via right-click. |
| DLL Export Viewer | Views exported function names, addresses, and descriptions in DLL files, aiding in quick debugging. |
| ExplorerPatcher | Open-source software that restores some Windows 10 features on Windows 11, such as the appearance of the taskbar and toolbar. |
| Fiddler Classic | A free HTTP proxy tool for recording and analyzing network requests. Direct link provided as the official site promotes subscription-based Fiddler Everywhere. |
| iPerf | Tests network bandwidth, latency, and throughput performance parameters. |
| K-Lite Codec Pack (Full) | A free multimedia codec pack that resolves video playback issues. |
| Node.js | A JavaScript runtime environment that allows server-side programming in JavaScript. |
| PowerPoint Shortcut Tools | Provides additional shortcut tools for PowerPoint, such as aligning two objects and quickly inserting frames. |
| Rufus | Creates USB boot media for installing and repairing operating systems. |
| Tera Term | An open-source terminal communication software used to connect and control various devices like microcontrollers and embedded systems. |
| WinDirStat / SpaceSniffer | Visualizes folder space usage. |
| X-Mouse Button Control | Customizes mouse button functions and settings, potentially replacing the bulky Logitech Options for Logitech mice. |
| x64dbg | An open-source dynamic analysis tool for decompiling and debugging. |
Paid Software
Below are some options for paid software, most of which require a license purchase.
| Software Name | Commercial Use? | Description |
|---|---|---|
| HWiNFO | Personal Use Only | Requires a license for commercial use; personal use is free. It monitors computer hardware parameters such as CPU, memory, and GPU temperature and frequency. |
| Internet Download Manager (IDM) | Paid Software | The licensed version of IDM supports commercial use. It is a download manager that boosts download speeds and offers resume and scheduling features. |
| Mathtype | Paid Software | A software for entering mathematical formulas in Word documents. |
| Pichon | Partially Free | Provides over 135,000 high-quality icons in various sizes and formats. Paying unlocks more icons. |
| Typora | Paid Software | A popular Markdown editor that supports multiple themes and a clean interface, and is cross-platform. |
| WinRAR | Paid Software | Software for compressing and decompressing RAR file formats. However, with Windows 11’s built-in decompression capabilities, the necessity for this software has decreased. |
Conclusion
The recommended software mentioned above can significantly enhance our development, collaboration, and productivity.
The table below summarizes each tool’s official website and provides information on whether they are open-source and suitable for commercial use.
| Tool/Application | Open Source? | Commercial Use? | Description |
|---|---|---|---|
| Everything | No | Yes | Quickly searches for files or folders based on their names. |
| Git | Yes | Yes | Distributed version control system, widely used in software development. |
| Notion | No | Yes | Cross-platform work collaboration tool that supports notes, task management, and more. |
| PowerShell 7 | Yes | Yes | Command-line shell and scripting language for Windows. |
| PowerToys | Yes | Yes | Provides additional tools for the Windows desktop, enhancing system experience and productivity. |
| ShareX | Yes | Yes | Open-source screenshot and screen recording tool with rich features and custom settings. |
| Visual Studio Code | Yes | Yes | Cross-platform code editor supporting multiple languages and rich extensions, integrated with Git tools. |
| WinCompose | Yes | Yes | Provides an easy way to input special characters, supporting customizable key combinations. |
| Windows Sandbox | No | Yes | Provides a lightweight, isolated environment to safely run untrusted applications and clears the virtual environment upon exit. |
| Windows Subsystem for Linux | No | Yes | Allows using Windows and Linux environments simultaneously on the same machine. |
| Windows Terminal | Yes | Yes | Modern command-line application that combines multiple command-line tools, offering tabs and highly customizable appearance. |
| Winget | Yes | Yes | Windows package manager for quickly installing, upgrading, and managing applications. |